
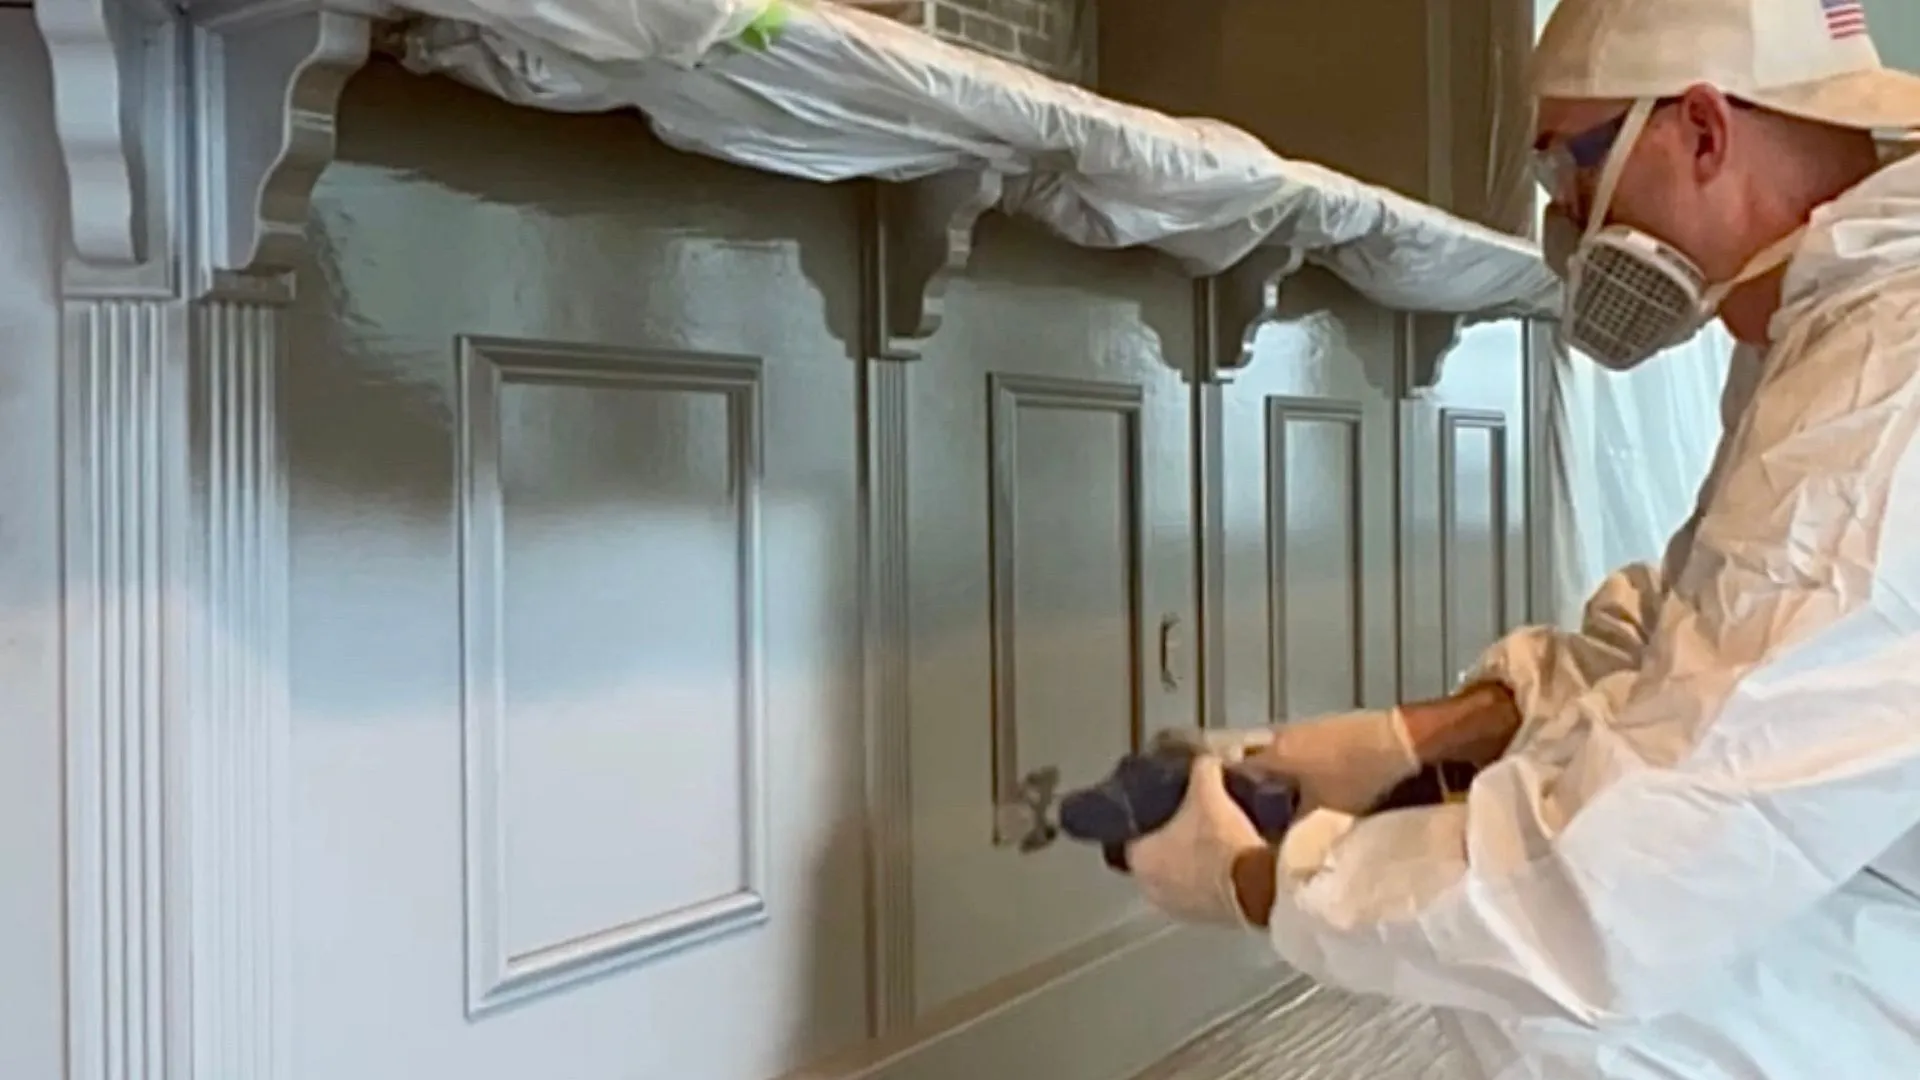
When it comes to giving your cabinetry whether it be in your kitchen, bathroom, laundry room or bar area a fresh and updated look, painting cabinets can be a game-changer. However, achieving that flawless, professional finish can be a challenging task if you don’t have the right tools at your disposal. That’s where a high-quality paint sprayer comes in. So put your paint rollers and paint brushes aside, because in this comprehensive guide, we’ll delve into the world of cabinet painting and explore the best paint sprayers that can help you achieve a professional-looking finish and stunning results. Whether you’re a DIY enthusiast or a professional painter, this guide has got you covered.
Affiliate links may be used throughout this blog post – read our policy here.
Benefits of Using a Paint Sprayer for Cabinet Painting:
Before we dive into the specifics of paint sprayers, let’s discuss why using one is the ideal choice for painting cabinets. Using a paint sprayer for cabinet painting offers numerous benefits that can significantly enhance the quality and efficiency of your project:
- Smooth and Even Finish: Paint sprayers provide a flawless, streak-free finish that’s hard to achieve with brushes or rollers. This is especially crucial for cabinets where a professional look is desired.
- Time Efficiency: Sprayers cover larger surface areas quickly, cutting down painting time compared to traditional methods. This is particularly advantageous when dealing with multiple cabinets.
- Uniform Coverage: Sprayers ensure consistent coverage, reaching intricate details and corners that brushes or rollers might miss. This results in a consistent appearance across all cabinets.
- Accessibility: Cabinets often have recesses and tight corners that are challenging to paint evenly with traditional methods. Sprayers can access these areas effortlessly, ensuring no part is left unpainted.
- Versatility: Paint sprayers are suitable for various types of paints, including primers, stains, and topcoats. This versatility allows you to achieve the desired look and protection for your cabinets.
- Customizable Settings: Many sprayers offer adjustable settings for spray patterns, pressure, and flow. This adaptability enables you to tailor the sprayer to the unique characteristics of your cabinets.
- Reduced Hand Fatigue: Using a sprayer requires less physical effort compared to constant brushing or rolling, making it a more comfortable option for larger cabinet projects.
- Professional Aesthetics: The flawless finish achieved with a paint sprayer adds a professional touch to your cabinets, enhancing the overall appearance of your space.
- Less Wastage: Paint sprayers are designed to minimize overspray, which reduces paint wastage and keeps your workspace cleaner.
- Easy Cleanup: Most paint sprayers are relatively easy to clean, especially if you follow proper maintenance routines. This saves time during post-painting cleanup.
- Options for Texture: Some paint sprayers offer adjustable settings that allow you to create various textures, giving your cabinets a unique look if desired.
- Future Use: Once you have a paint sprayer, it can be used for multiple projects beyond cabinet painting, making it a versatile tool for your DIY arsenal.
In conclusion, using a paint sprayer for cabinet painting streamlines the process, enhances the quality of the finish, and provides you with a range of customizable options. Whether you’re a professional painter or a DIY enthusiast, a paint sprayer is an invaluable tool for achieving remarkable cabinet transformations.
Factors to Consider When Choosing a Good Paint Sprayer:
Before investing in a paint sprayer for your cabinet painting project, it’s crucial to consider these factors to ensure you make the right choice.
Type of Paint Sprayer:
- HVLP (High-Volume, Low-Pressure): HVLP sprayers are known for their precision and control. They release a higher volume of paint with low pressure minimal overspray, making them ideal for cabinet painting.
- Airless Sprayers: Airless sprayers are capable of covering large areas quickly. While they’re efficient, they may produce more overspray compared to HVLP sprayers.
- Compressed Air Sprayers: These sprayers use compressed air to atomize the paint. They offer versatility but might require more skill to control the different spray patterns effectively.
Project Size:
- Consider the size of your cabinet painting project. If you’re working on smaller projects or a small kitchen, an HVLP paint sprayer might be the best choice. For larger projects, an airless sprayer could be more efficient.
Sprayer Capacity:
- Check the paint container capacity of the sprayer. A larger capacity might be convenient for bigger projects, while a smaller container is easier to handle and clean.
Adjustability and Control:
- Look for a sprayer with adjustable settings for spray pattern, pressure, and flow. This allows you to customize the sprayer to match the intricacies of cabinet surfaces.
Ease of Cleaning:
- Proper maintenance is key to the longevity of your paint sprayer. Opt for a model that’s easy to disassemble and clean, as paint buildup can affect performance.
Price and Quality:
- Quality paint sprayers come at various price points. While it’s tempting to go for the cheapest option, investing in a higher-quality sprayer often pays off in terms of performance and durability.
The Best Cabinet Paint Sprayers
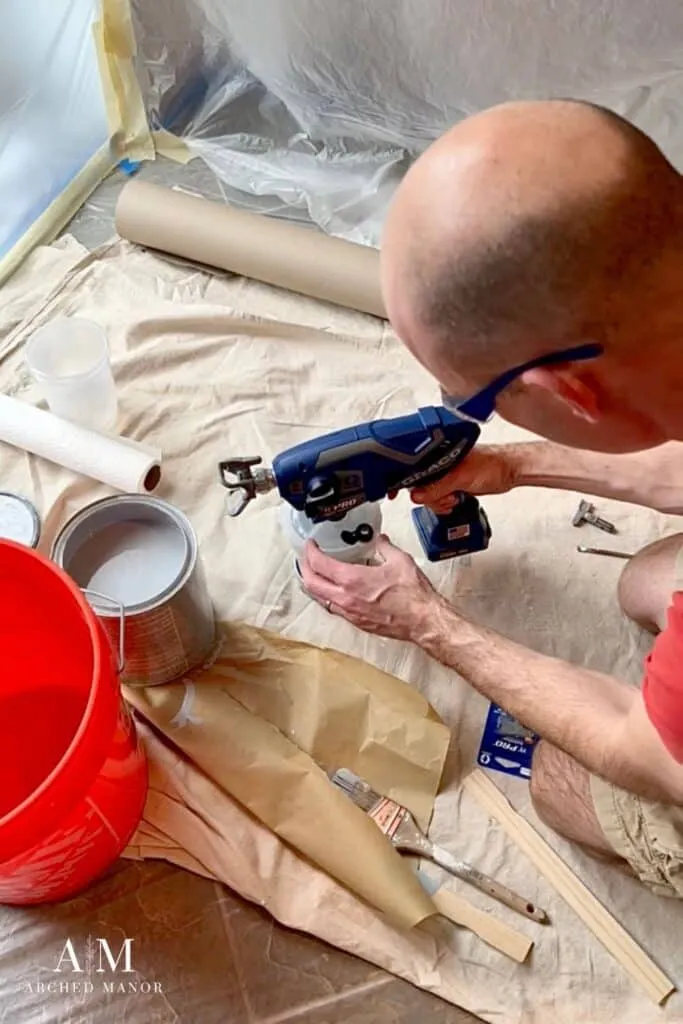
Graco Ultra Cordless Airless Handheld Paint Sprayer
The Graco Ultra Cordless Airless Handheld Paint Sprayer offers a revolutionary solution for cabinet painting, combining the convenience of cordless operation with the efficiency of airless technology. This handheld sprayer empowers users with unmatched portability, allowing them to move freely around cabinets without being tethered to power outlets. This level of mobility not only enhances productivity but also makes it easier to access every nook and cranny of intricate cabinet designs. The airless technology ensures consistent and high-quality results by atomizing the paint into a fine mist, resulting in a smooth and professional finish. With adjustable controls and pressure settings, users can adapt the sprayer to different cabinet surfaces and materials, ensuring optimal coverage without overspray. Cleanup is a breeze thanks to the easy-to-disassemble design and the ability to use water-based paints, reducing the post-painting maintenance time. The Graco Ultra Cordless brings unparalleled freedom, precision, and efficiency to cabinet painting, making it an indispensable tool for DIY enthusiasts and professionals alike.
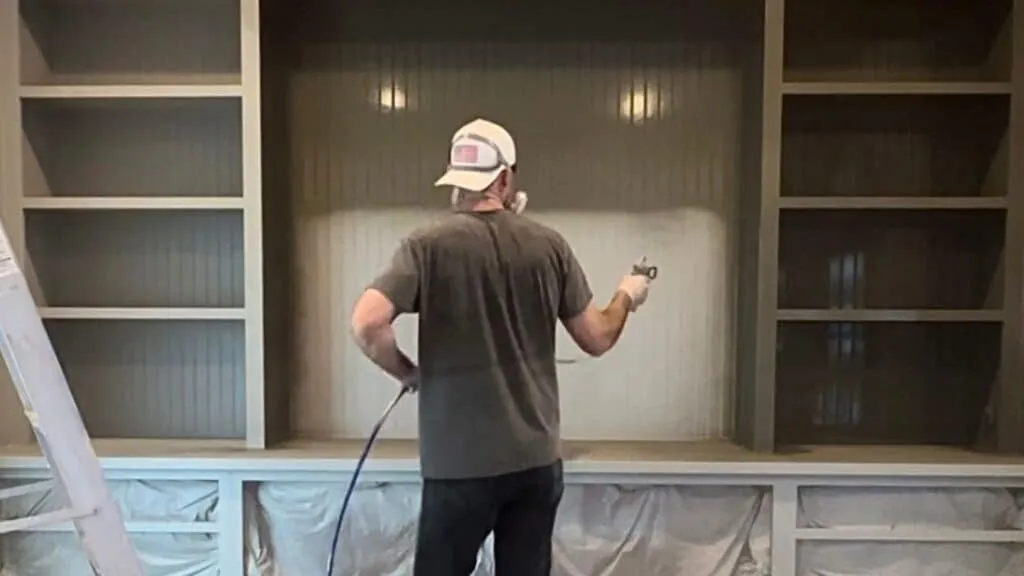
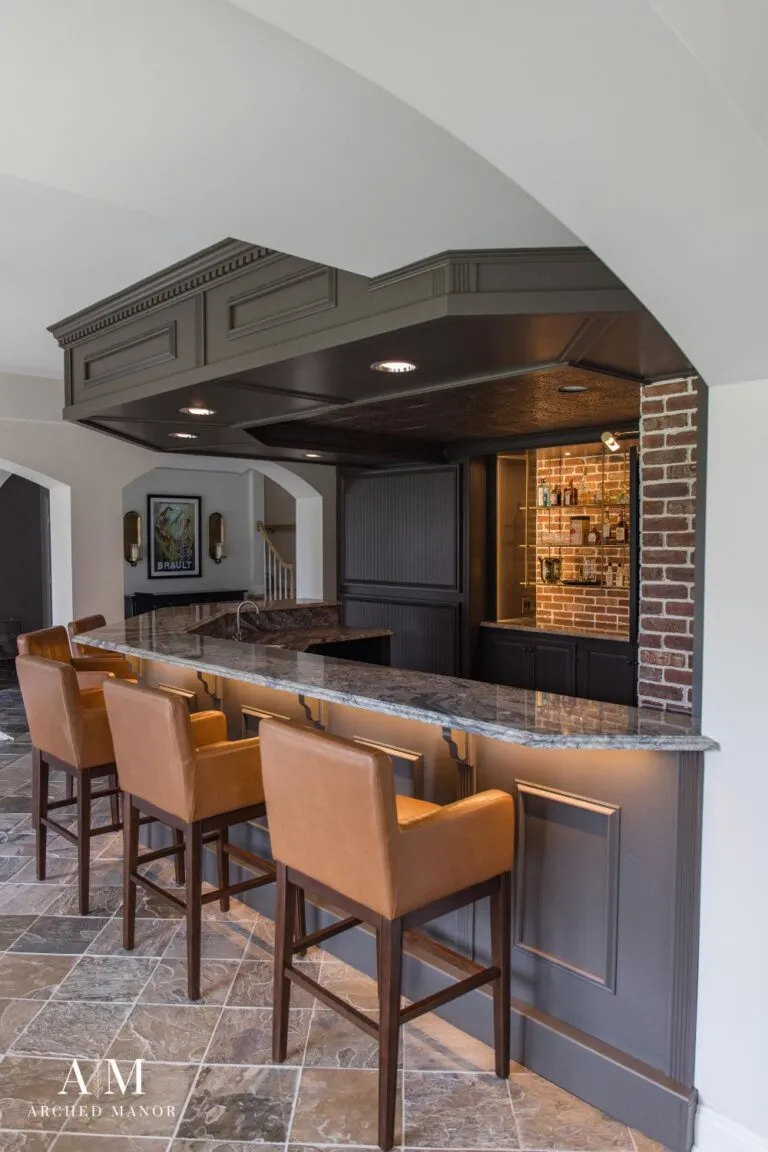
We recently used this particular paint sprayer to paint our basement bar cabinets and could not have more good things to say about our experience. In our opinion this is the best option for all the reasons listed above and yielded the best results. The one con however, is the price point and is something to consider when deciding whether to purchase or use.
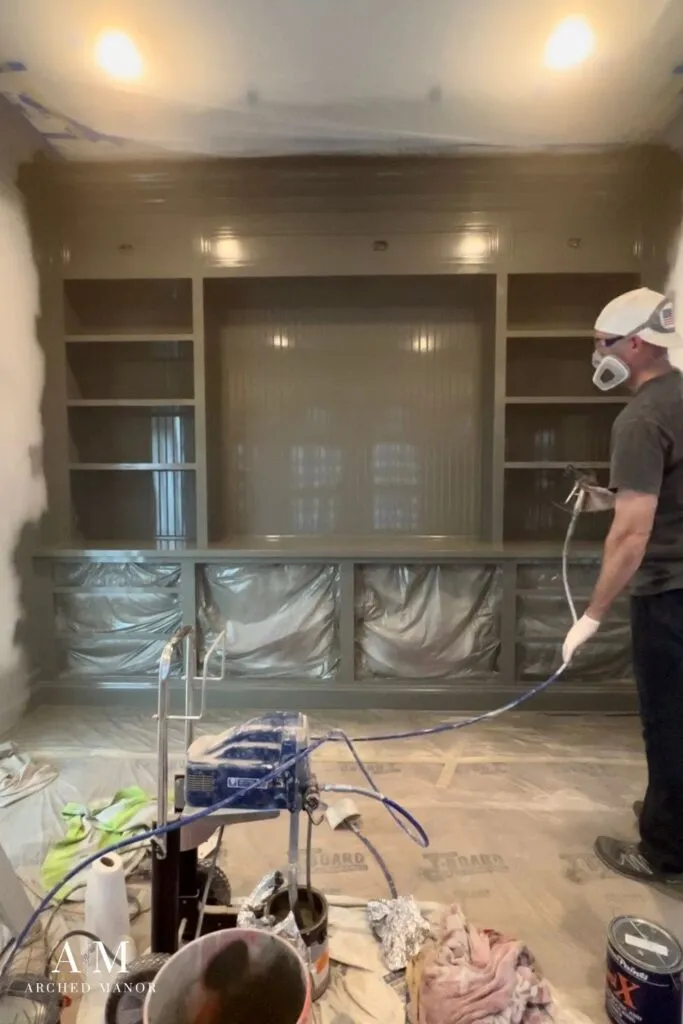
Graco Magnum X5 (Airless):
The Graco Magnum X5 is one of the standout airless paint sprayers renowned for its versatility, reliability, and consistent performance. Designed to cater to both small projects completed by DIY enthusiasts and large projects taken on by professionals, the Magnum X5 boasts a powerful yet efficient motor that allows for the application of various coatings with ease. With adjustable pressure controls, users can fine-tune the paint flow and spray output to match the specific requirements of their cabinet painting project. This feature is particularly advantageous when working on cabinets with diverse surfaces or intricate details. The X5’s durable construction ensures longevity, making it a cost-effective investment for multiple projects. Additionally, its compact size and lightweight design contribute to its maneuverability, allowing users to navigate tight spaces and reach high or challenging areas effortlessly. Whether you’re a novice painter or a seasoned pro, the Graco Magnum X5 stands as a reliable tool that delivers a smooth, even finish on cabinets while significantly reducing overspray and paint wastage.
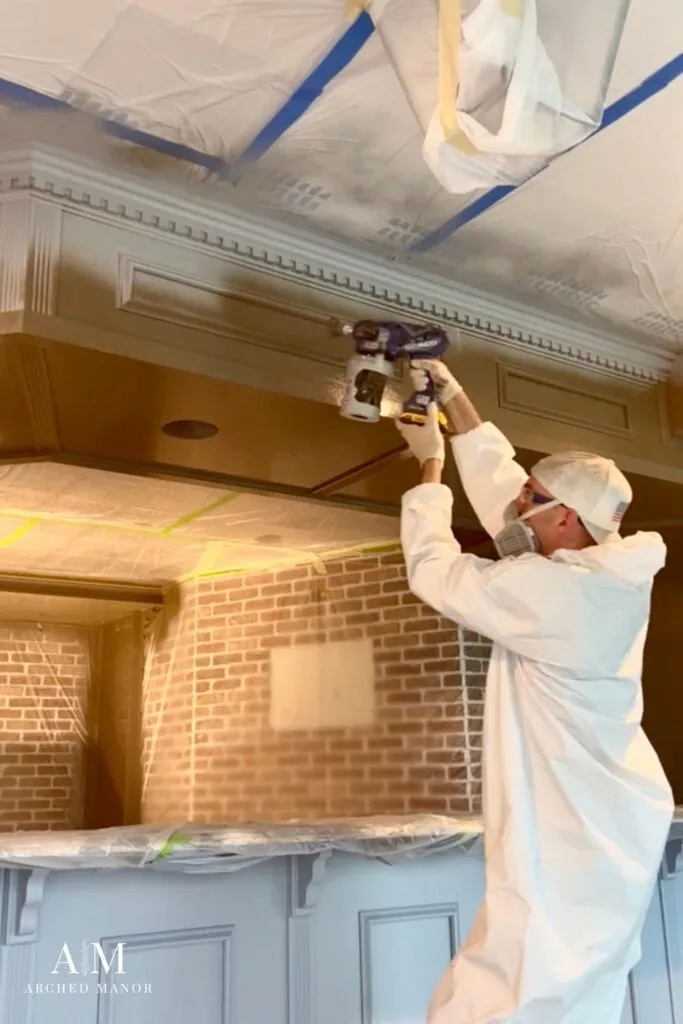
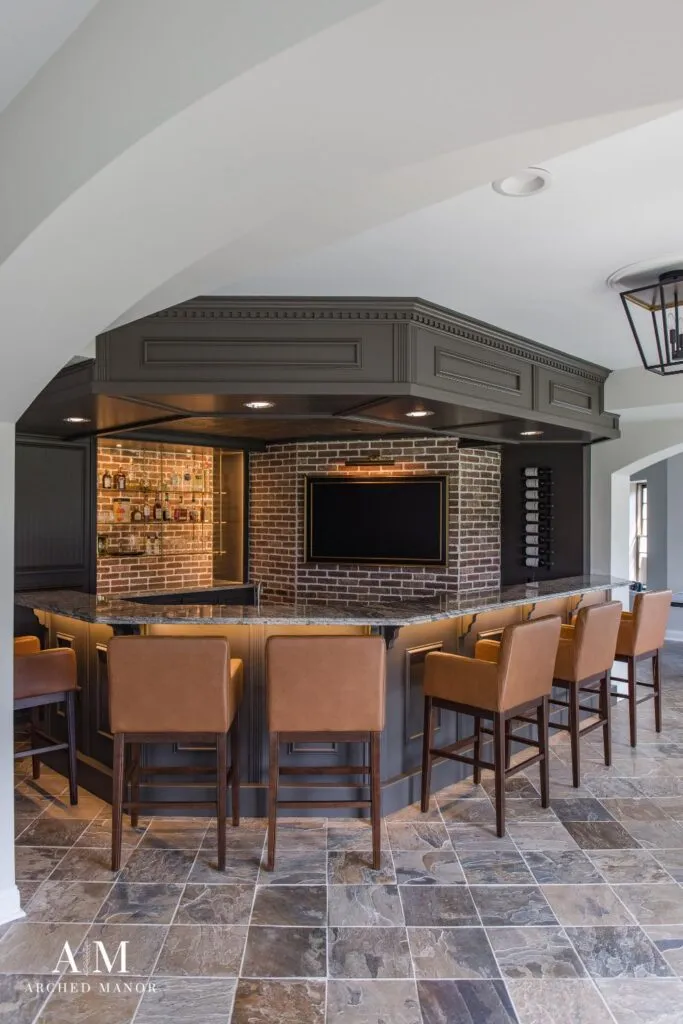
We cannot speak to the Graco Magnum X5 specifically, however we do own and have used the Graco Magnum X7 on several projects such as our home office renovation and dining room renovation and had great results. While this sprayer would work absolutely fine on cabinetry, we found it was best when painting complete rooms and high volume projects. The reason being because the cord made it less mobile and a little more difficult to get good angles for all the nooks and crannies of cabinetry. For full room projects, we love the X7 more than our cordless sprayer we talked about above because the ability to reach high places with the 100 feet of hose and the suction tube that can go right into your paint bucket rather than refilling because of the amount of paint you would use in larger areas.

Fuji Semi-PRO 2 HVLP Spray System:
The Fuji Semi-PRO 2 HVLP Spray System stands as a testament to precision and excellence in cabinet painting. Designed with the needs of professionals and discerning DIYers in mind, this system showcases a potent 2-stage motor that delivers exceptional atomization for a flawless finish. Its HVLP technology minimizes overspray while maximizing control, enabling users to achieve the highest level of detail on cabinet surfaces. The adjustable fan pattern further enhances customization, allowing for seamless coverage even on intricate designs. Boasting both power and sophistication, the Semi-PRO 2 system includes a comprehensive set of accessories, from a durable metal spray gun to an ergonomic handle, ensuring a comfortable painting experience. Whether you’re a seasoned painter aiming for professional results or an enthusiast eager to elevate your cabinet painting endeavors, the Fuji Semi-PRO 2 HVLP Spray System offers an exceptional toolset for achieving remarkable and lasting cabinet transformations.
Wagner Control Spray Max HVLP:
The Wagner Control Spray Max HVLP sprayer presents an accessible and user-friendly solution for those venturing into cabinet painting. Tailored for beginners and DIY enthusiasts because of it’s affordability and ease of use, this sprayer provides a gateway to achieving professional-looking results without the complexity of traditional painting methods. Its adjustable settings offer control over the spray pattern, ensuring even coverage on cabinet surfaces. The lightweight design and comfortable grip make it easy to maneuver, even for extended periods of painting. Compatible with a variety of materials, from thin stains to thicker latex paints, the Control Spray Max HVLP simplifies the process of achieving a smooth and uniform finish on cabinets. For those seeking an affordable and efficient entry point into cabinet painting, the Wagner Control Spray Max HVLP sprayer serves as a reliable and approachable choice.
Titan ControlMax 1700 Pro (Airless):
The Titan ControlMax 1700 Pro stands as a powerhouse in the realm of airless paint sprayers, particularly suited for tackling sizable cabinet painting projects. This sprayer’s high-performance motor and airless technology enable it to cover extensive surfaces efficiently, making it an ideal choice for professionals and those engaged in substantial home improvement endeavors. With reduced overspray compared to traditional airless sprayers, the ControlMax 1700 Pro ensures precise application while maintaining a clean working environment. Its adjustable pressure settings permit customization, adapting to various cabinet surfaces and paint consistencies. This sprayer’s durability, paired with its ease of use, positions it as a robust and dependable tool for achieving a consistent and professional finish on cabinets, making it an indispensable asset in any cabinet painting toolkit.
Tips for Successful Cabinet Painting with a Sprayer:
- Preparation is Key: Properly clean and sand the cabinet surfaces before painting to ensure optimal adhesion. Remove all hardware and tape off areas you don’t want to paint.
- Practice Makes Perfect: If you’re new to using a paint sprayer, practice on a scrap piece of wood or cardboard to get a feel for the spray pattern and pressure.
- Maintain Consistent Speed: Keep a consistent spraying speed to ensure uniform coverage. Rapid movements can result in uneven patches.
- Overlap Strokes: Overlap each pass slightly to avoid leaving gaps in coverage. This technique contributes to a smoother finish.
- Test the Thickness: Before painting the cabinets, test the paint’s thickness with the sprayer to ensure it flows smoothly without clogging the nozzle.
- Protect Surrounding Areas: Cover countertops, floors, and other surrounding areas with drop cloths or plastic sheets to prevent overspray from reaching unintended surfaces.
Tips to Cleaning a Paint Sprayer
Properly cleaning your paint sprayer after each use is essential to maintain its performance and longevity. Here are some tips to ensure effective cleaning:
Flush with Solvent: Begin by flushing the sprayer with an appropriate solvent recommended for the type of paint you used. Run the solvent through the sprayer until the paint is completely flushed out.
Remove Nozzle and Filters: Remove the nozzle and any filters, strainers, or screens. Clean them thoroughly using a brush or solvent to remove any paint residue or debris.
Disassemble and Clean: If your sprayer is designed to be disassembled, take it apart as instructed in the manual. Clean each individual part, including the spray gun, fluid passages, and seals. Pay close attention to crevices and small components.
Soak in Solvent: For particularly stubborn paint buildup, you can soak the disassembled parts in solvent for a period of time to loosen the paint. Make sure to follow the manufacturer’s recommendations for soaking duration.
Brush and Scrub: Use brushes, scrub pads, or toothpicks to gently remove any remaining paint from hard-to-reach areas. Be careful not to damage delicate components.
Rinse Thoroughly: After cleaning, rinse all parts with clean water to remove any traces of solvent or paint residue.
Check Seals and O-Rings: Inspect seals, O-rings, and gaskets for any signs of wear or damage. Replace them if necessary to prevent leaks during your next use.
Lubricate Moving Parts: Apply a light coat of recommended lubricant to moving parts and seals to ensure smooth operation and prevent corrosion.
Reassemble: Put all the cleaned components back together, following the manufacturer’s instructions for proper reassembly.
Run Clean Water: Run clean water through the sprayer to ensure that all traces of solvent and paint are flushed out.
Final Check: Before storing your sprayer, double-check that all parts are properly cleaned and reassembled.
Storage: Store your paint sprayer in a clean, dry place, away from extreme temperatures.
Proper cleaning not only maintains the performance of your paint sprayer but also prevents cross-contamination of paint colors and ensures that you’re ready for your next painting project. Always refer to your sprayer’s user manual for specific cleaning instructions tailored to your model.
Paint Sprayer Accessories
When gearing up for a paint spraying project, assembling the right accessories is pivotal for a seamless and successful painting experience and here are some accessories to consider. Essential protective gear like safety goggles, a mask, and gloves shield you from potential overspray and fumes, ensuring your safety throughout the process. To safeguard your surroundings, lay down drop cloths or plastic sheets to prevent unintended paint splatters. Elevate your spraying precision with a range of extra nozzle tips, including durable brass spray tips of varying sizes and angles. These tips not only offer consistent performance but also allow you to tailor to different spray patterns and the intricacies of your cabinet surfaces. Utilizing a paint strainer ensures a clog-free operation by filtering impurities from the paint, ensuring a steady flow and uniform coverage. Extension poles are valuable for reaching high cabinets without requiring a ladder, enhancing your accessibility. Post-spraying, cleaning brushes and solvent play a crucial role in maintaining your equipment, ensuring its longevity for future endeavors. By assembling these accessories, including the versatile brass spray tips, you equip yourself for cabinet painting projects with confidence, precision, and professional results.
The Best Paint Choice for Cabinet Painting
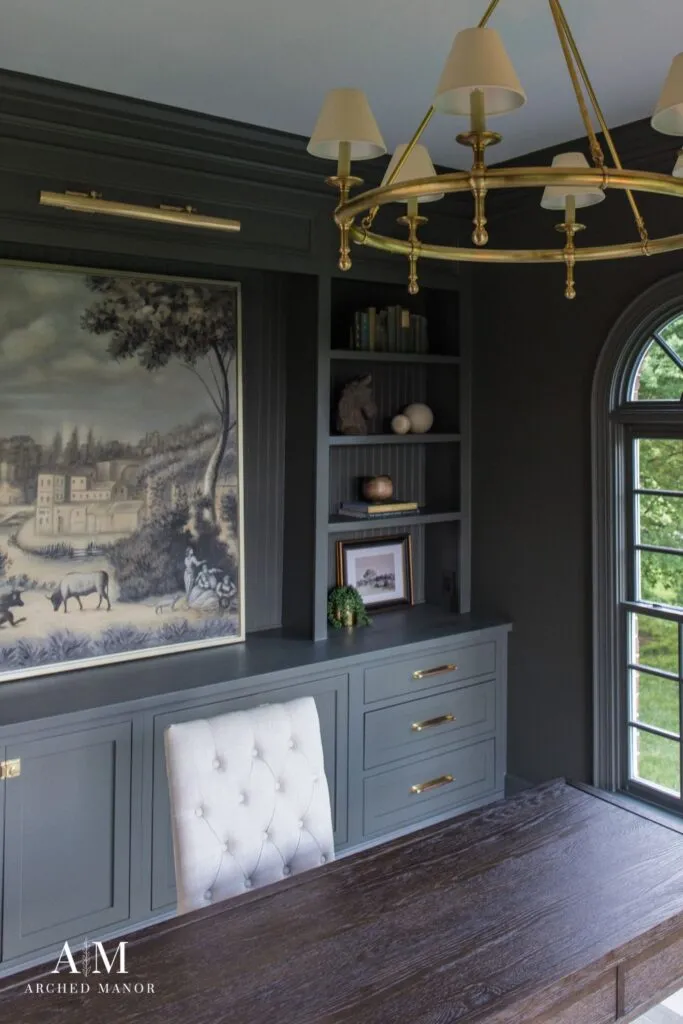
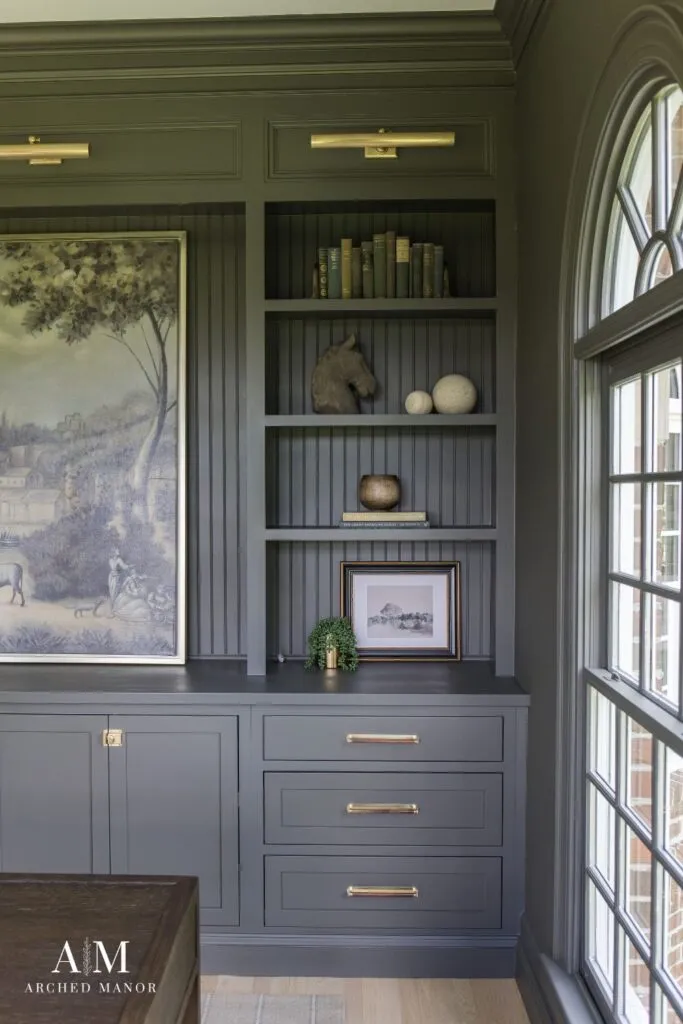
Selecting the right type of paint for your cabinetry is a pivotal decision that significantly influences the durability and aesthetics of the finished project. When painting cabinets, opting for a high-quality, durable paint is crucial to withstand the inevitable wear and tear of daily kitchen use. For this purpose, a water-based acrylic or latex paint is often the preferred choice. These paints offer excellent adhesion, durability, and a smooth finish. They also emit fewer odors and dry relatively quickly, allowing for efficient painting without the need for extensive ventilation. Furthermore, their easy clean-up with soap and water simplifies maintenance in the long run. Satin or semi-gloss finishes are commonly recommended for cabinets as they strike a balance between offering a smooth, easy-to-clean surface and minimizing the appearance of minor imperfections. Ultimately, the choice of paint should align with your aesthetic preferences and the functional demands of your space. We recently painted our basement cabinetry using enamel paint which is a latex based paint and are thrilled with the results! You can read more about that project here as well as other details such as the importance of priming your cabinetry first.
A fresh coat of paint on cabinets is a great way to breathe new life into any cabinetry in your home, and using the right paint sprayer is essential for achieving professional results. Whether you’re a seasoned painter or a DIY enthusiast, there’s a perfect paint sprayer out there for your cabinet painting project. By considering factors like sprayer type, project size, adjustability, and quality, you can make an informed decision that will ensure a successful and satisfying cabinet painting experience. With the right tools and techniques, you’ll soon be enjoying your beautifully transformed kitchen cabinets.
FAQs
HVLP (High-Volume, Low-Pressure) sprayers are known for precision and control, making them ideal for cabinets. Airless sprayers cover larger areas quickly but might produce more overspray.
Most paint sprayers are versatile and can handle various types of paints, including acrylics, latex, and stains. Always check the manufacturer's recommendations for compatibility.
Thinning paint is sometimes necessary, especially for airless sprayers. Check the paint's label or the sprayer's manual for recommended thinning ratios.
Generally, maintaining a distance of 6 to 10 inches from the surface provides optimal results. Adjust as needed for the specific sprayer and paint being used.
Clean the sprayer by flushing it with an appropriate solvent, disassembling the parts, and cleaning each component thoroughly. Pay attention to filters, nozzles, and seals. Refer to the user manual for detailed cleaning instructions.

About The Authors
John and Megan are the founders of Arched Manor, which is a passion-project turned business featuring home design, renovations, DIY tutorials, décor, e-Design, and 3-D rendering services. This married couple lives in Leesburg, Virginia, and is currently renovating The Arched Manor, a brick colonial house built in 2000.


")
