
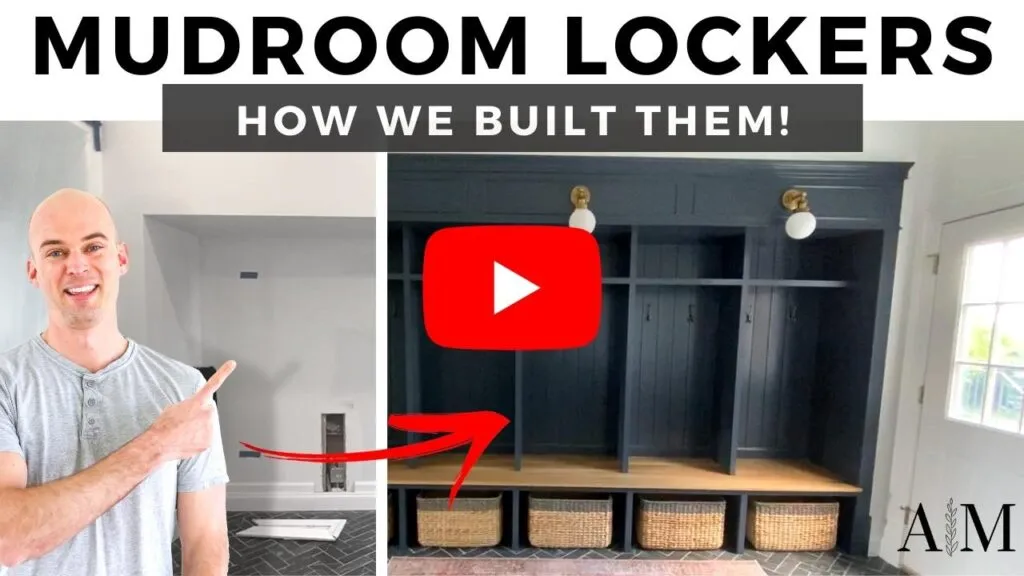
You can usually see a debris trail of jackets, shoes, socks, and backpacks from the garage door to the family room whenever the kids come home from school. We need organization, and we need it now! When we purchased The Arched Manor, there were two closets in a small hallway by the garage door, but they lacked organization and it was extremely claustrophobic. We blew out the walls and created an inset where we hoped to build mudroom lockers one day (more details of that can be found in this blog post).
Fast forward to April 2020, and enough is enough! We green-lit the mudroom locker project and have been working hard (mostly nights since schools were closed and we had to balance our full-time jobs and watching the kids) to get this built. It took twice as long as we thought, but we are happy to announce it’s done! In this post we will show you how we built it and the tools and materials we used. Our space is unique to our house, so our measurements and design/construction below will need to be tailored to fit your unique space.
Tools Used
I always stress that you must have the right tools for the job – these lockers required both basic tools and a few specialized ones:

Materials
We used cabinet-grade 3/4-inch oak plywood for the general construction of the cabinets, and oak trim to surround it. For the bench, we used 12’x6” white oak boards. Since this is a mudroom and likely to be exposed to water and moisture, we chose real wood and not an MDF product, which is prone to expanding and puckering when exposed to water.
- Trim Screws
- Bull’s Eye 1-2-3 Primer
- Benjamin Moore Advance Paint
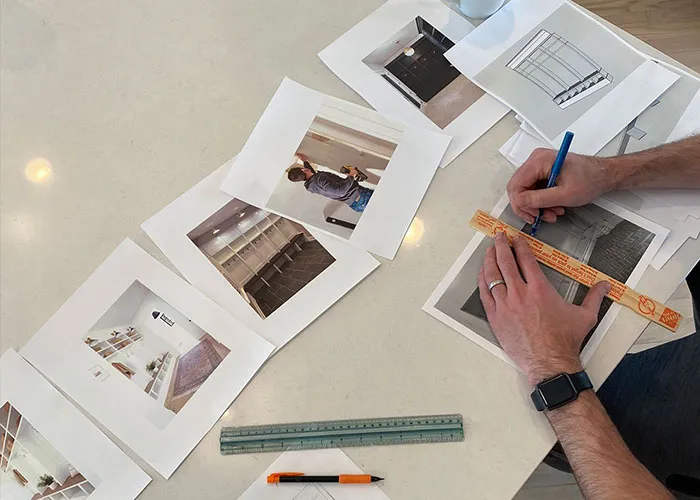
Step 1: Research & Design
Mudroom lockers can be built in a million different ways – some have drawers at the bottom, others have spaces for baskets. Some have dividers between each locker, others don’t. Finding the design that you like and that fits the style of your home is a challenge, but it must be done. Thankfully we live in the information age, and sites like Pinterest and Houzz exist. Save the designs you like to a board and find the one (or a combination of a few) that work. Sketch it on paper and make a mood board with your vision. Here is what we came up with when we were researching and designing:
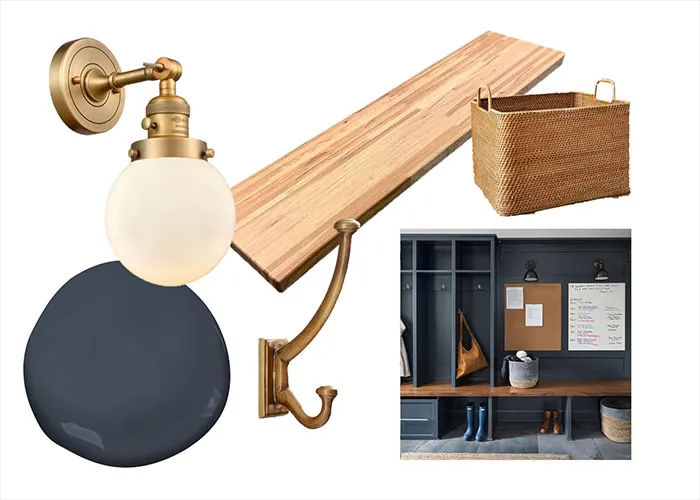
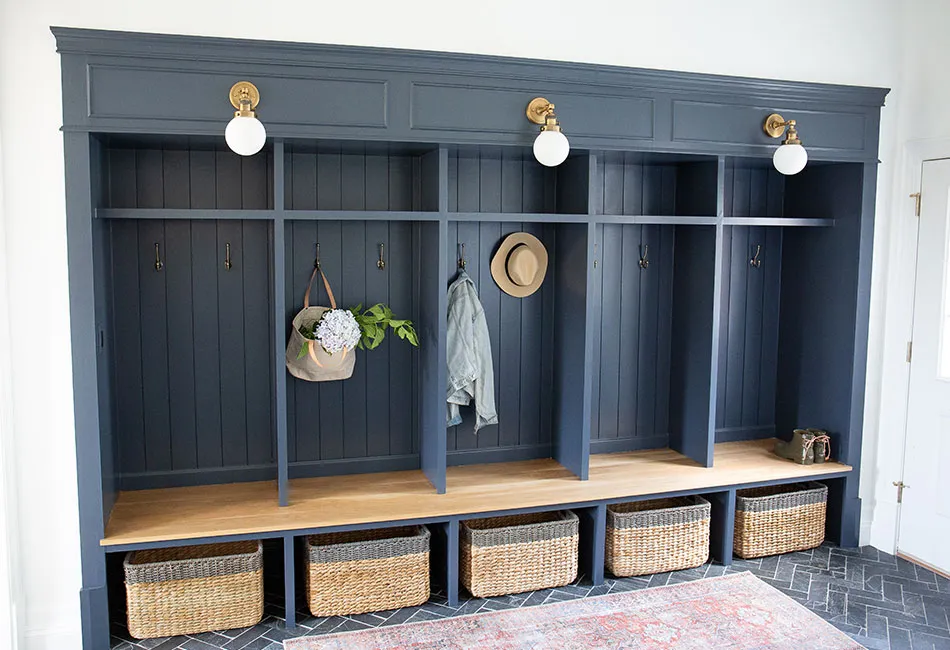
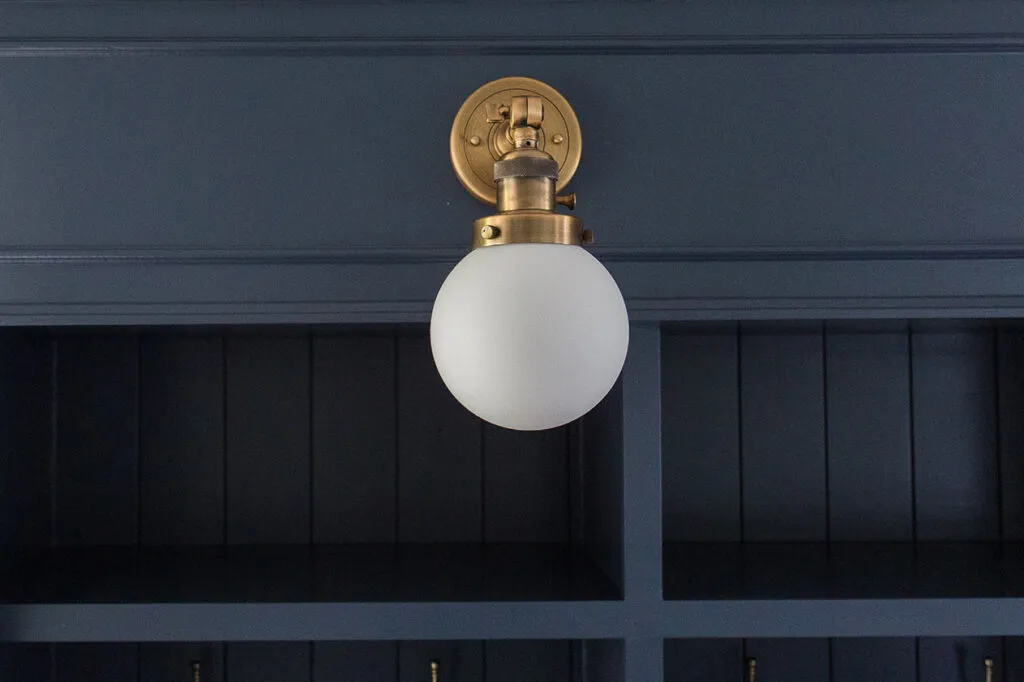
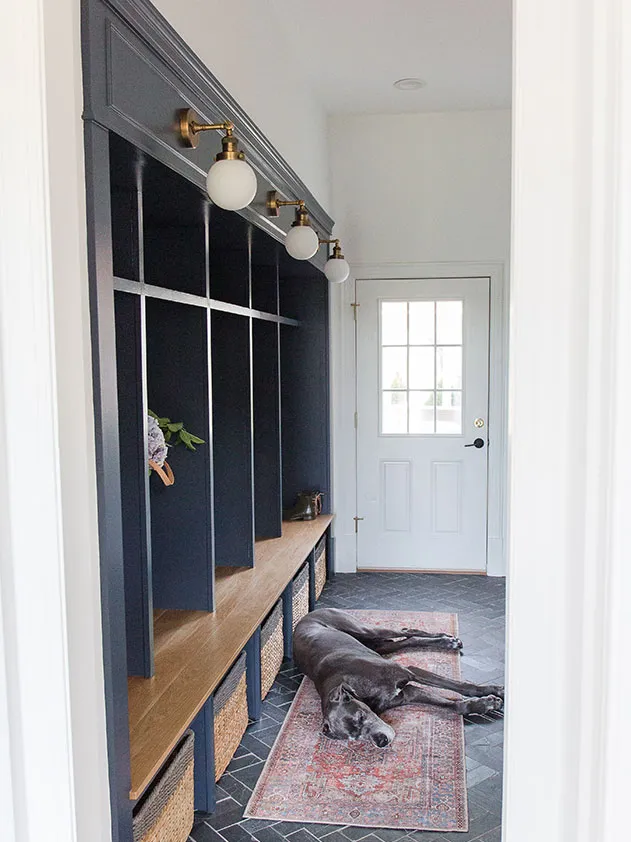
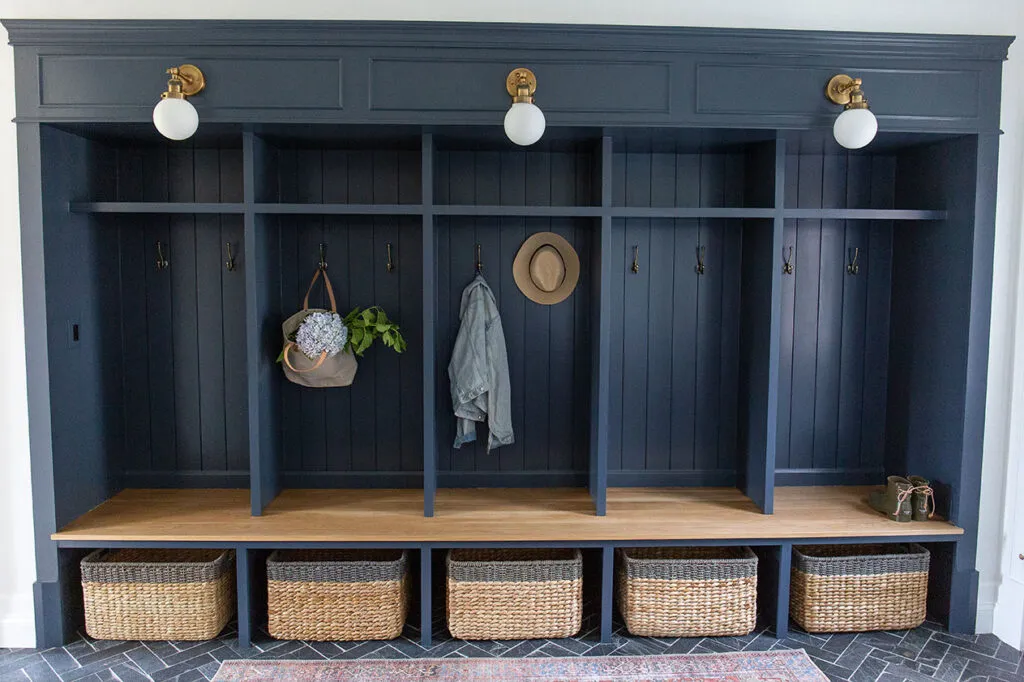
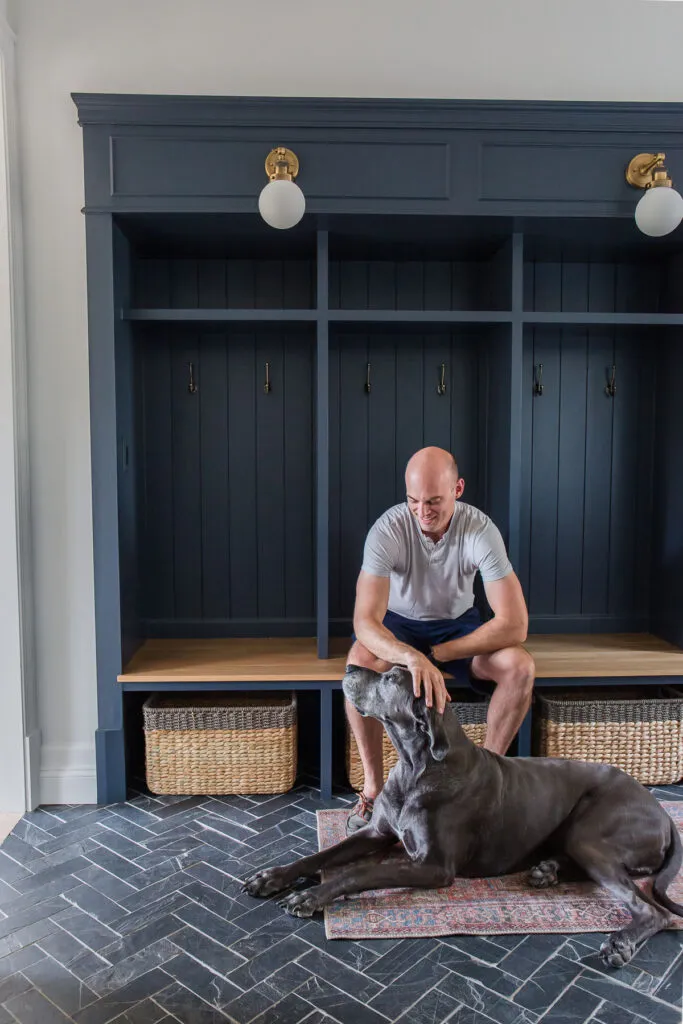
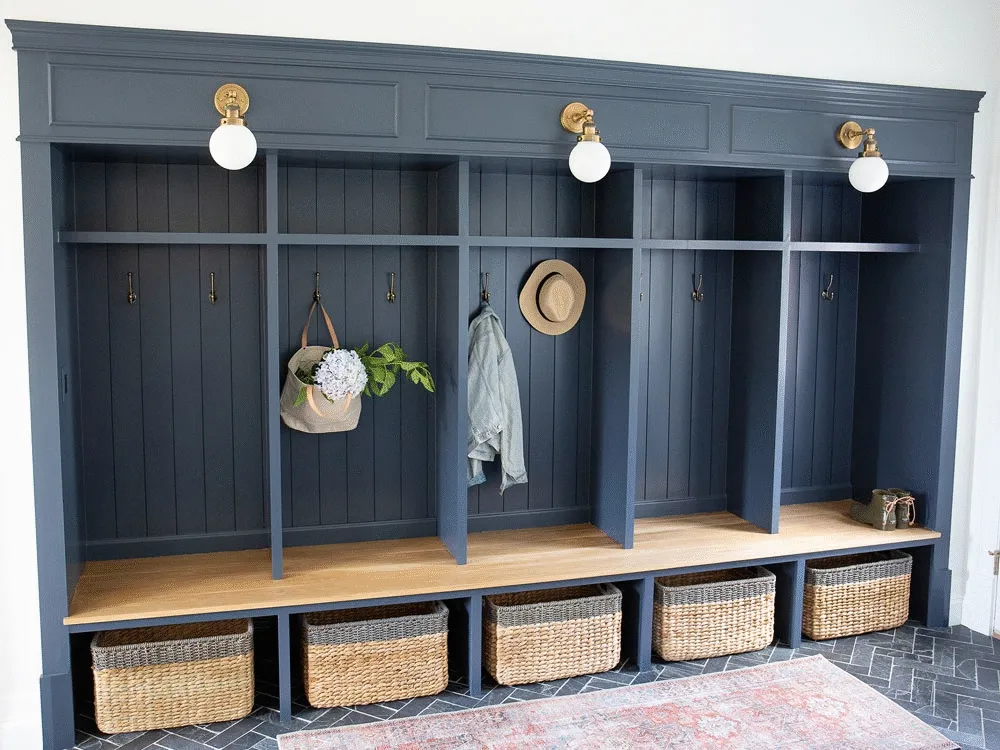
Our goal from the very beginning was to make our lockers look like a piece of custom built-in furniture. We loved the classic look of Navy and warm wood tones, complimented by antique brass hardware. This not only is a kid friendly combination (dark paint hides scratches and scrapes from the kids) that will never go out of style.
If you are not handy, short on time, or would just rather purchase a set of mudroom lockers, check out our blog post with our Top 5 Mudroom Lockers and Hall Trees You Can Buy!

Measure your space and determine how many lockers will fit. We wanted spacious bays, so we agreed on five bays at ~29” wide. We also liked the look of having baskets underneath the bench. These are great for hiding shoes and sandals from view. Determine what bench top you want – butcher block, planks, painted plywood, stone, etc. We chose white oak planks because we wanted that warm wood look, and the wide planks were less busy than butcher block. We also liked that we could have one continuous plank that could span the entire width – if we went with butcher block we would have a seam somewhere since affordable butcher block does not come in lengths as long as our area.
If you are installing lighting, plan where the power source will come from and where you want your switch located. Also, figure out what type of lighting you want – sconces above the lockers, recessed lights above each bay, etc.
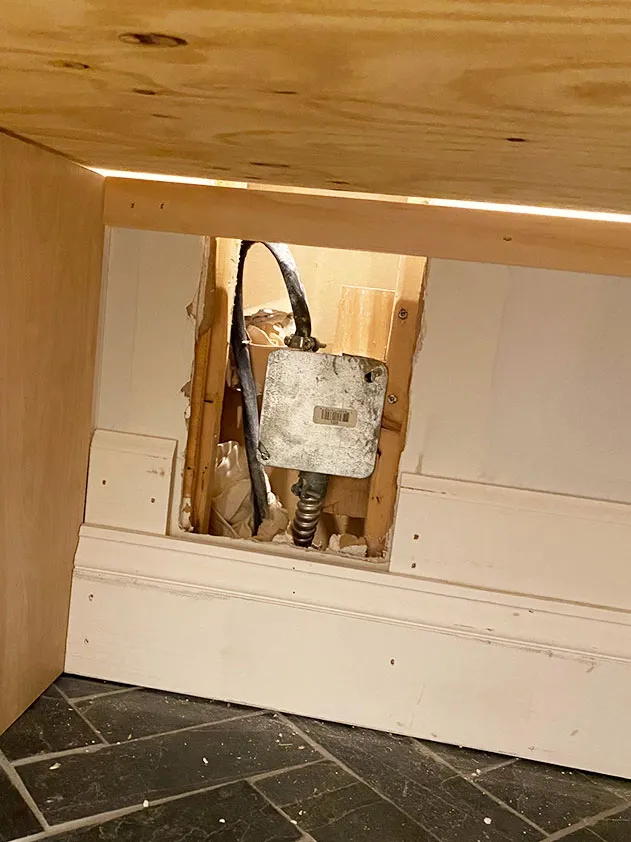
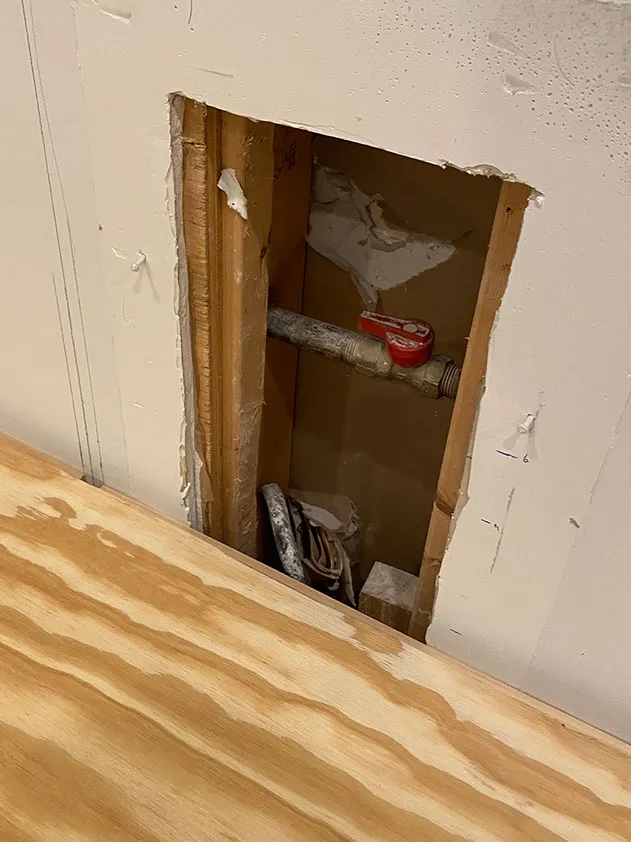
Also, take note of any special circumstances you have to work around. For example, do you have any HVAC vents to deal with? Electrical outlets? Carpet to remove, etc.? For us, we had an inset for the lockers, but we discovered the inset was not square and the floor was not level. We also have a gas shutoff valve access panel for the range on the opposite side of the wall, which we needed to work into our design.
Step 2: Prep the Area
Remove any baseboard trim, carpet, or other items in your future locker area. Measure everything at least twice, and verify your design will fit nicely into your space. In our space, we removed the trim and actually build the side walls of the cabinets off the sides of the inset so that our 12′ white oak plank would fit perfectly in the space. Losing 4 inches from the overall width of the lockers in order to gain that consistent, no-seam look seemed like a fair trade-off.
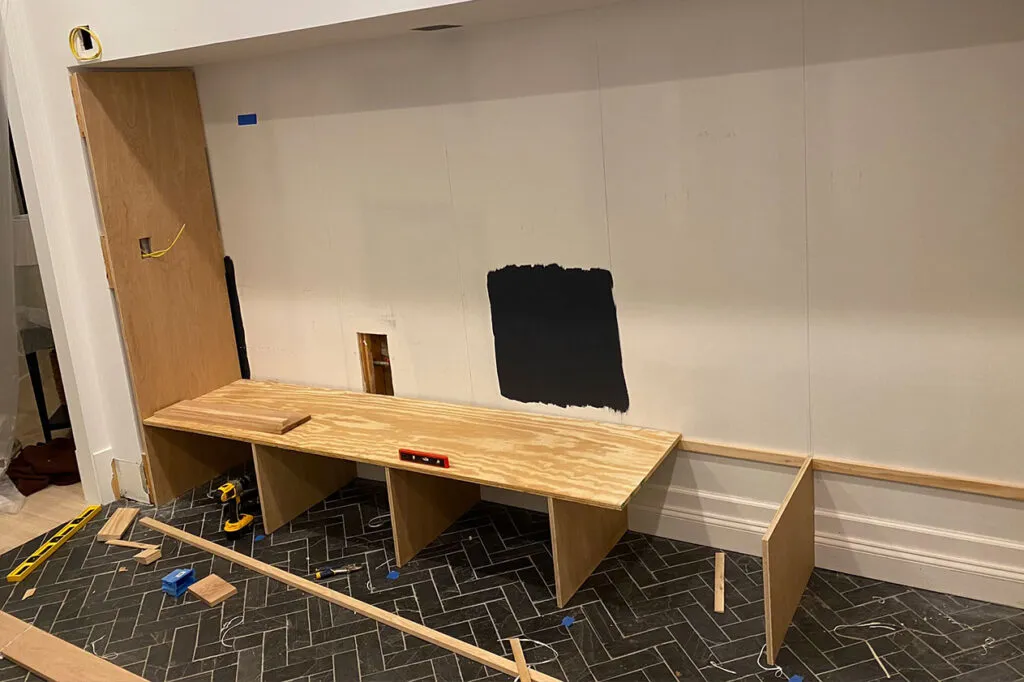
Step 3: Build the Base
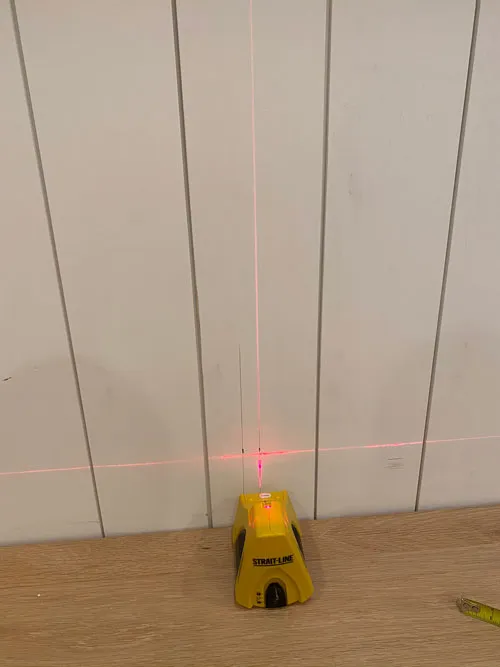
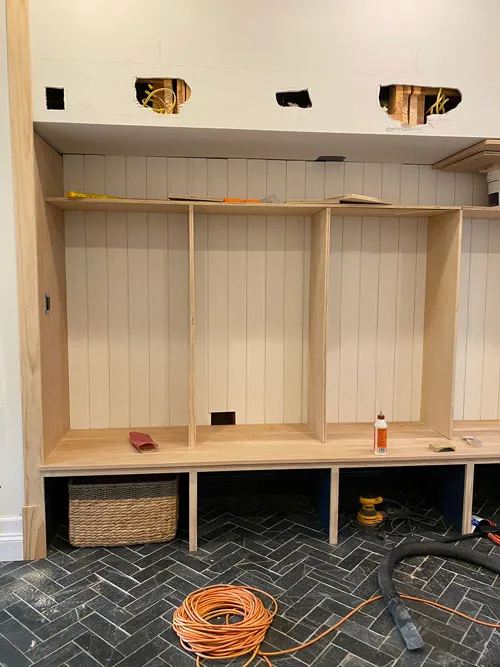
The base must be solid – it has to support not only the weight of the upper cabinets, but also the weight of multiple people sitting on it at the same time. We cut the 3/4 inch cabinet-grade plywood supports and ensured that the tops of each provided a level surface for the plywood on top (was a bit challenging since the floor was not level and the inset was not square). The true hero of this step is the laser level. We used this to calculate how high to cut each support and also how deep. We screwed 3/4”x1.5” pieces on the back wall between each support (at the top) and on the far left and right side of the unit to provide a support for the plywood bench to use.
Before we put the plywood top on the base, we cut baseboard trim (that matched the rest of the room) and nailed that to the wall. This helped in supporting the horizontal bracing of the supports.
Pro Tip: Consider priming and painting the supports and areas that will be under the benchtop during this step. While the benchtop is off, it is much easier to paint and may save you loads of time later on.

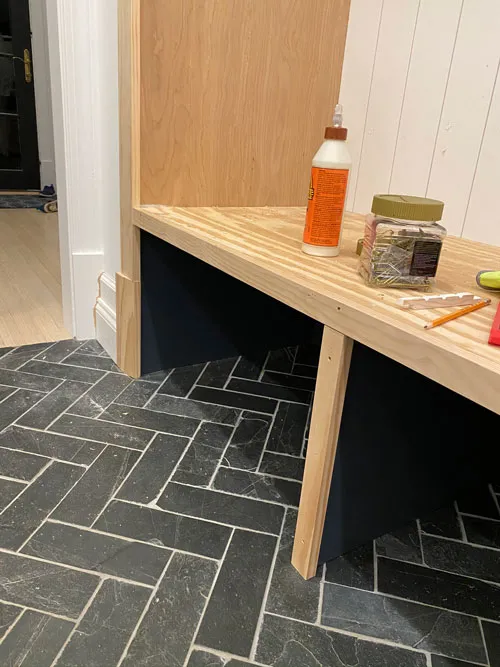
To make sure our white oak planks have a nice, solid foundation to rest on, we secured 3/4” plywood on top of the supports. We used plenty of construction adhesive and carpentry screws to ensure this would be a solid unit.
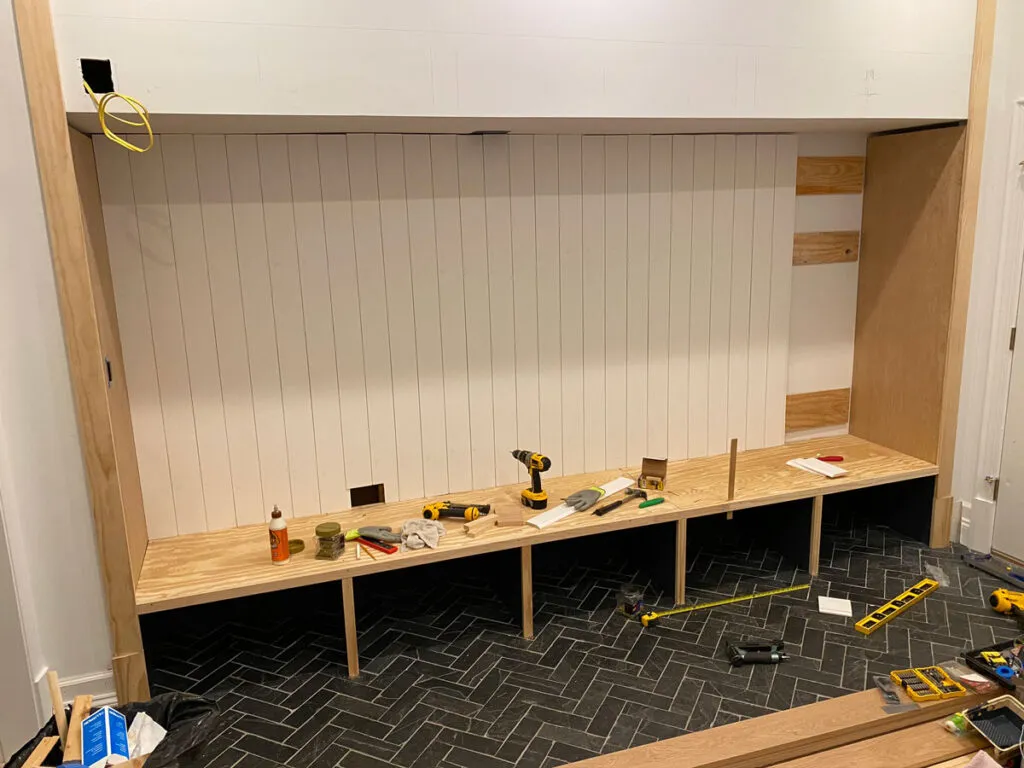
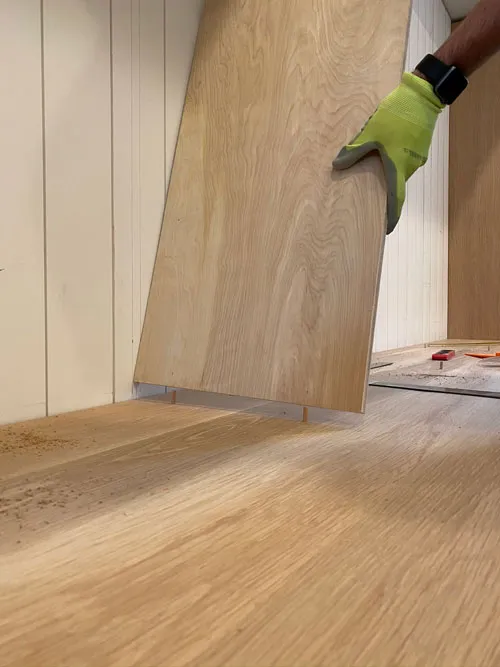
Step 4: Install the Shiplap
We wanted vertical shiplap on the backside of the locker bays, so this needed to be installed on top of the benchtop and before the vertical supports and upper cabinetry. We screwed scrap pieces of plywood horizontally on the backwall so that the shiplap (and ultimately the coat hooks) would have something to nail/screw into.
Pro Tip: Use pre-primed shiplap and avoid shiplap that is made of knotty pine as the sap can bleed through some primers.
Step 5: Create the Benchtop
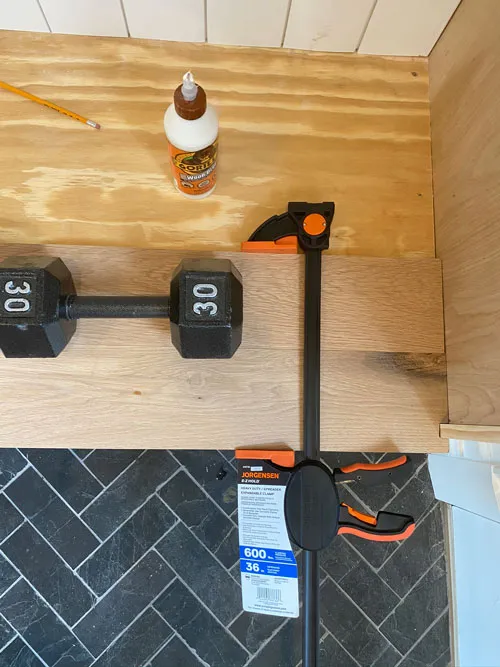
We were able to find our white oak planks in 11′ and 12′ lengths at Tart Lumber. The two 12′ sections allowed us to have a no-seam look at the front, and we cut the rest so that the seams would be under the vertical supports of the lockers (hidden from view). We used a good amount of wood glue to adhere the planks to the plywood base. We started with the outer plank and used weights overnight to ensure the glue created a tight, secure adhesion. The next plank we glued and used several quick-grip clamps to ensure a tight fit against the previous plank, and used weights to hold the plank down. This process was repeated for the rest of the planks.
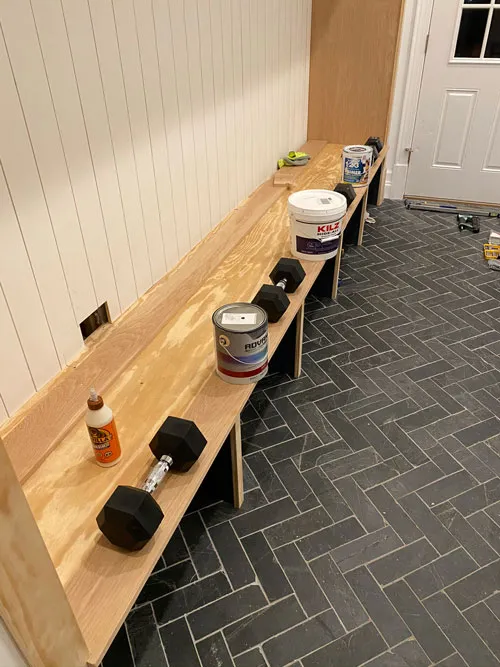
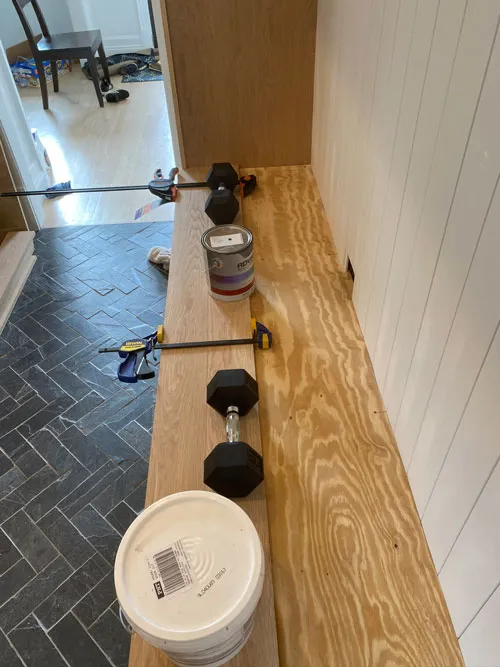
Once the planks were down, we used a belt sander to smooth them down to a consistent height. We tried using an orbital sander for this, but we needed more power (as Tim-the-Tool-Man-Taylor would say). We purchased a Ryobi belt sander for $60 and it worked like a charm! Created quite a dust storm, but worth it.
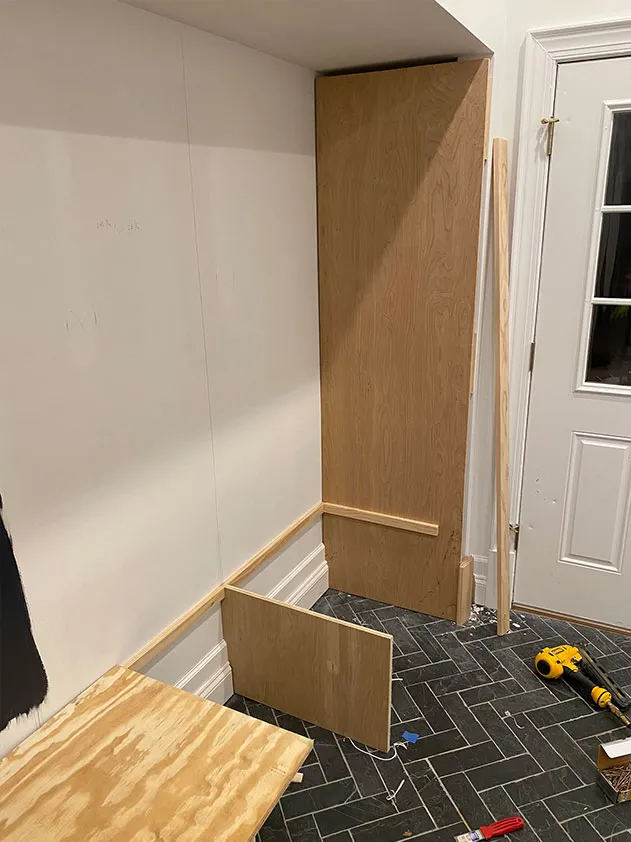
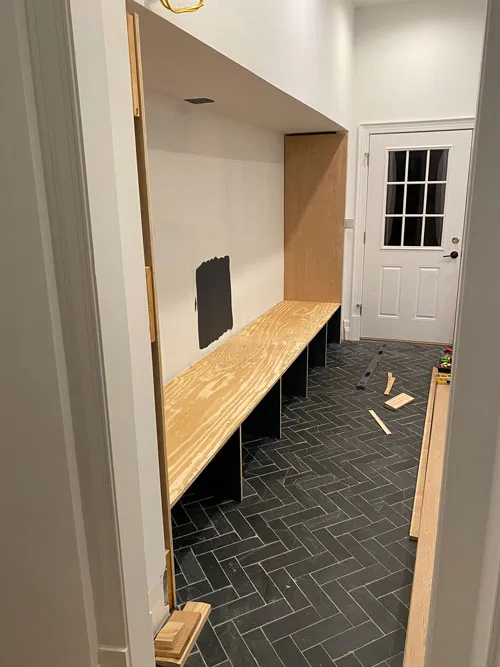
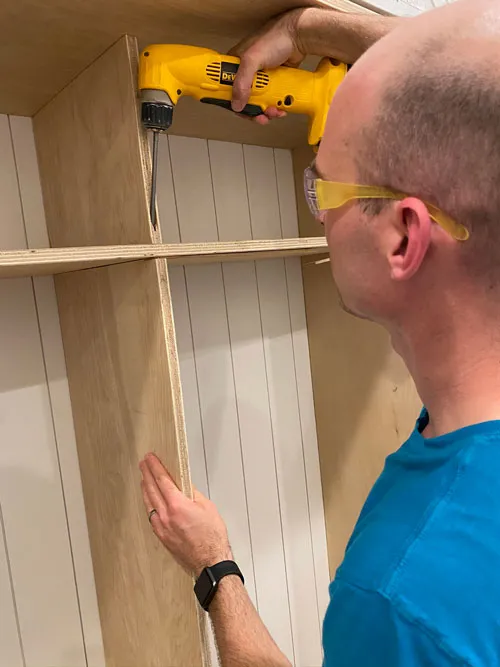
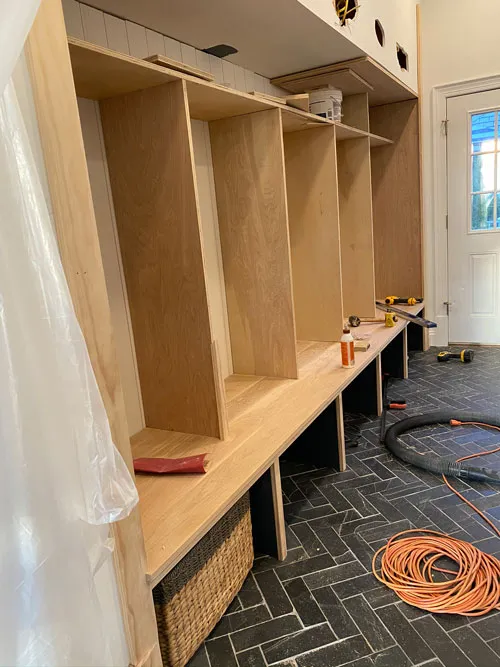
Step 6: Construct the Upper Lockers
Determine how deep you want each of your locker bays. For our space, we determined that the vertical sides of each locker should be 15 inches deep. We used our 3/4” cabinet grade plywood for the sides and upper lockers, and secured everything together with a combination of wood glue, nails, and carpentry screws. We also used wood dowels (with wood glue in the holes) to secure the vertical pieces to the benchtop. This worked out well and provided a super-strong connection that will survive the abuse our kids are sure to give them.

Originally, we thought we wanted the upper cubbies to come protrude all the way to the front, but after dry-fitting a sample section and seeing how this looked, we decided to keep them the same depth of the locker bays (15 inches). This is an example of how your design can evolve as you construct it, which is part of the fun of these custom projects!
The upper cubbies were secured with wood glue, nails, and screws. We used a pocket jig to secure the vertical supports to the lower horizontal section. This jig was extremely helpful in getting these sections rock solid – we highly recommend you have one of these jig kits in your toolbox for situations like this. Once the cubbies are constructed, it’s time to move on to one of our favorite parts – finish trim!
Step 7: Add the Finish Trim
Secure your finish trim to the lockers using a combination of wood glue and nails. For extra strength, use carpentry screws as well, since these pieces are more likely to be hit and bumped.
As we mentioned earlier, we wanted this unit to look like a piece of built-in furniture, so using trim and molding details from the existing room was essential. We used 1.5″ trim on the locker bays and shelves to give it that custom cabinetry look. Then, we used the same plinth trim that our existing doorways use and opted for a simple, 4.5″x 3/4″ trim board for the sides of the unit.
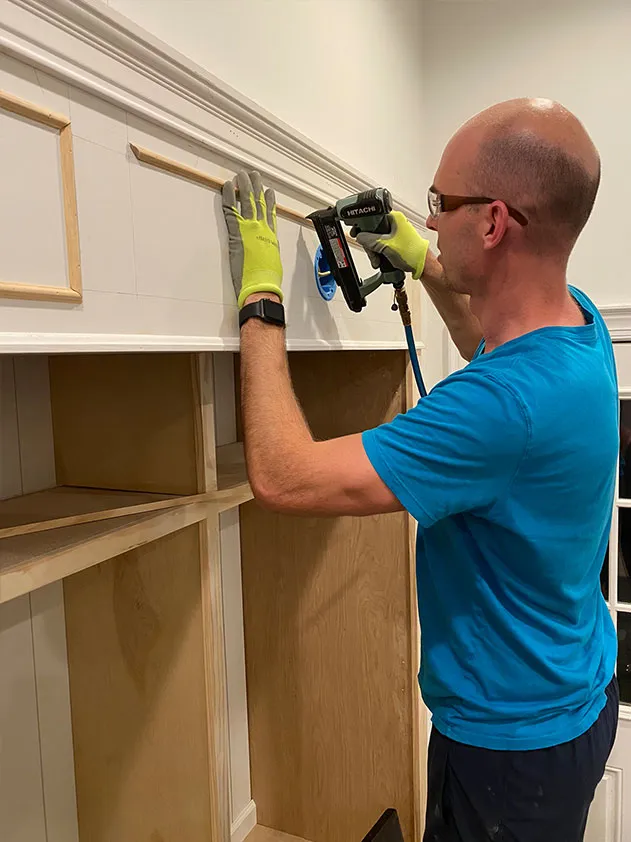
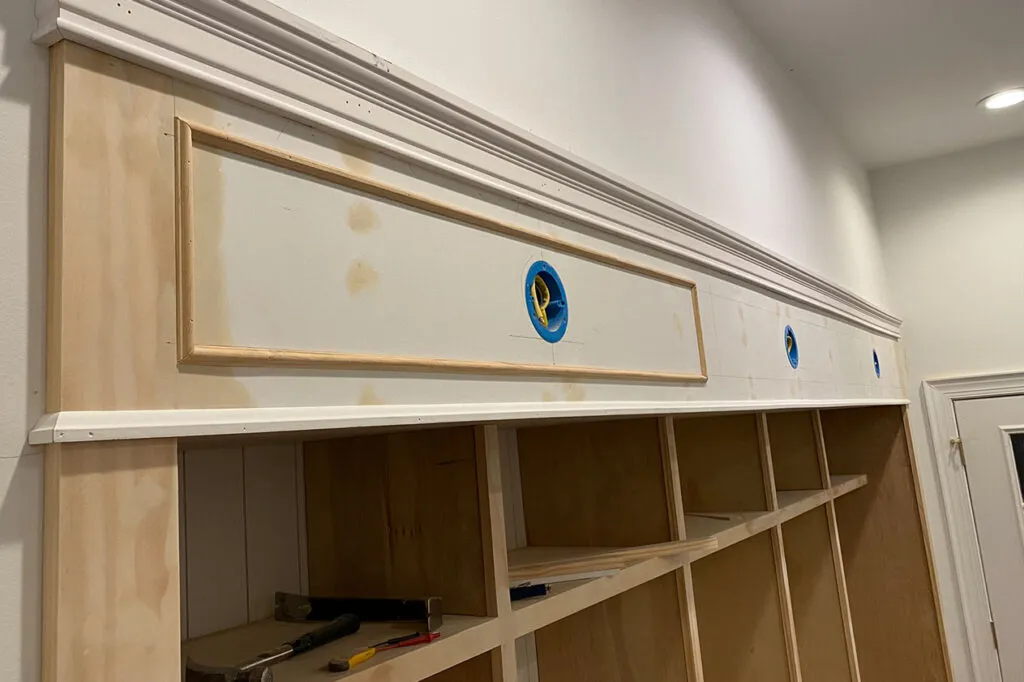
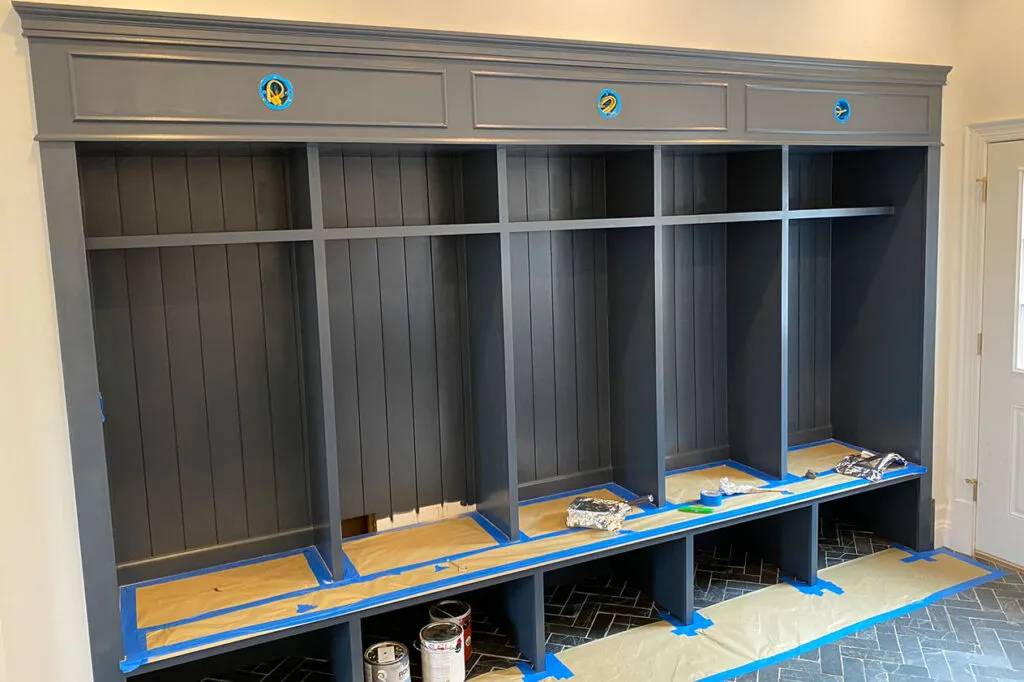
For the top, we had a couple challenges that we had to consider when constructing. First, we knew we wanted three lights, and these had to be positioned evenly on the unit. However, there were several 2x4s in the wall section that were right were we wanted to put the lights. I had to cut away some sections of 2×4 and add support in a few other areas in order to make room for our light boxes.
We used a 12” trim board as the header for our unit, and a jigsaw to cut the holes for the circular light boxes. This piece was secured to the upper wall using nails and screws. To create that custom look, we selected trim pieces to create picture frames around the lights and a more ornate piece for the top.
Step 8: Wood Putty Party
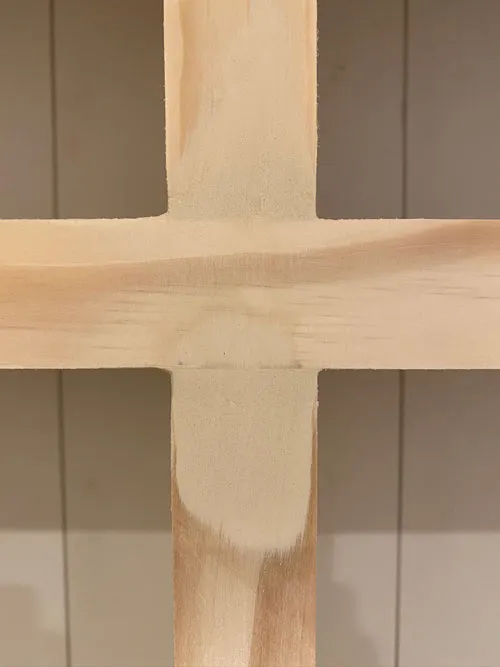
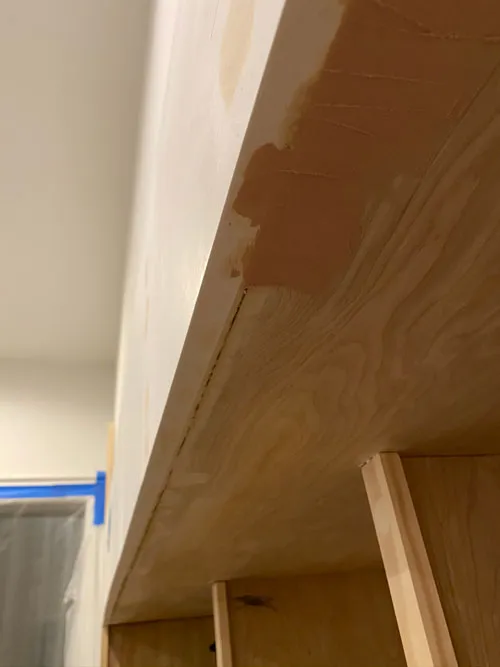
Fill all the holes with wood putty and sand to ensure a smooth finish. Also, use wood putty on the seams/joints of your outside trim pieces so that it looks like one piece of furniture. For our unit, we also used wood putty in the seam between the header board and the top horizontal piece of the upper cabinet. The sanding is the worst part of this step – consider using an orbital sander or a mouse sander to make the job easier and quicker.
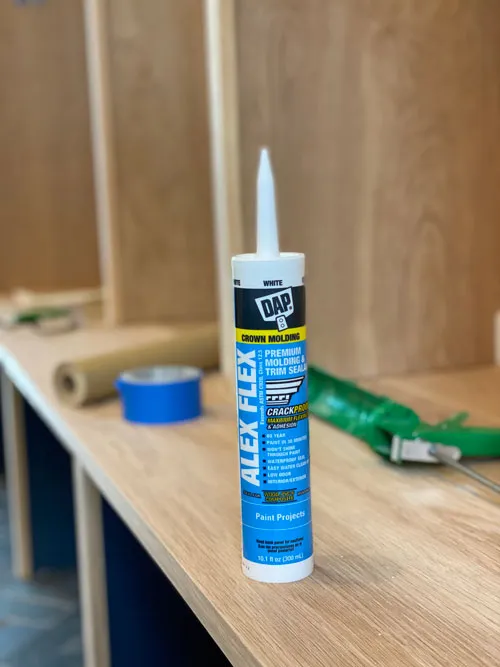
Apply a high-quality caulk to the seams throughout the unit. We can’t stress this enough – pay the extra few dollars and get premium caulk! This will prevent cracking and splitting down the road.
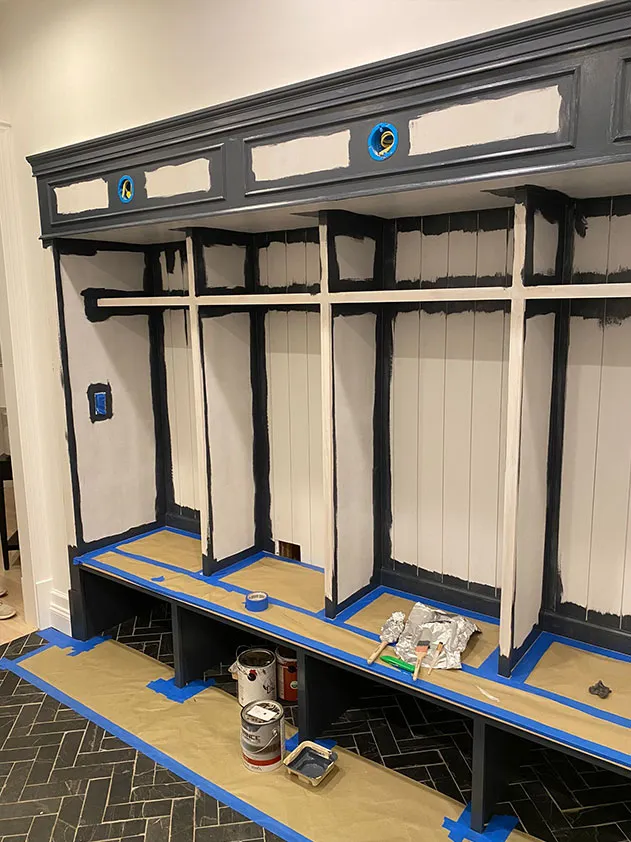
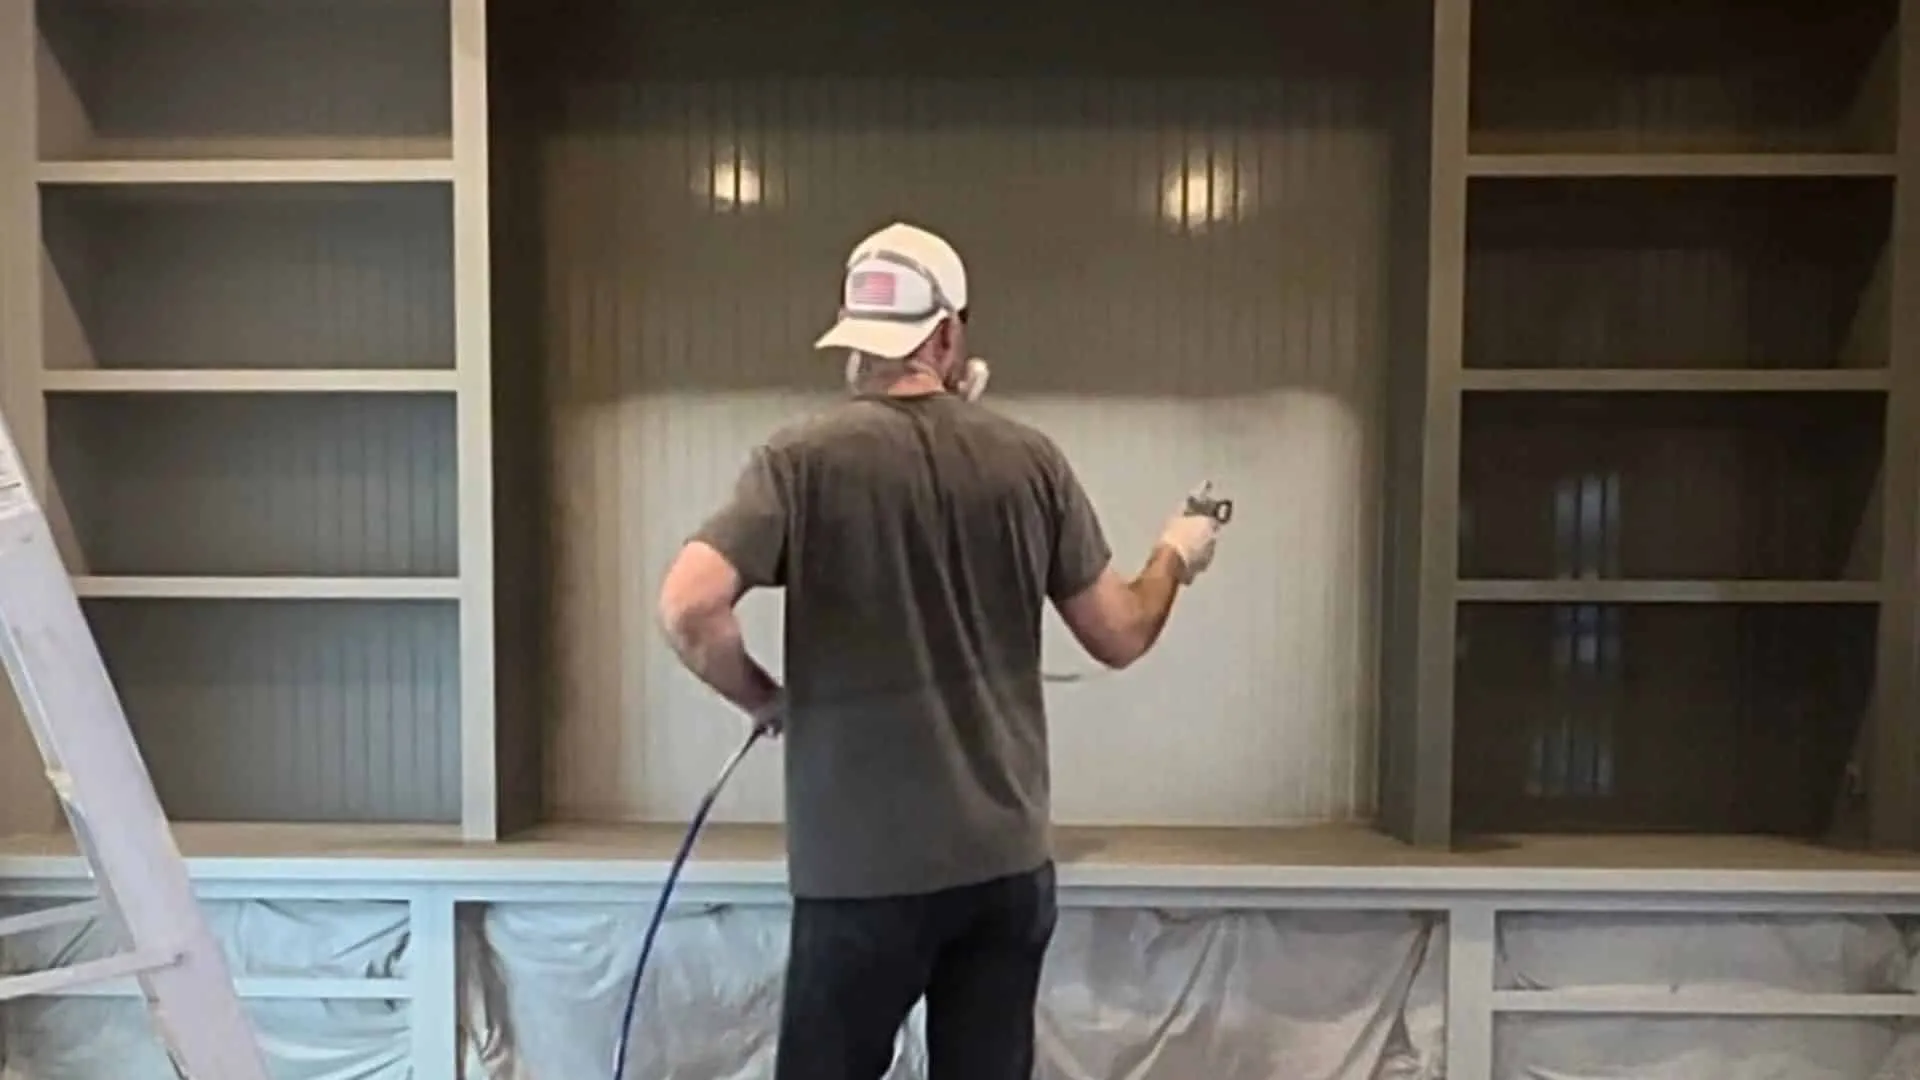
Step 9: Prime & Paint
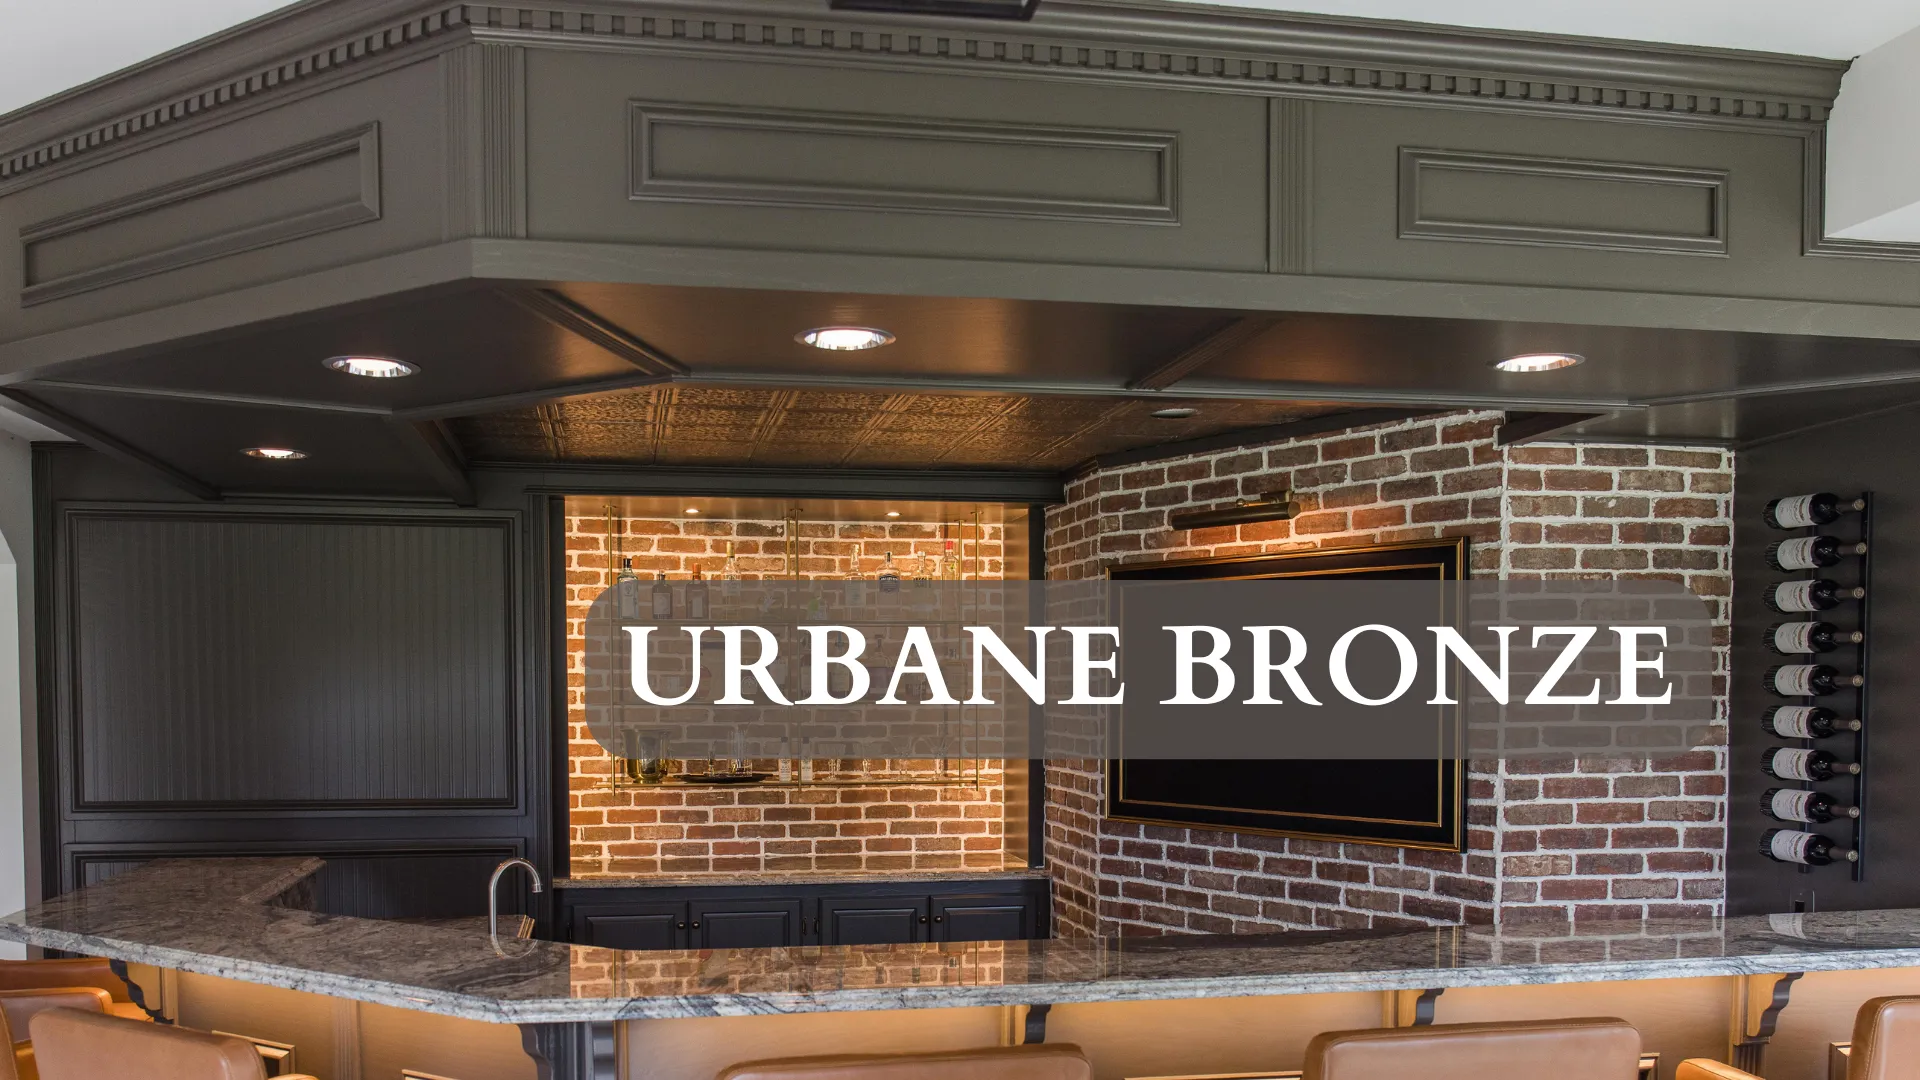
Decide how you are painting – by hand or by sprayer. We decided to paint by hand (brush and roller) as this required less prep-work and was easier to break into small sections of work (since we worked on this mostly in 1-2 hour blocks of time at night). For the primer, we used Bull’s Eye 1-2-3 Primer in white. For the main color, we used Benjamin Moore Advance Paint in Satin, Hale Navy.
If you are rolling, make sure to use foam rollers – they provide the smoothest finish, which is what you want on cabinetry. Also, buy premium paint for cabinetry that will settle flat on both vertical and horizontal surfaces.
Pro Tip: If I were to do this over again, I would spray these cabinets. The finish is “Ok”, but in certain lights and at certain angles, you can see the transition from where I brushed to where I rolled.
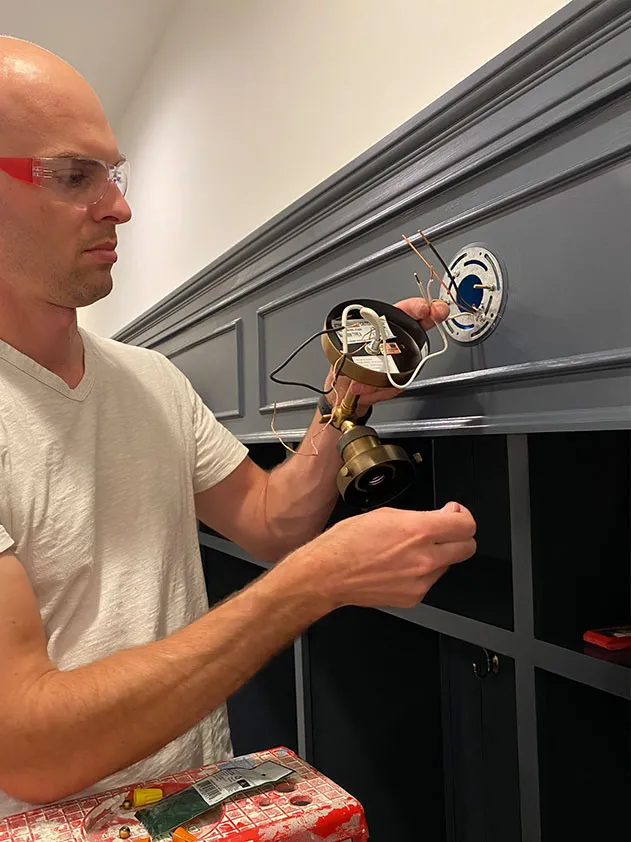
Step 10: Lighting & Hardware
If you are installing light fixtures as part of your design, install them once all the paint has dried for at least 24 hours. Our design has three lights, and they installed pretty easily. Only hiccup is that each one had an on/off lever on the side of the light. Two of them were in the “off” position when I installed them, so when I turned the power back on and only one light was lit, I spent about 20 minutes checking the wire connections in each light before realizing that their levers were in the off position.
For the hooks, I created a template out of some scrap wood and used that to drill the holes so that each bay would have consistently-placed hooks. We originally purchased 10 Pottery Barn hooks that were gorgeous, but they were back-ordered for 3 months. We instead found similar hooks from amazon that were only $5 per hook (vice $25 from PB), and they not only look great but are very well made.
Step 11: Seal the Benchtop
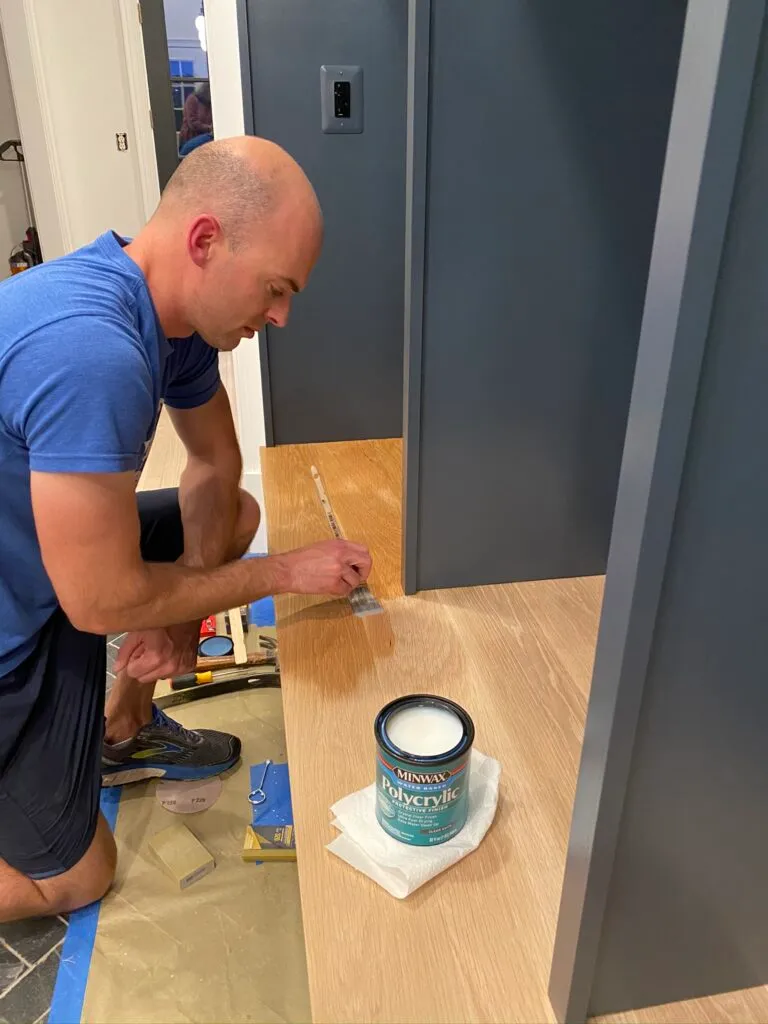
How you finish the benchtop can drastically change how your mudroom lockers look. You can stain and seal the wood to pretty much whatever color you want. For ours, we used white oak wood and wanted to keep the lighter, natural look. We first tried a clear, oil-based sealer, but this added an amber tone to the wood that was a bit too orange. We then switched to a water-based polycrylic sealer in a satin finish that looked more natural and less orange. We applied three coats of polycrylic to the benchtop, sanding the wood with 220 grit sandpaper after each coat.
Step 12: Accessorize Like a Boss
Add baskets and other storage devices to your cubbies to make them as functional as possible and/or to hide everything. A carpet runner can also bring a lot of warmth to your space – just make sure you can wash it!
That’s it! Your project is done so sit back, relax, and take a picture of it before your family piles it full of crap!


")

The Comments
Beth
Beautiful! Would love to know what brand/where your tile floors are from!
1021home
→ BethThe tile is from Floor and Decor – here is the link! https://www.flooranddecor.com/stone-decoratives/black-natural-slate-tile-100188788.html?externalVisit=true#q=slate+tile&start=14
Mariam Qasim
Hey love love! Could you tell the height of the lockers? From the bench to the bottom of the cubby?
Thanks
1021home
→ Mariam QasimThank you so much! The height of the lockers from the bench to the bottom of the upper cubby is 50″. The width of each locker is 28 inches, and the depth is 15 inches. Hope that helps!
Mariam Qasim
→ 1021homeThank you! One more question….what color grout did you use for the slate tile?
Thanks
Mariam
1021home
→ Mariam QasimHi Miriam – We used DeLorean Gray! Here is a link: https://rstyle.me/+k-xkSX4Vgh8ngKK77QEmSQ
Mariam Qasim
Thank you so much for your quick replies! One last question lol…could you tell me the depth of the bench front to back?
Thanks again!
Mariam
1021home
→ Mariam QasimThe depth of the bench is 24″. 🙂
Mariam Qasim
→ 1021homeYour awesome!
Thanks!
Mudroom Locker Build 2-Minute Timelapse – Arched Manor
[…] oak bench, antique brass hooks and lights, and plenty of storage space! Make sure to also read this blog post to see pictures of the build process, along with all the tools and materials we used along the way. […]
Mudroom Lockers and Hall Trees – Top 5 You Can Buy – Arched Manor
[…] build ours by hand so that it had a custom, built-in look. You can read all about that process in this blog post. Also, we wrote another related blog post about things to consider when designing your mudroom […]