
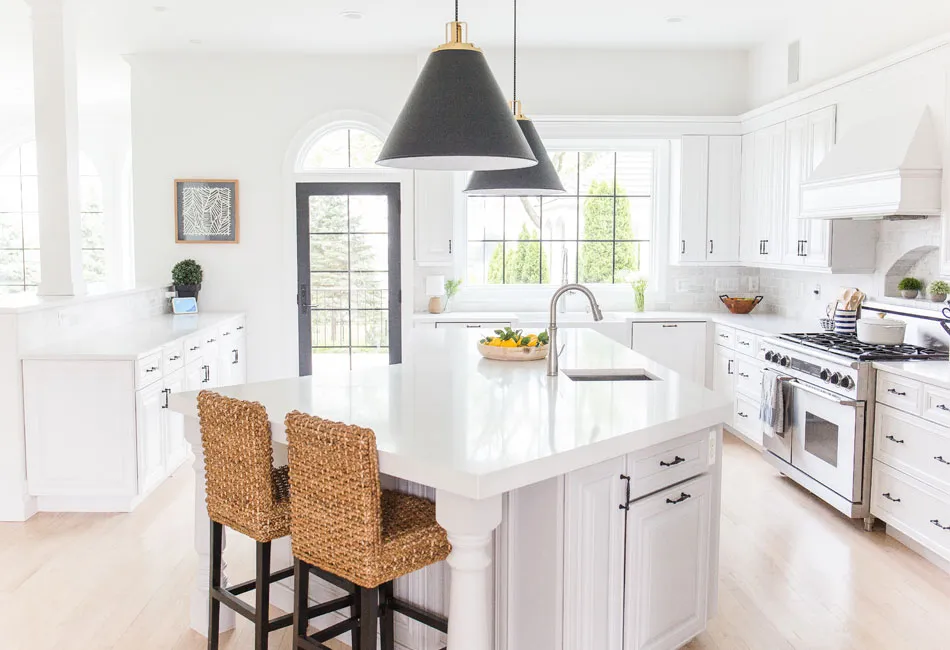
In a previous blog post, I gave a high-level overview of our kitchen renovation, but we have been getting a lot of detailed questions about various finishes and products, so now seems like a good time to give all the dirty details on our kitchen rehab journey. When our family is together or we have friends over, we usually tend to gather in the kitchen. Since it is such a key space for us, we knew that when we bought The Arched Manor, we needed to put a lot of effort into renovating it. In each section below, we will describe what we started with, our design process, and details on the final finishes.
Cabinets
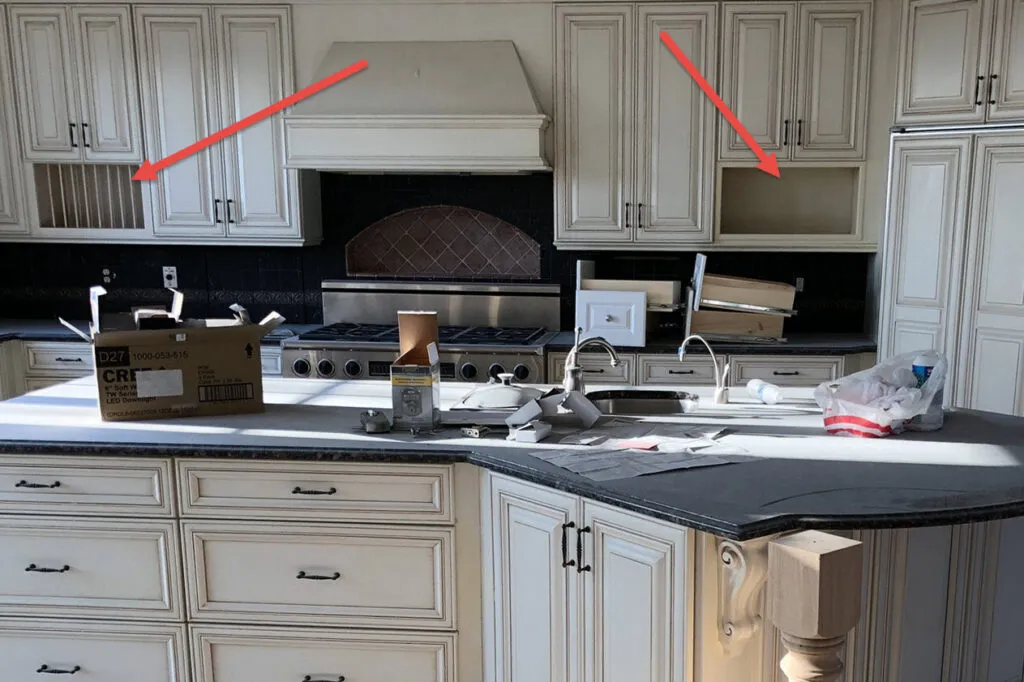
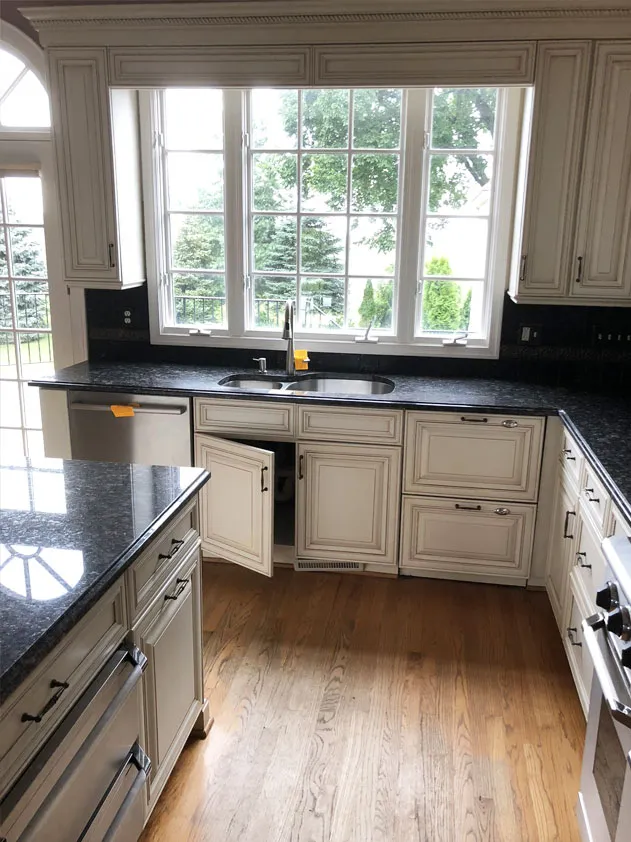
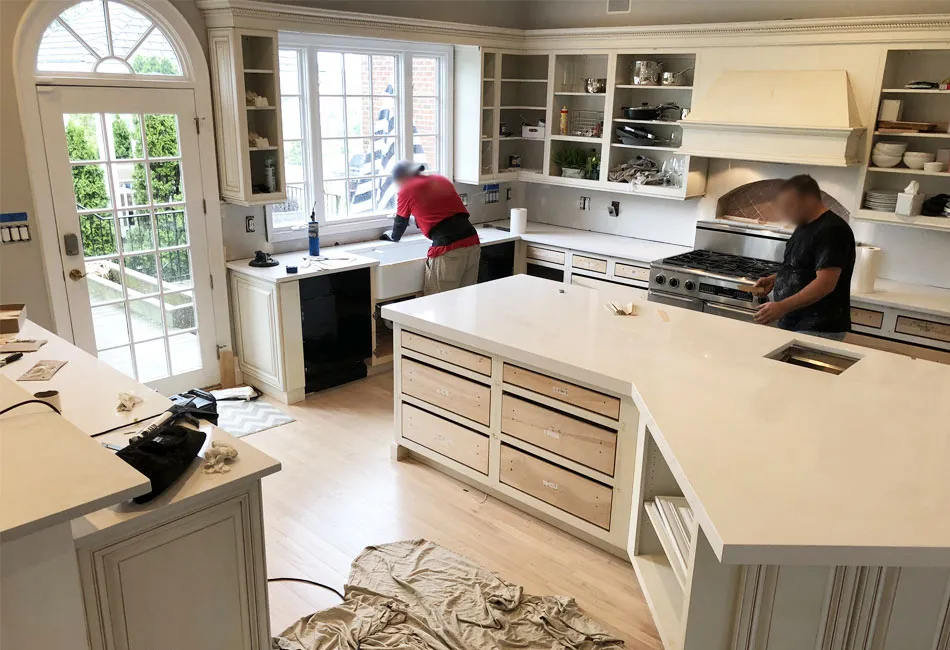
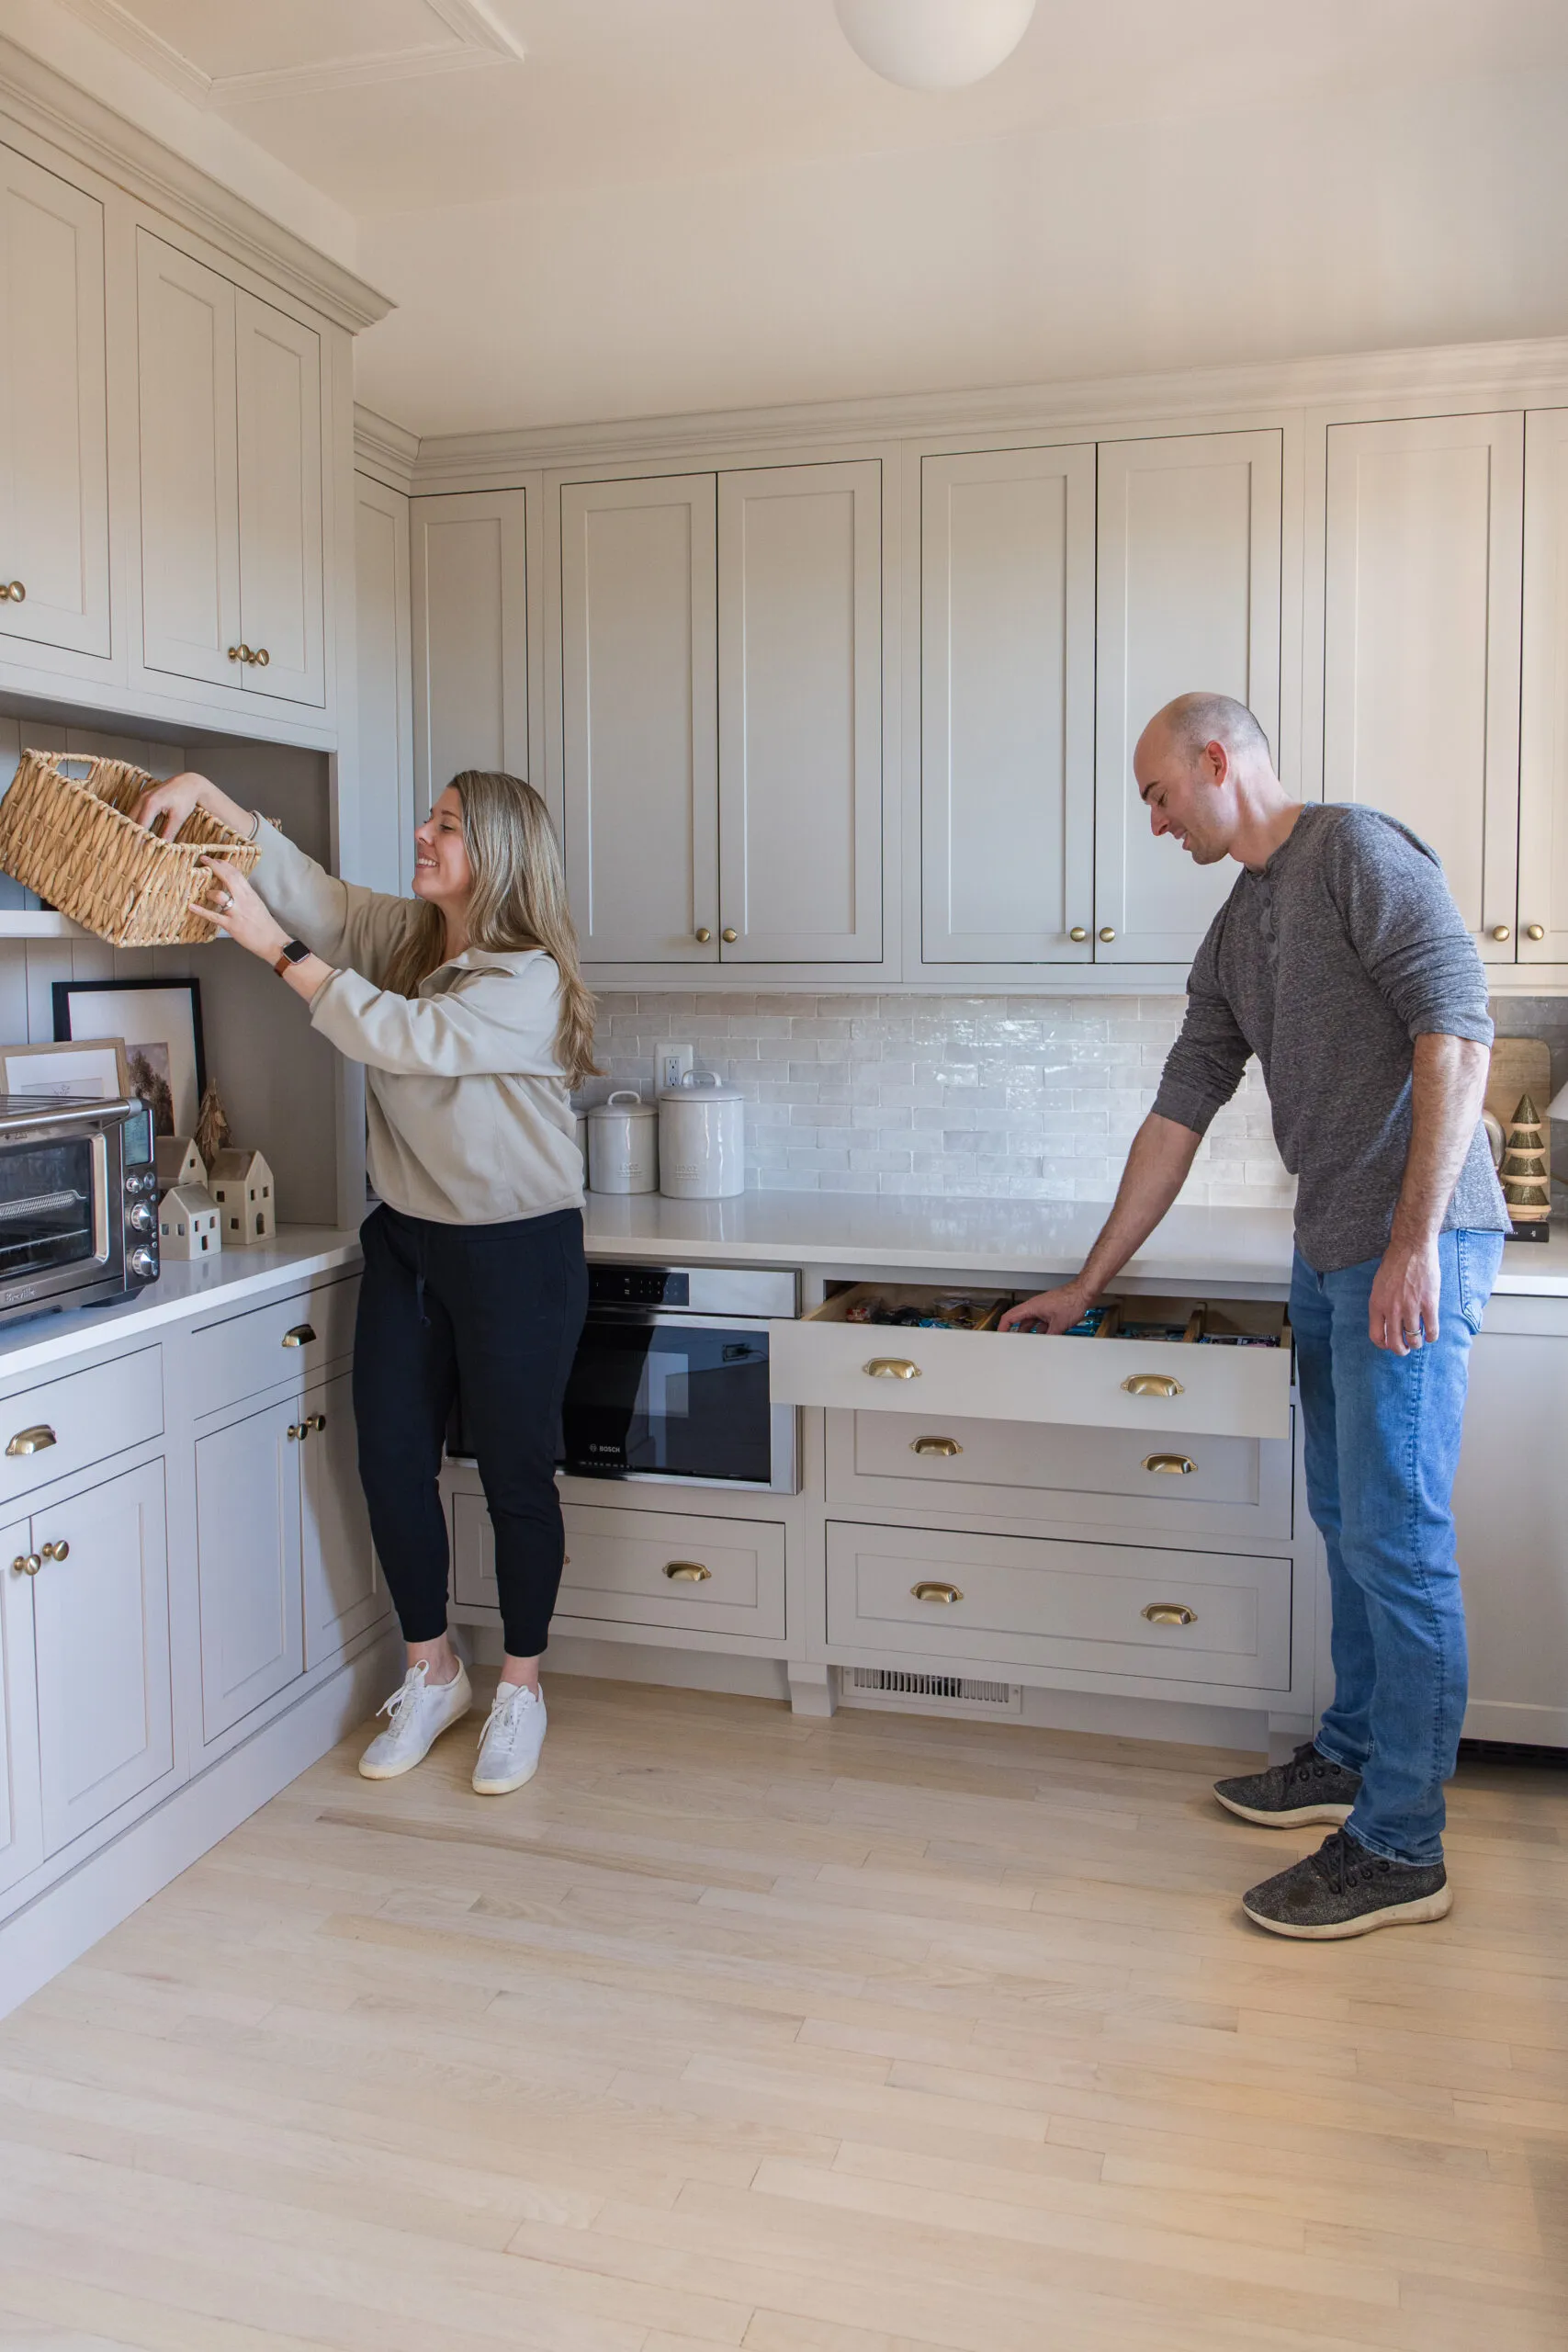
The dingy, off-white Omega cabinets were (for the most part) in really good condition, considering their 20 years of use. For the uppers, there were two areas that needed some rework. The first was the vertical plate rack section. This may have been hip in the late 90’s, but is definitely out of style today. We removed the rack inserts and purchased a set of replacement cabinet doors that span the entire height of the cabinet. We did a similar process for the microwave inset. First off, this section could only fit a very tiny microwave. Secondly, who wants to look at a microwave (that’s not even built-in) in their uppers? We purchased two full-height doors to fit over this section, and now we have the bonus feature of having a dedicated outlet in that cabinet to charge our tablets! Our friends over at Bray & Scarff in Sterling, VA helped us find the matching Omega pieces that we custom ordered.

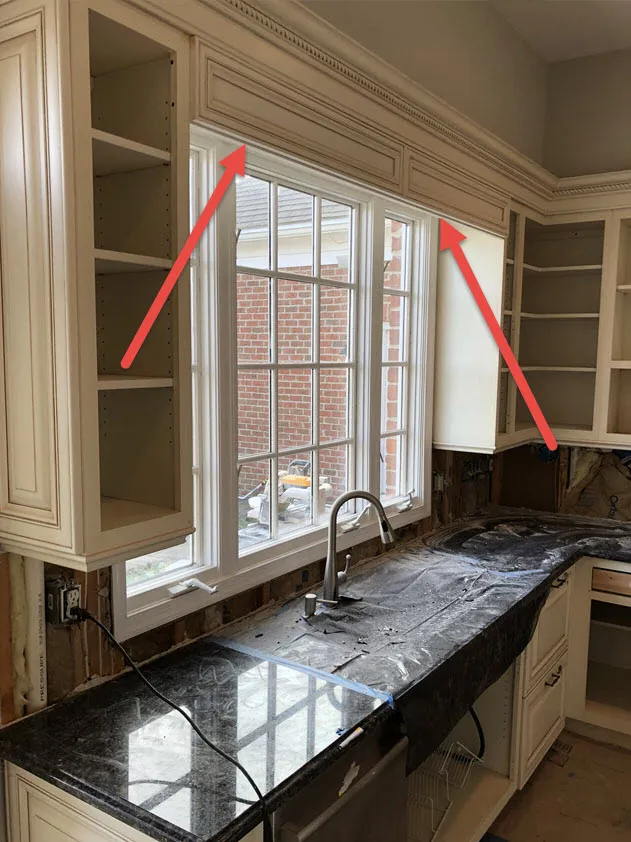
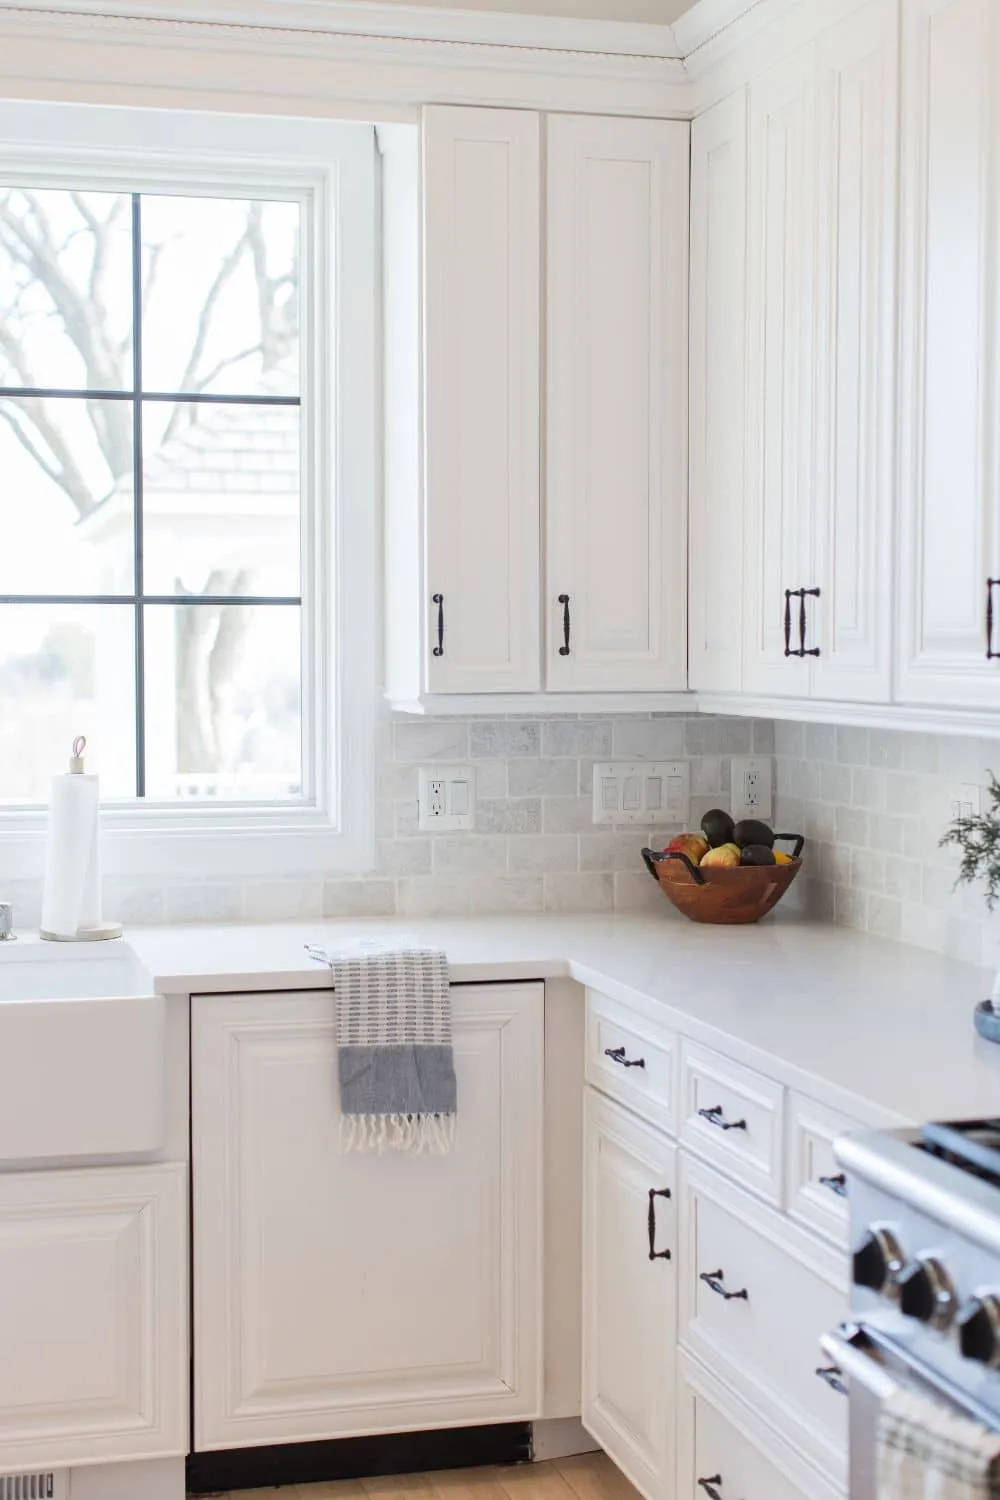
Another cabinet change we made was to remove the sink cabinet under the window and replace it with a farmhouse sink cabinet. The existing sink was an under-counter sink, but we knew we had to blow that out and put in a proper farmhouse sink. Another change we made in this area was to remove the piece of cabinet trim below the cabinet crown molding, which blocked some of the natural light and restricted the view.
We were very thankful that this kitchen had two dishwashers, but neither of them worked. We replaced both of them with the same model of dishwasher and opted to get the panel-ready version so that we could blend these in with the existing cabinetry. Having the stainless steel fronts would be visually heavy to the eye, so we bit the bullet and ordered the custom Omega fronts.
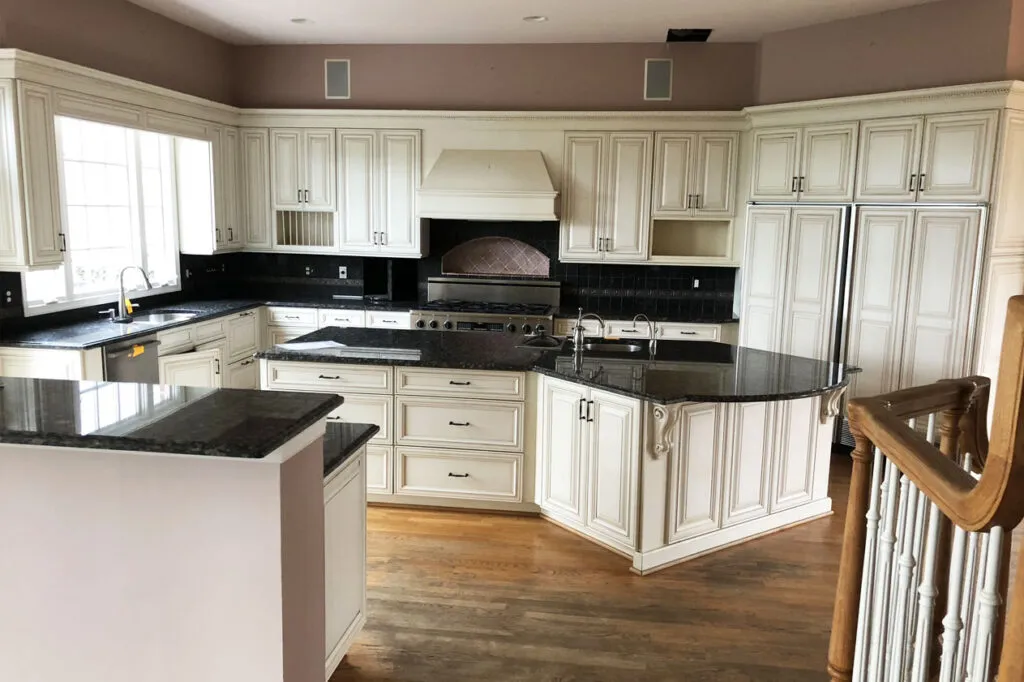
The last change to the cabinets was the overhang area on the island. We will explain more about this area in the “Island” section below, but the cliff-notes version is that we extended the counter top to make a proper seating area. This required the removal of the corbels and the installation of two decorative supports. We priced out the matching style to our cabinets from Omega and were blown away by the four-figure cost. We instead purchased similar supports from Wayfair for a fraction of the price, and they have worked out great so far.
Once we had all the new cabinetry pieces installed, we had everything primed and painted by professionals. In our last house, The Sweet Suburban, I painted the kitchen cabinets myself and swore I would never do it again. It’s a process, and the professionals that we used had a special, super-strong paint that they use (made in North Carolina) that has held up great so far. They first applied a quality primer – the original cabinets had a finish where the nooks and crannies had a darker finish/rub, so it was very important to use a quality primer to stick to that material. Note that they did not sand the cabinets first – that was not needed if a quality primer is used. We painted the island a Benjamin Moore color, Smoke Embers, in a satin finish. The rest of the cabinets we painted in Benjamin Moore Brilliant White, in a satin finish. We also painted the walls of the kitchen Super White by McCormick (read more about our paint in this blog post).
Countertops
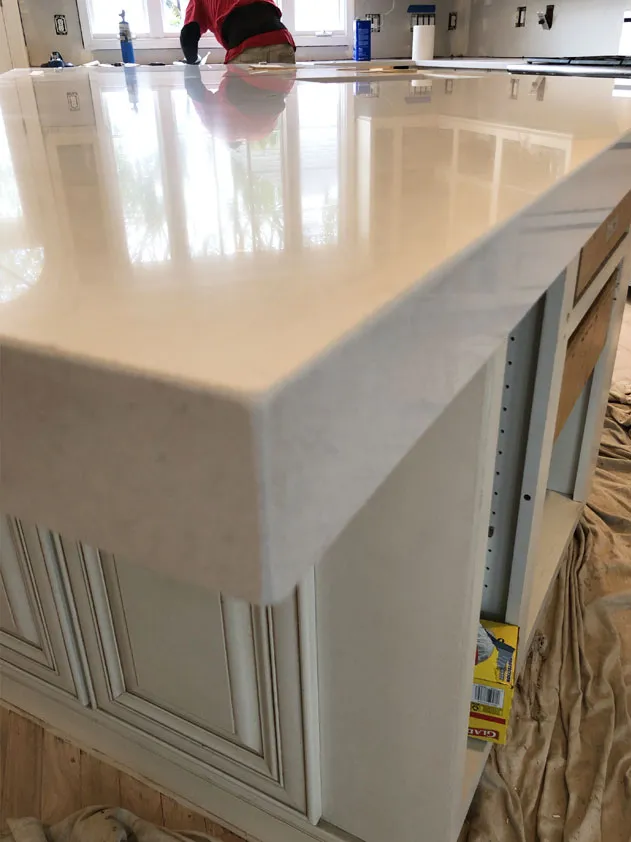
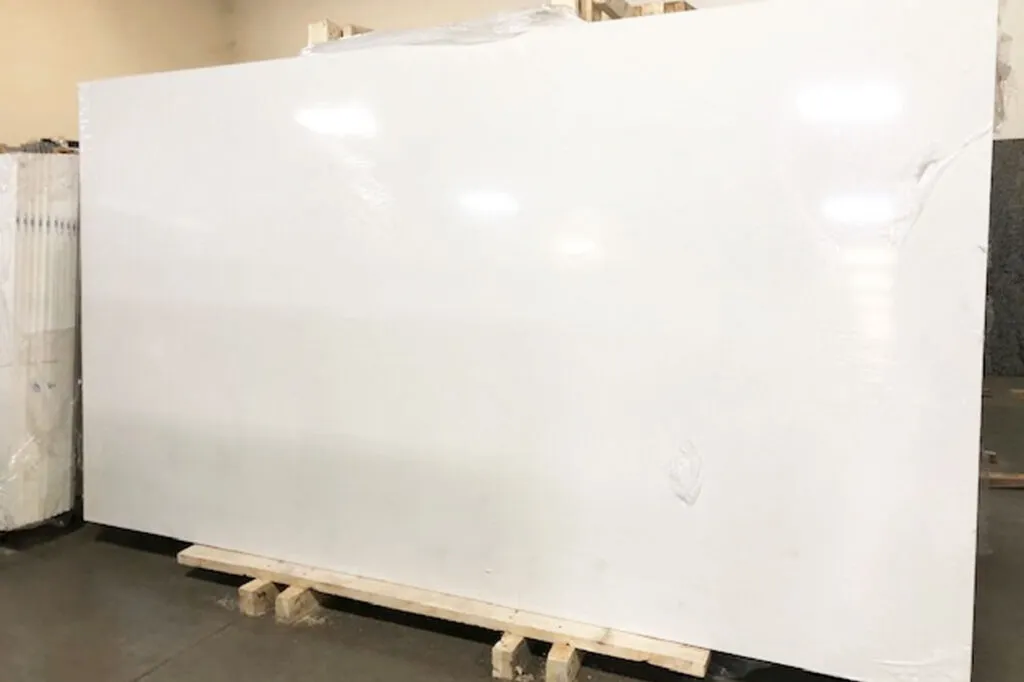
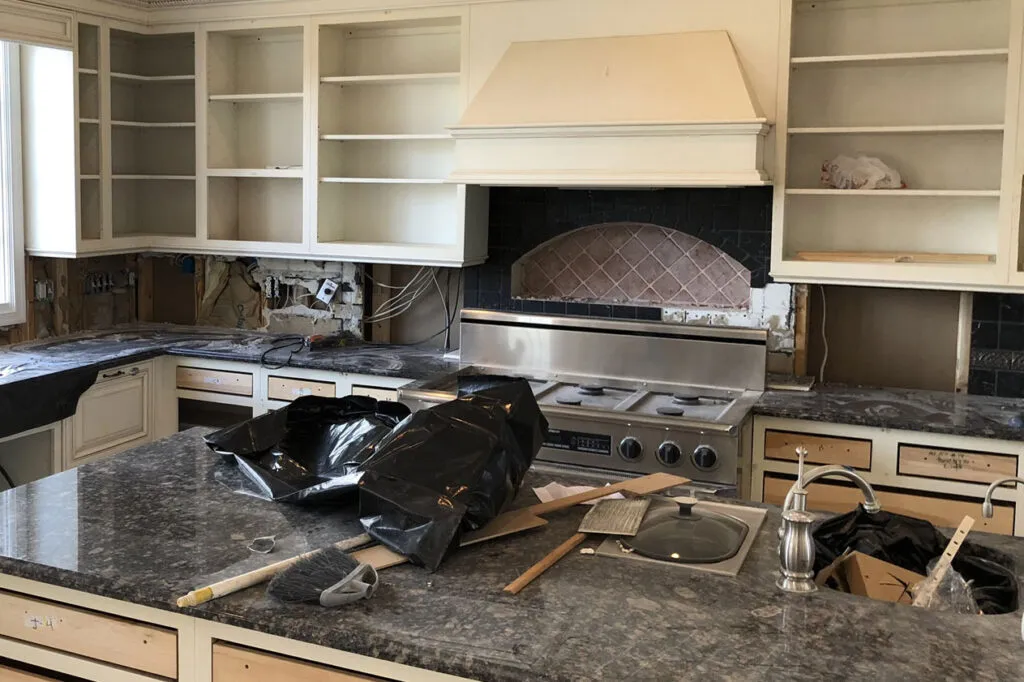
Oh man, this was a hot topic for weeks and produced quite a bit of drama. We originally wanted white countertops for the perimeter and a statement slab on our island – something in the marble or quartz family that had gray-toned veins. Our general contractor recommended his “guy”, who came out and measured and told us what stone manufacturer’s he works with. We went out and looked at their selection and fell in love with some slabs of quartz that looked like marble. The problem was that our island has an angled turn, and since we were extending it even further (for the eat-in area), we could not find a singular slab that could be used without a joint. There would have to be a seam, and when dealing with veins in the quartz, they have to match pretty well or else your eye will go right to the seam. This countertop “guy” did not tell us this initially, so we wasted half a day picking out beautiful slabs that we ultimately could not use. We kept asking him to look at other materials or other companies that offered larger slabs, and we did not hear back from him. So we gave him the boot. We contacted another local company that we enjoyed working with, and they confirmed what we had feared all along – we could not get a single slab of “marble” looking quartz in the size we needed. We decided to just go with one material for the entire kitchen, BUT we did a 2.5 inch mitered edge on the island to differentiate it from the rest. The material we chose is called Organic White, and it has a bit of gray detail that gives it a softer, warmer look than stark white quartz.
Island
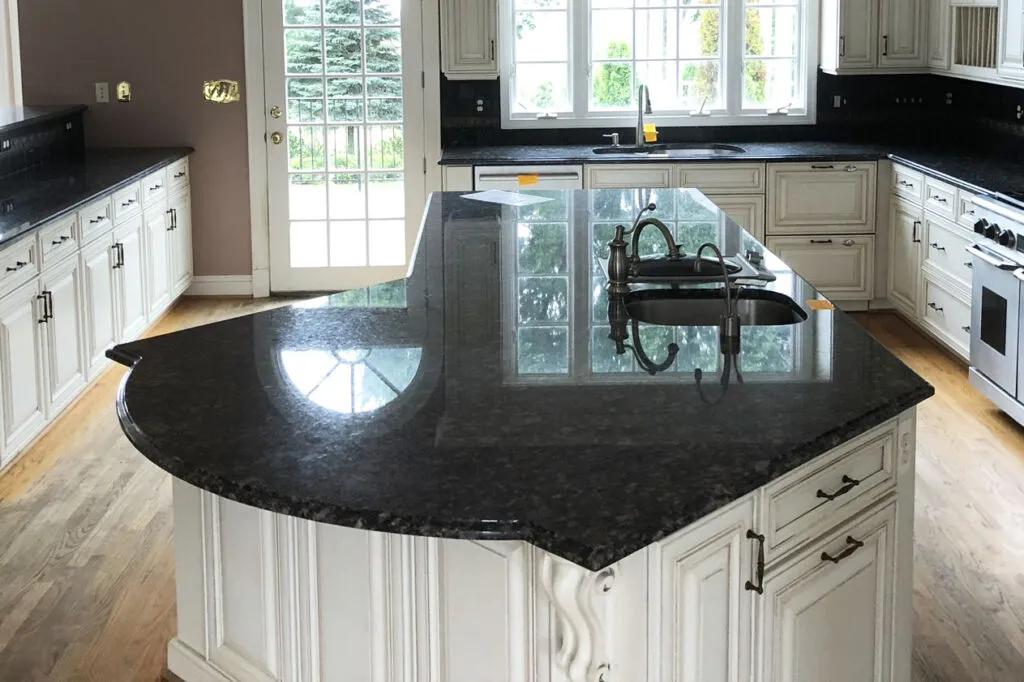
Let’s get this out in the open – we were not a fan of the angled island when we first saw the house. We gravitate towards large, rectangular islands, so we toyed with the option of replacing what we had with a rectangle, but actually being in the space (physically), and seeing the other angles of the kitchen and surrounding rooms, the angular island actually works – it feels natural. So we kept it…but we did update it slightly. The end of the island had a circular overhang, but there was not enough room to fit more than a couple stools. We extended this part of the island outwards and added two supports to give a custom look. We also removed the random vegetable steamer next to the prep sink and replaced the sink and faucet. As mentioned above, the “thick” countertop with mitered edges gives the island a sturdy, custom look.
Backsplash
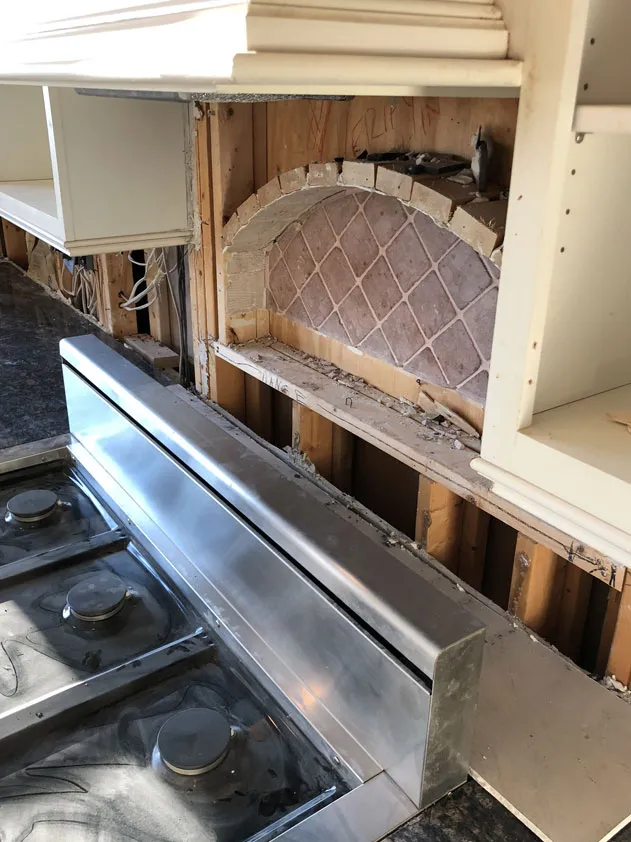
This kitchen had a feature (if you can call it that) I have never seen before…ever. The backsplash had two built-in lazy susans that we are assuming were to store certain items like salt and pepper, paper towels, bread? We quickly removed this bizarre quirk, along with the dingy black tile. We replaced it with honed, tumbled-edge marble tiles. Marble comes in all different tones, so we spent a few weekends visiting tile stores to find what we were looking for. For the inset above the range, we used a different shape and pattern to give this section some flair. We chose a hexagon tumbled Carrara marble. We used two applications of sealer to ensure that no spaghetti sauce splatters (which are common for us) would stain the tile and/or grout.
Lighting
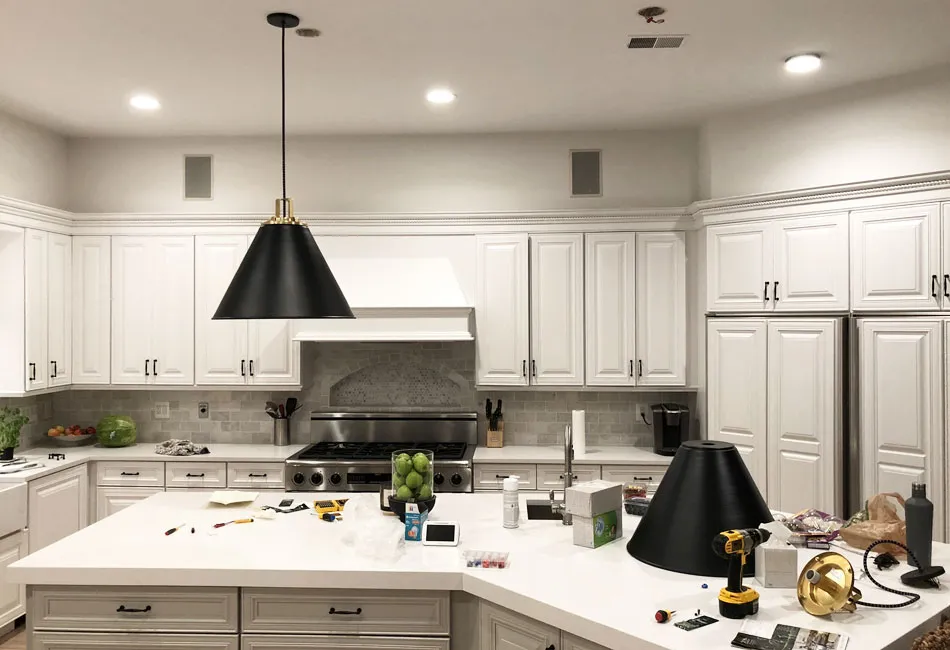
Lighting is something that is really important to us, so we wanted to make sure this space was properly lit. We also like to dim the lights at night, so choosing the right light type (incandescent vs. LED) for certain lights was key. LEDs do dim, but they don’t dim the same way an incandescent bulb does. Our lighting style uses a combination of LED and incandescent lights. For the 6-inch recessed lights, we installed our favorite LED retrofit light bulbs made by Parida. For the 4-inch recessed lights above the bar area, we installed CREE retrofit bulbs. We also installed LED under-cabinet light bars. These lights are all connected to Casetta dimmers, but we mainly keep them at 60% power or above. Anything less than that, the light quality diminishes. All the other lights in the kitchen are incandescent so that we can dim them low at night. These areas include the island pendants, over-the-sink lights, range lights, and the kitchen table lights.
For the pendant lights above the island, we found these matte black with aged brass accents from Rejuvenation. The kicker here is that the light cords are custom made and you have to order them in the height you need. Since they are custom, you cannot return them, so it was a bit of a risk. But if you check Pinterest for these lamps, you will see tons of pictures of these lights and they all look amazing. We get asked frequently about the height between the countertop and the light, and this is a tricky thing to figure out – it depends on the height of your ceiling. We settled on a counter-to-light height of 34.5 inches since our ceilings are 11 feet.
Flooring
For the flooring, we kept the existing red oak floor. As you can see from the before pictures, it was in rough shape, but refinishing this floor brought new life into this room. Read more about how we refinished (and lightened) our floors in this blog post.
Windows and Doors
The window over the kitchen sink did not open, and was rotting on the outside. The door also was rotting and dated. We replaced these two items as part of our Renewal by Anderson replacement window/door package for the backside of the house. We chose a picture frame window that has dual color grids – black on the inside and white on the outside. The door has a similar grid structure, and we painted the inside of the door in Black Panther from Benjamin Moore. We chose matte black hardware for the door, which is such a cool, modern element in an otherwise traditional kitchen.
Odds and Ends
For the door hardware, we cleaned, primed, and painted the existing copper pulls with matte black. These are holding up “ok”, although many of the frequently used pulls are chipping after about a year of use. We knew that painting was not the long-term solution, but it is a budget-friendly method of updating the look of your cabinetry in a short amount of time. Eventually we will replace these, but for now, they are doing their job and look presentable.
We also replaced the beige, circular electrical outlets to white rectangular outlets. This is something we are working to do in every room of the house. Circular outlets are dated, and the off-white is “off-putting” (see what we did there?).
So those are all the nitty-gritty details of what we did to the kitchen to make it our own. If you have any questions, please ask them in the comment section below, and please make sure to follow us on instagram @1021home.
Shop Our Kitchen
[gkit id=1]


")
