DIY Home Movie Theater Room Reveal – Building on a Budget

“I can’t afford a home theater” is a myth that many homeowners believe to be true. And I get it…the equipment, the furniture, the projector, the speakers…it all adds up and there is also an underlying pressure to get top-of-the-line EVERYTHING. But folks, I’m here to tell you it’s not true – you can build a home theater that looks and sounds amazing for not a whole lot of money (comparatively)…just like we did for this home theater for a client in Haymarket, Virginia. I should also mention we completed our DIY home theater room in our home a few years back, and this new one is an updated version of ours. There is a fine line of “quality video/sound” vs. cost, and I know the sweet spot, which is what I’ll share with you here in this blog post.

Table of Contents
    Add a header to begin generating the table of contents

    Affiliate links may be used throughout this blog post – read our policy here

    The Original Space

    The client’s home was newly built in 2022, and they opted to have their basement finished and the builder’s floorplan carved a decent sized home theater in the back corner. Our client loves to watch movies, so he had the builders install their home theater system in the room. Now I know what you are thinking – if the builders installed it, why are we renovating this room?  Well, it’s unfortunate that this happens, but the quality of wiring, speakers, and placement that is typical of builders is sub-par. They placed the five “surround” speakers in the ceiling, and they completely forgot to wire the HDMI cable from the wall to the projector outlet. They also did not install any power outlet in the ceiling to power a projector, which is something I would expect to be done when paying for the builder’s home theater package.  The interior walls of this space were flat and only included baseboard molding – which is perfect since this gives us a clean slate to work off of. 

    The far corner of the theater room had an inset space – this is where the builder put their audio/visual wiring box, so this was probably intended for a cabinet or media console to be installed. The room also has a door to the HVAC/storage room, as well as a small closet in the back.  One omission we noticed right away was an entry door to the theater – the area is accessible by a wide walkway from the recreation area of the basement, and natural light pours into the room from the double glass doors on the back of the house. The ceiling has 9 recessed lights, but the back middle light is right over the projector area – another oversight from the builder. 

    Our Vision for this Home Theater Design

    We love a dark, yet inviting home theater – much like the one we installed in our own home – so dark colors are what we chose for this new home theater design.  The client already owned a set of black leather theater chairs and they wanted to use those in the final space. We have been dying to use the color Iron Ore from Sherwin Williams, and this theater was the perfect excuse we needed to use it. We like to use a monochromatic paint scheme using a matte finish for home theaters, to include the ceiling and surrounding trim. 

    Since we love using SketchUp and V-Ray for all our projects, we took our design ideas and modeled the theater project in 3D: 

    For the carpet, we wanted something a bit lighter than the walls so as to not give a dungeon vibe to the room. Lighting is also a critical element for a theater room, and the ability to have soft light that is dimmable is key.  Adding wall sconces to the sides of the theater allows for elegant, dimmable lighting that fits in well with our theme. 

    Adding doors to block out the natural light in this space is a top priority to prevent any degradation of image quality on the screen, so we added a set of double doors that will blend seamlessly with the outer recreation room wall.  

    The client wanted a pit couch sectional so their family could lay and watch their favorite movies together – they purchased The Chelsea Pit Sectional couch in Graphite polyester. In order for the back row behind this couch to have a good view, a riser needed to be added to the design. All the home theater seating would be facing the front wall of the theater, where a big screen would be installed to display the projected video from a ceiling-mounted 4K projector. For the sides of the theater, we design wall columns to break up the long walls and add some depth and interest to the room. These also contain sconces that will cast light in both vertical directions. 

    Home Theater Layout & Structure

    The original floorplan had a small space in the corner that was designed to house the media components, however, we opted to add a wall here to create a rectangular layout for our theater. The client will eventually add a door on the opposite side so that they can create a closet from this dead space. 

    The wall columns are constructed from 2x4s and finished with drywall and trim to match the rest of the room. For the riser, we constructed a 10″ riser using a series of pressure treated 2×8’s and 3/4 plywood.  This gives enough of a height difference so that the back row viewers can see the screen over the front row couch. 

    For this design, we are not incorporating acoustic panels, but you certainly can if that is something you desire. From a sound-quality perspective, I don’t think they are a necessity, but they also don’t hurt either and are a great way to add some depth to walls that need a bit of visual separation. 

    All of the audio equipment will be stored in the back closet. We will add some shelving and route all the wires and cables from the theater room into this closet space.  

    Dolby Atomos Surround Sound System

    This theater is designed for Dolby Atmos 7.2.2 surround sound.  What that means is that there will be three speakers up front (left, right, and center), two speakers on the back wall, two speakers in the ceiling, two speakers on the side walls (one on each side wall), and two subwoofers. Let’s break these down and explain what we chose for each.

    The Best In-Wall Home Theater Speakers for Front Left, Right, and Center Channels

    The front set of speakers is arguably the most important, as this is where your ears will hear most of the sound coming from. For our theater designs, we like to hide the front speakers behind the screen – it gives a clean look.  

    In general, we don’t recommend budget speakers and we don’t recommend high-end speakers – there is a sweet spot in the middle that fits both our quality standards and our budget, and the Polk Audio 265 3-Way In-Wall Vanishing Series speakers are perfect for the front left and right channels. For the center channel, the matching Polk Audio 255c-RT is a solid choice. These two types of speakers have paintable grills so they can match the wall color, but you don’t have to paint these since the large screen will cover them. 

    The Best In-Wall Home Theater Speakers for Back Surround Channels

    For the back surround channels in our Atmos Surround Sound design, we recommend Polk Audio RC85i In-Wall 8″ Speakers.  These are a great option that is easy on the budget and pack a powerful punch with the 6 1/2″ woofer.  The frame and grille are paintable so that they can easily blend into the dark wall color. 

    The Best In-Wall Home Theater Speakers for Left and Right Surround Channels

    The left and right surround channels should be located on the side walls in-line with the first row of seating, slightly above ear height (when seated). We recommend using the same surround speakers as the back surround channels, the Polk Audio RC85i In-Wall 8″ Speakers.  The left and right surround channels are an important element in giving that immersive Atmos sound quality. 

    The Best Subwoofers for a Home Theater

    If we wanted to blow our budget, we could have sprung for in-wall subwoofers – that would give a cleaner appearance and a tad more floor area for the kids to play. But in our opinion, the cost delta is not worth the advantages that in-wall subwoofers bring.  For our theaters, we recommend the Klipsch 12″ Subwoofers. These are front-firing subwoofers with spun copper woofers that deliver deep, rich bass. They literally shake an entire house at only 50% power gain. And that is not an exaggeration…so prep your spouse accordingly! Each unit delivers 600 watts of dynamic power, which is why we ran a dedicated circuit from the breaker box just for these.  

    The Best In-Ceiling Home Theater Speakers

    For the upward sound that plays a key role in the Dolby Atmos experience, we recommend the Polk Audio RC80i 8″ Round Speakers.  These have an adjustable tweeter that you can aim towards the seating areas (directional) and are paintable so they can blend into the ceiling.  These give a great bang-for-your-buck and are super-easy to install.  

    The Best Receiver for Atmos Home Theaters

    Having audio equipment that can power each channel properly is essential in delivering a high-quality sound home theater. Again, you can spend a fortune on fancy receivers from high-end brands. But don’t. Stick to that mid-range sweet spot and you won’t be disappointed. Our client had already purchased a receiver before they hired us, and luckily it was one that offered Atmos 9.2!  The one they purchased was the Pioneer VSX-LX303 9.2 Channel Network AV Receiver, which was replaced with the more recent VSX-LX305 9.2 Channel Network AV Receiver. I have to be honest, I was hesitant about using a Pioneer receiver (I have never used them before, I have only used Sony and Denon), but I have to say that I was pleasantly surprised. It was easy to configure, and the menu system was easy to navigate and setup. If the size of the room is longer in shape, you may want to opt for 4 channels in your ceiling, in which case you need 7.2.4 Atmos and the next tier receiver: Pioneer Elite VSX-LX505 Elite 11.2 Channel AV Receiver.  

    For our home theater inside The Arched Manor, we have a longer room shape and we used the Denon AVR-X6700H 8K Ultra HD 11.2 Channel Receiver. Don’t get me wrong, it PUMPS…but is it worth double the price of the comparable Pioneer Elite? Absolutely not. I hear no clear differentiation between the two systems, so go with the Pioneer – it’s a great deal!

    Video Projector & Projector Screen

    Screen size is a critical component in any home theater, and for this space, we are installing a 150-inch projector screen, specifically the Elite Screens Sable Frame AcousticPro1080P3 Series, 150-inch Diagonal 16:9, Sound Transparent Perforated Weave Fixed Frame Projection Projector Screen. Given the ceiling height and the pit couch height, this is the largest screen we could accommodate in this space.  Also, since our screen is audio acoustic, we can place the left, center, and right speakers behind the screen so we don’t have to worry about leaving space on the sides of the screen area for speakers.  The frame itself is fairly easy to assemble, and I appreciate the black velvet material on the outside of the frame that absorbs projector overshoot.  

    For the projector, we recommend the Epson Home Cinema 4010 4K PRO-UHD (1) 3-Chip Projector with HDR.  This unit is certainly not the least expensive, but certainly not the most expensive either. At around the 2K price-point, the quality-to-cost ratio is perfect. The picture quality is outstanding and gives a superb viewing experience.  In our opinion, this projector and screen combination is the best way to view a film in a home movie room.  

    Home Theater Lighting

    Soft, dimmable lighting is the best option for a cinematic home movie theater experience.  On the sides of the theater, we added four Monroe Sconces from Shades of Light. These have a simple and classic look, and give vertical light projection that highlights the architectural detail of the wall columns, yet keeps the light out of the eyes of the movie viewers.  These home theater sconces are controlled by our favorite Lutron Caseta Dimmer in black (to match the dark theme of the theater).  

    We swapped out the existing recessed lights and installed 4 inch Commercial Electric LED Ultra Slim lights. These are “smart” and can be controlled using an App, and the LED color can be changed to literally any color in the rainbow. The ability to change the light color was something the client was willing to pay extra for, so we made it happen. To make these lights blend into the ceiling better, we painted the white trim surround with spray paint matched to the color Iron Ore. 

    Media Room Furniture

    ​For those that follow us on Instagram, you know that we love our Friday night family movie night on our theater pit couch. Our client wanted that as well, so they ordered the same Chelsea Pit Couch for this space. They also had a row of black leather theater chairs, so we incorporated that into the space as well. The back seating section is raised 10″ thanks to the riser we built, so the view from the back chairs to the screen is unobstructed by the pit couch in front. These leather chairs are also fully reclinable, so we made sure to leave enough space behind the chairs so they would not hit the wall when extended. 

    The End Result

    We are thrilled with how this theater came out and love all the details that went into it. It’s the perfect home theater setup for a young family – two rows of seating, so much space for kids to play in front, and we didn’t break the bank thanks to careful selections made in home theater equipment.  And the acoustics in this room will blow you away! Here are some pictures of the final space: 

    Frequently Asked Questions

    Dark colors, such as Iron Ore from Sherwin Williams, are favored. Using a matte finish for the walls, ceiling, and trim reduces light reflections.

    Media components can be a source of noise (fan sounds) or visual distractions (lights) that can disrupt the immersive movie experience

    Consider using a thick, floor to ceiling height velvet curtain with a blackout lining.

    An audio-transparent screen allows for sound waves to pass through, enabling you to install in-wall speakers behind the screen without causing any audio distortion

    The choice depends on the size of the room, ceiling height, and available space. Ensure you read the projector documentation and understand the throw ratio before purchasing.

    Soft, dimmable lighting is ideal. Wall sconces on the sides allow for elegant lighting that does not interfere with the viewer's experience.

    Be mindful of room acoustics by adding carpets. Prioritize proper speaker and screen placement. Always try to balance quality with budget and read up on equipment specifications before making purchases

    About The Authors

    About The Authors

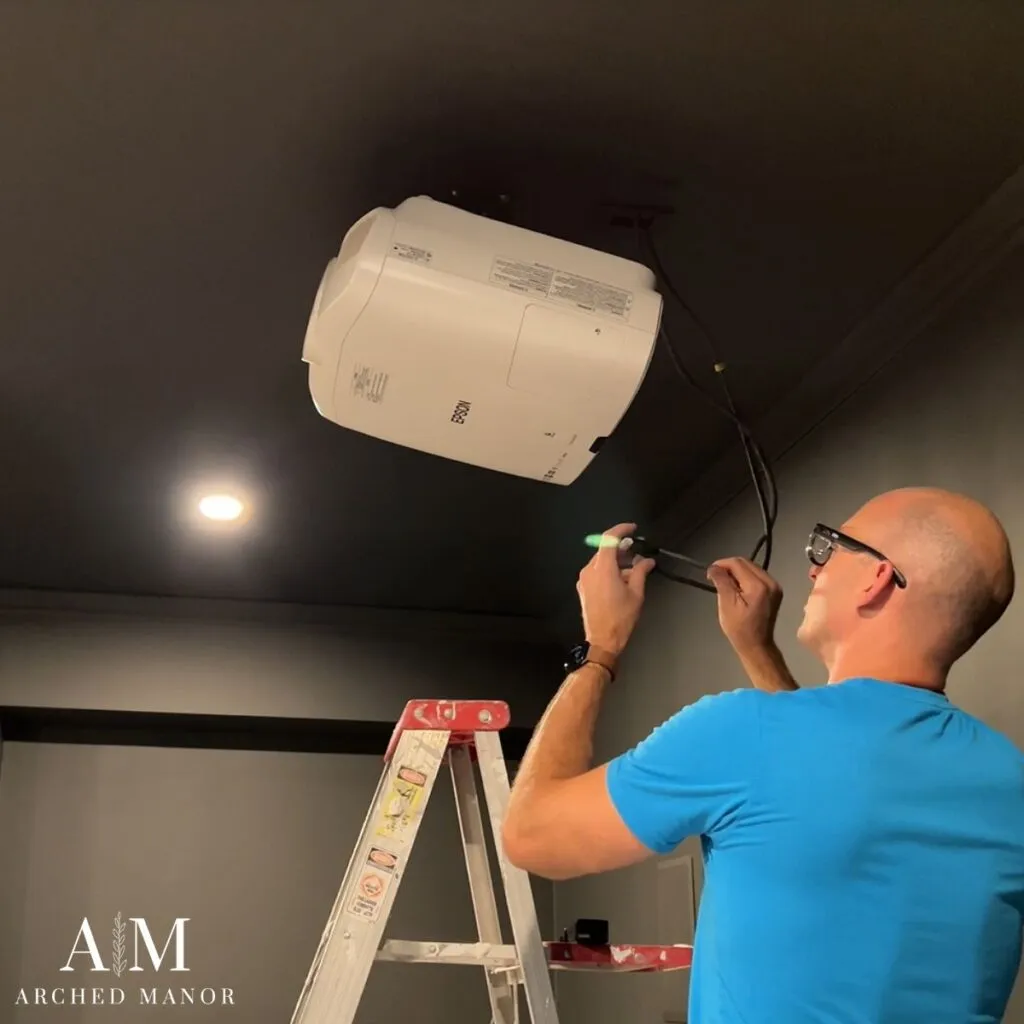
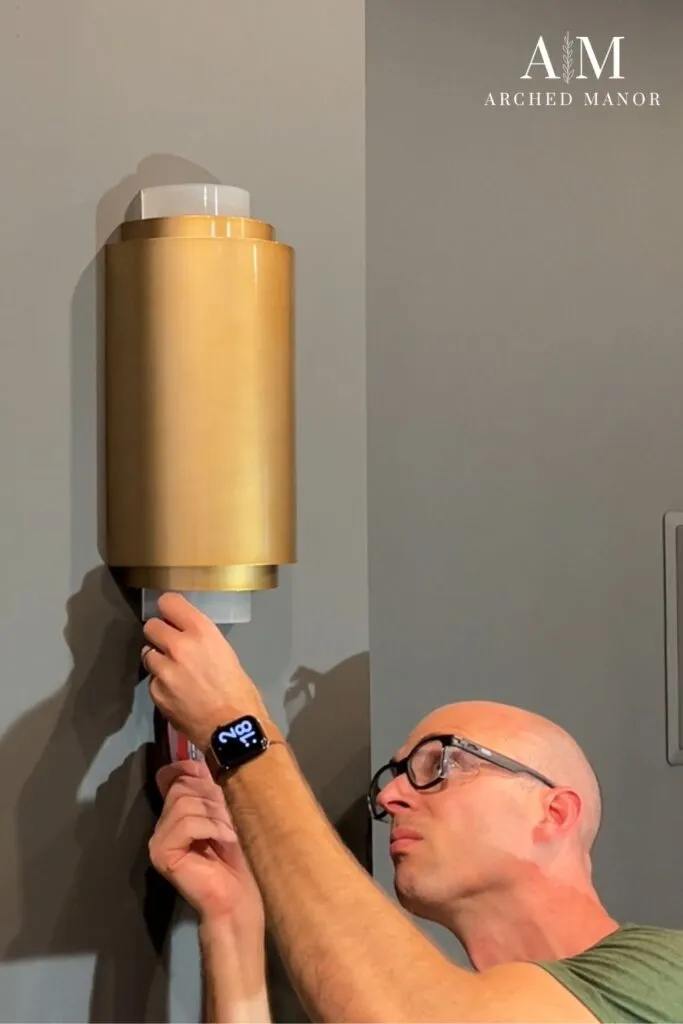
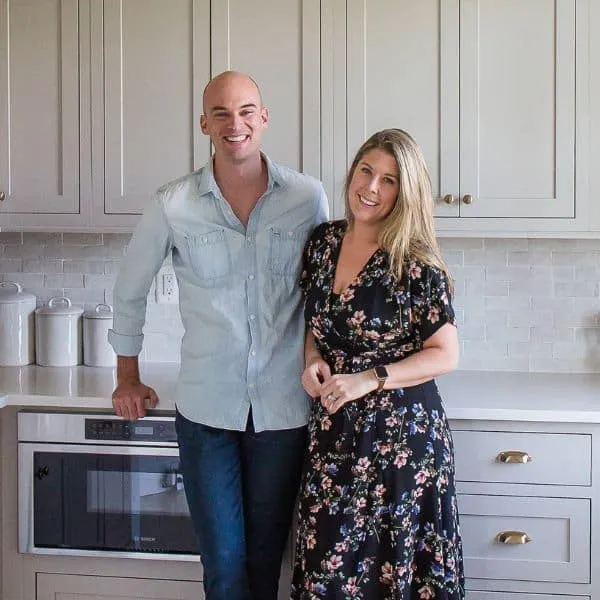
    John and Megan are the founders of Arched Manor, which is a passion-project turned business featuring home design, renovations, DIY tutorials, décor, e-Design, and 3-D rendering services. This married couple lives in Leesburg, Virginia, and is currently renovating The Arched Manor, a brick colonial house built in 2000.

    Learn More

    Leave a Comment

    The Comments

    • Shelley
      January 28, 2024

      Wow, well done! This room came out stunning!

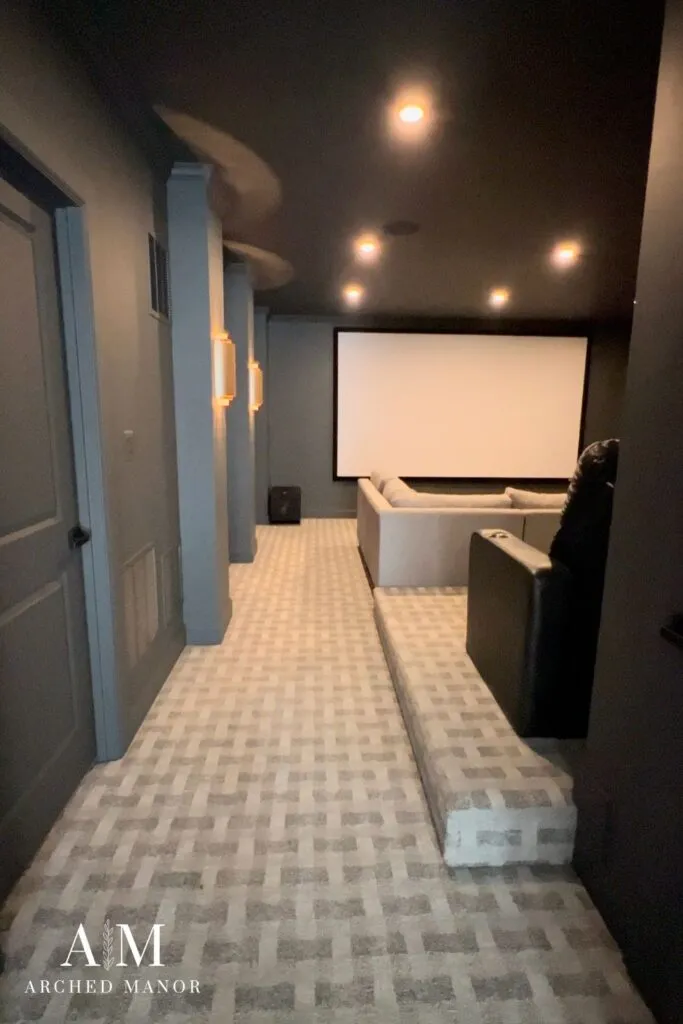
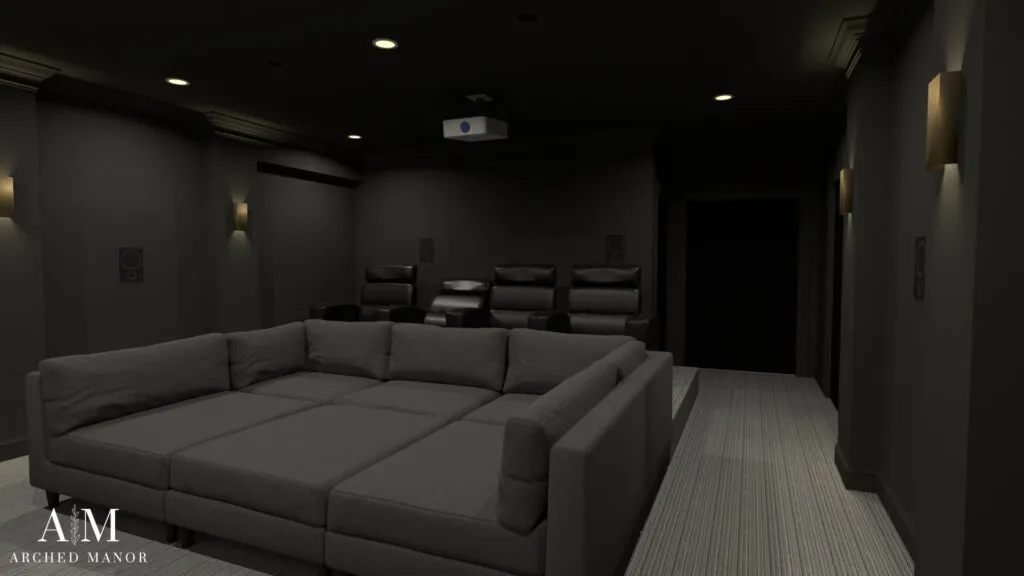
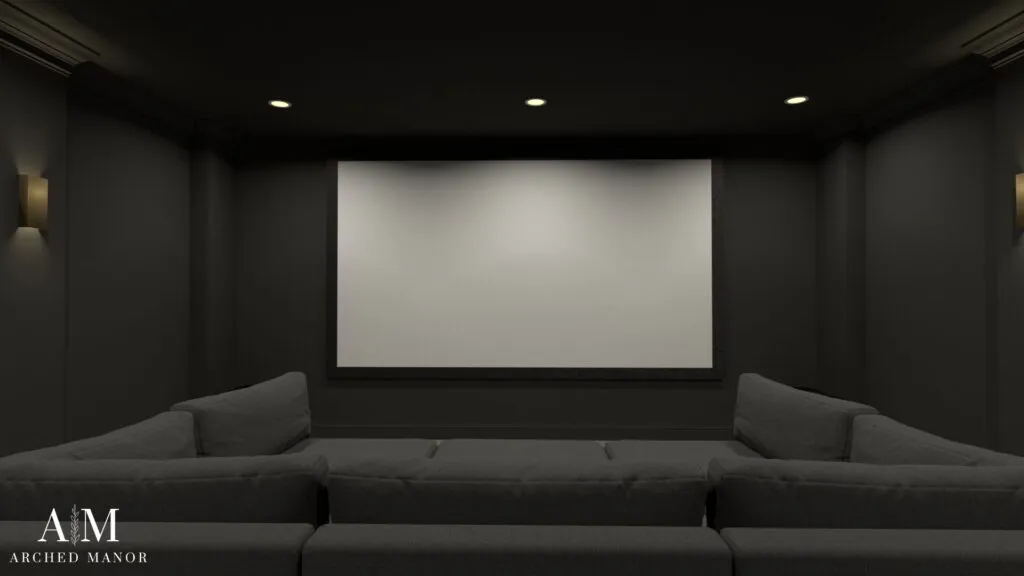
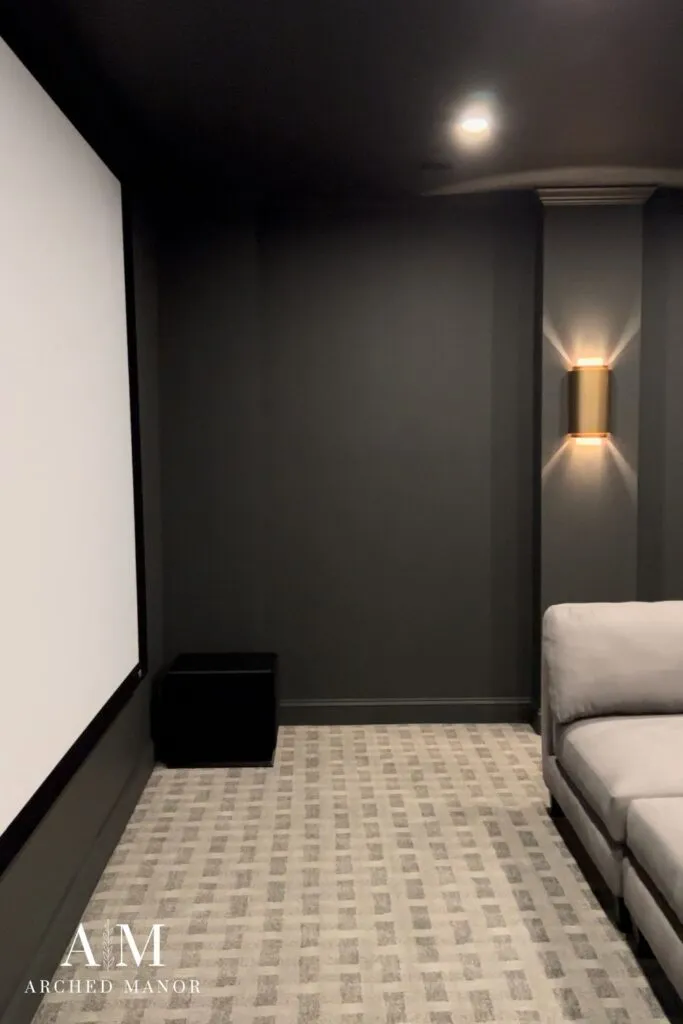
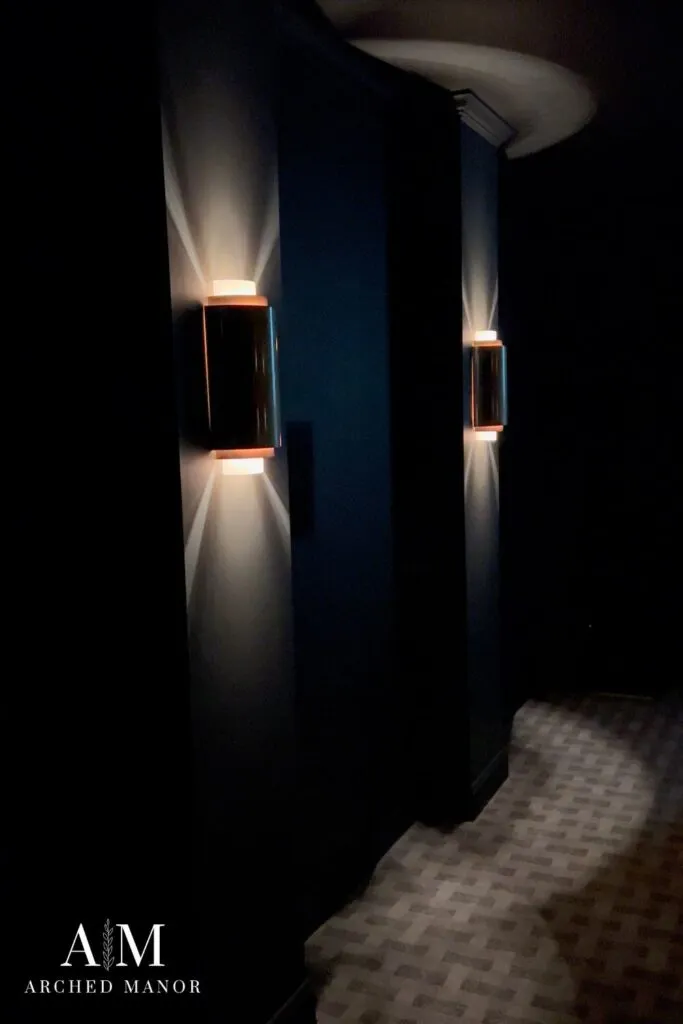
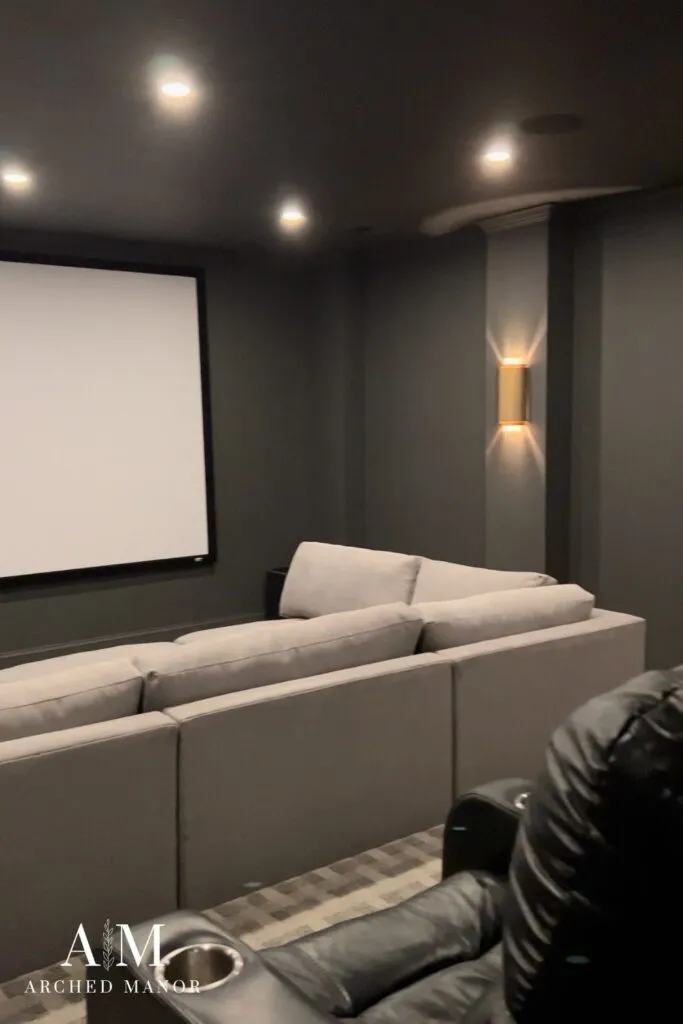
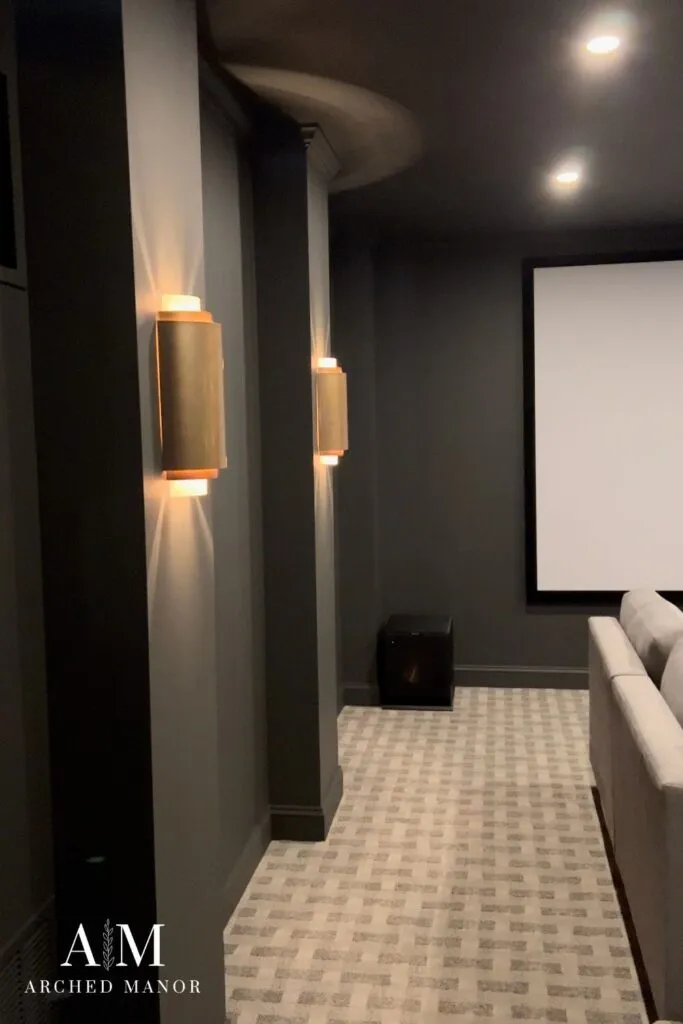
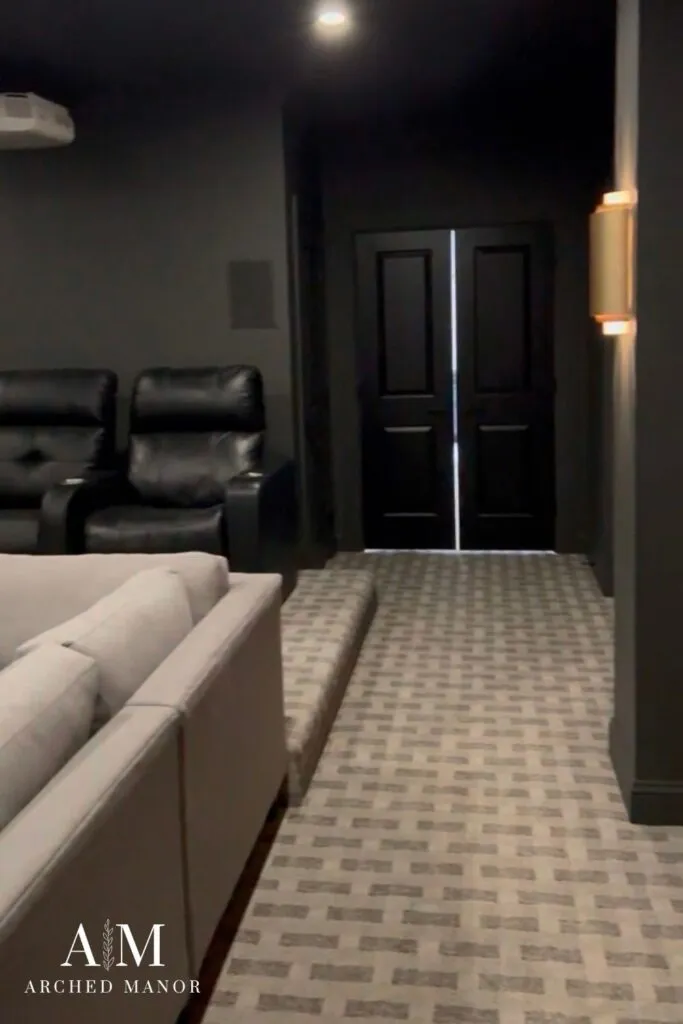
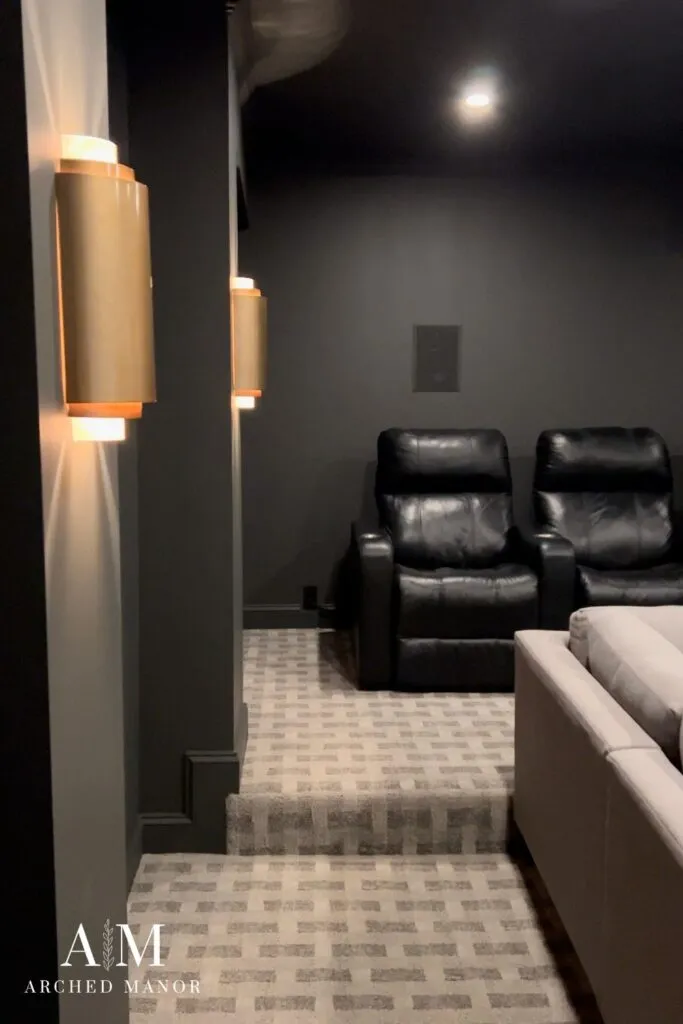
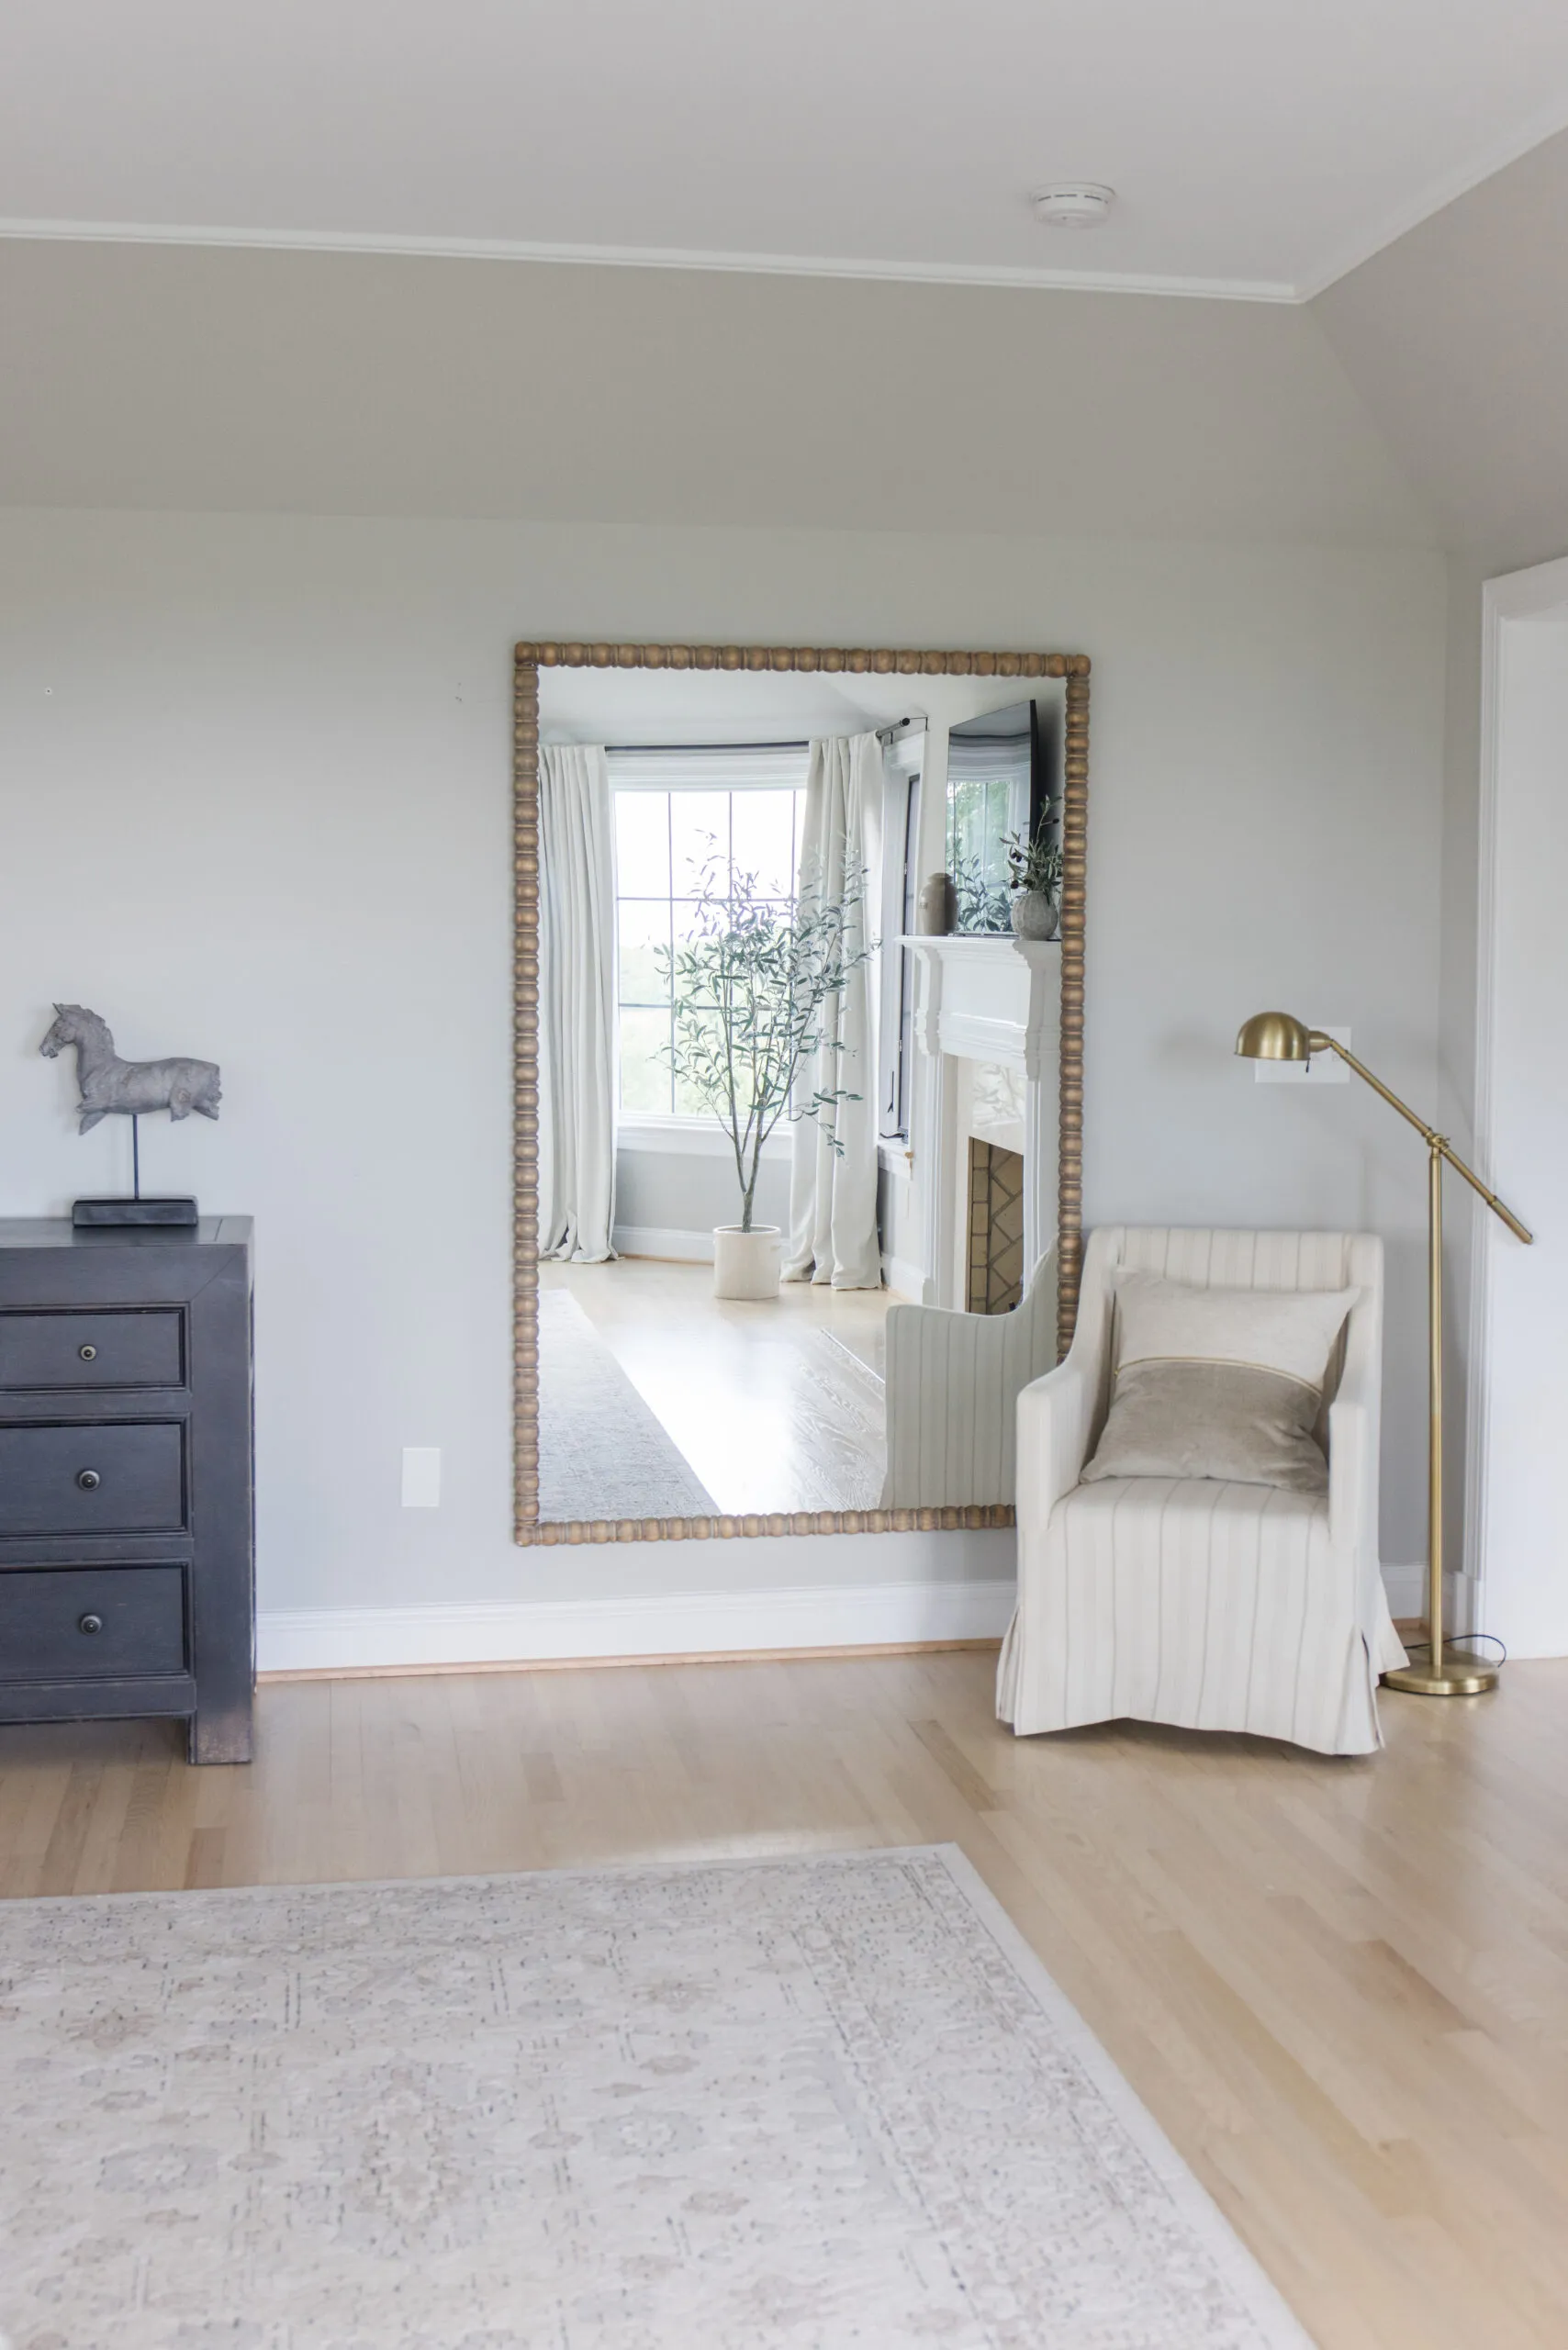
      We’re currently remodeling our media room and I chose Iron Ore for the walls and fireplace. We have dimmable lighting but I’m wondering if you have a recommendation regarding a kelvin setting for the recessed LED lighting.

      Thank you,
      Shelley

      • Arched Manor
        → Shelley
        January 28, 2024

        Hi Shelley, thank you so much! We recommend 2700K for warm lighting.

    Meet Megan & John

    Hi there! We’re a married couple with a passion for DIY, decor, and home improvement! We’re currently renovating The Arched Manor in Leesburg, VA.