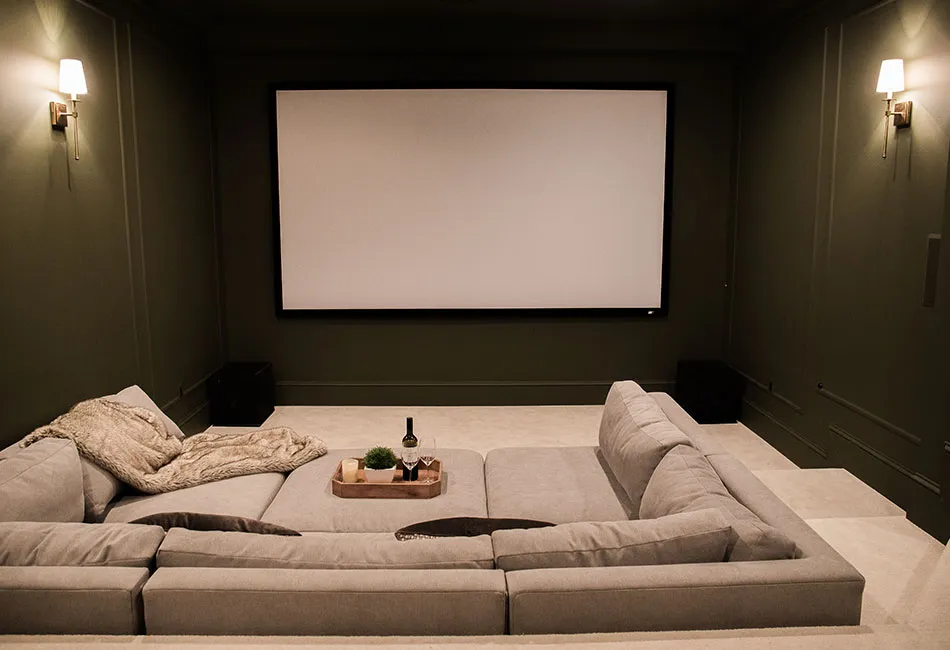
Lights, camera….no action. A cold, dark, damp theater room with maroon carpet and hard, fold-down stadium seating is what we inherited when we purchased The Arched Manor. The potential for this home theater was through the roof, it just needed some work. A lot of work.
The first thing we had to do was figure out the moisture issue. This was a multi-month process of trial and error, but we eventually had a waterproofing system installed on that entire section of the house. Once that was in, the real fun began!
Overview of our changes
Here is a breakdown of what we did:
Removed the dated crown molding and rope lighting (so 90’s!).
Repaired the drywall and cut the stepped risers to accommodate a pit-couch.
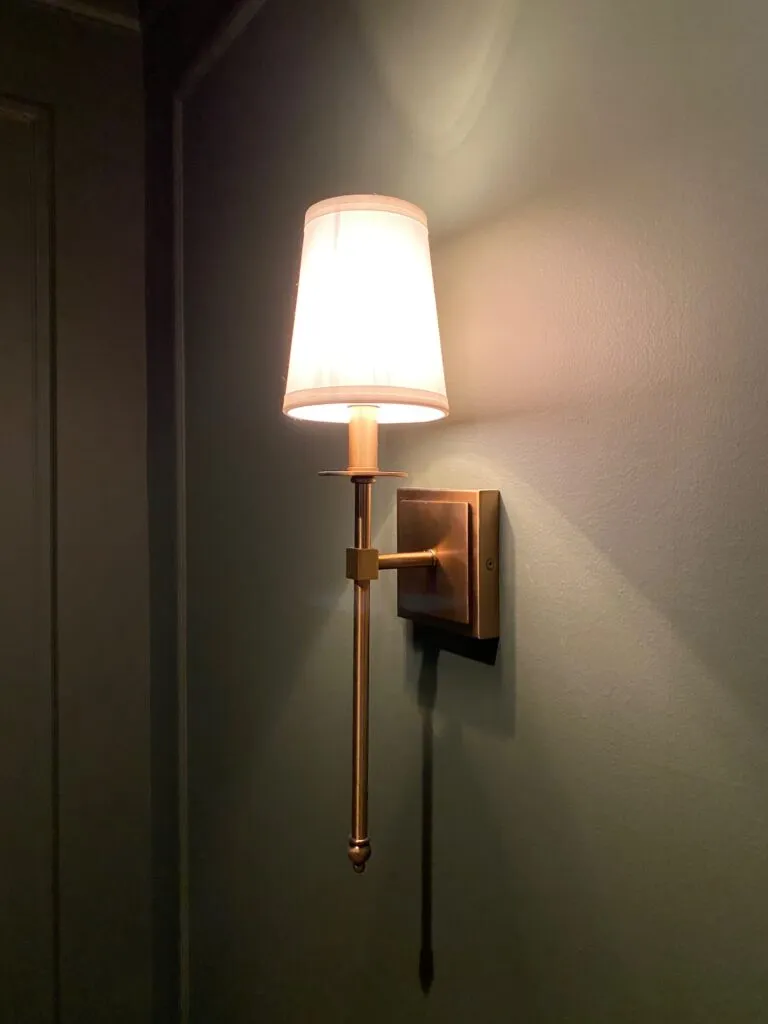
Rewired the sconces and adjusted positioning.
Replaced all the baseboard with larger, two-piece baseboards.
Installed picture frame molding on all the walls, with the exception of the screen wall.
Replaced all the lighting and installed smart-dimmer switches.
Removed the ceiling fan.
Installed new carpet with extra-thick, memory foam padding.
Painted the ceiling, trim, and walls the same color: Behr Black Bamboo in Matte finish.
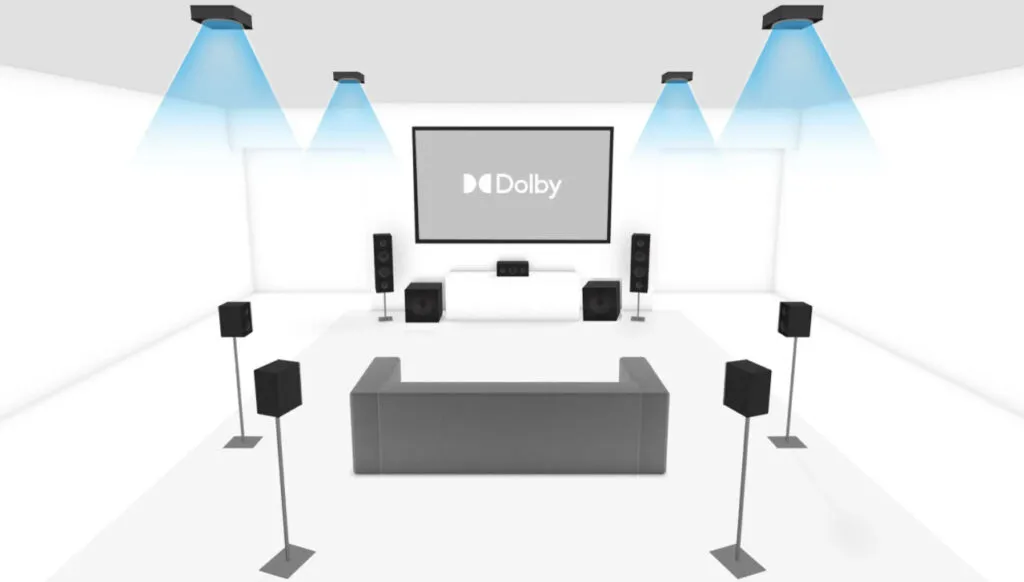
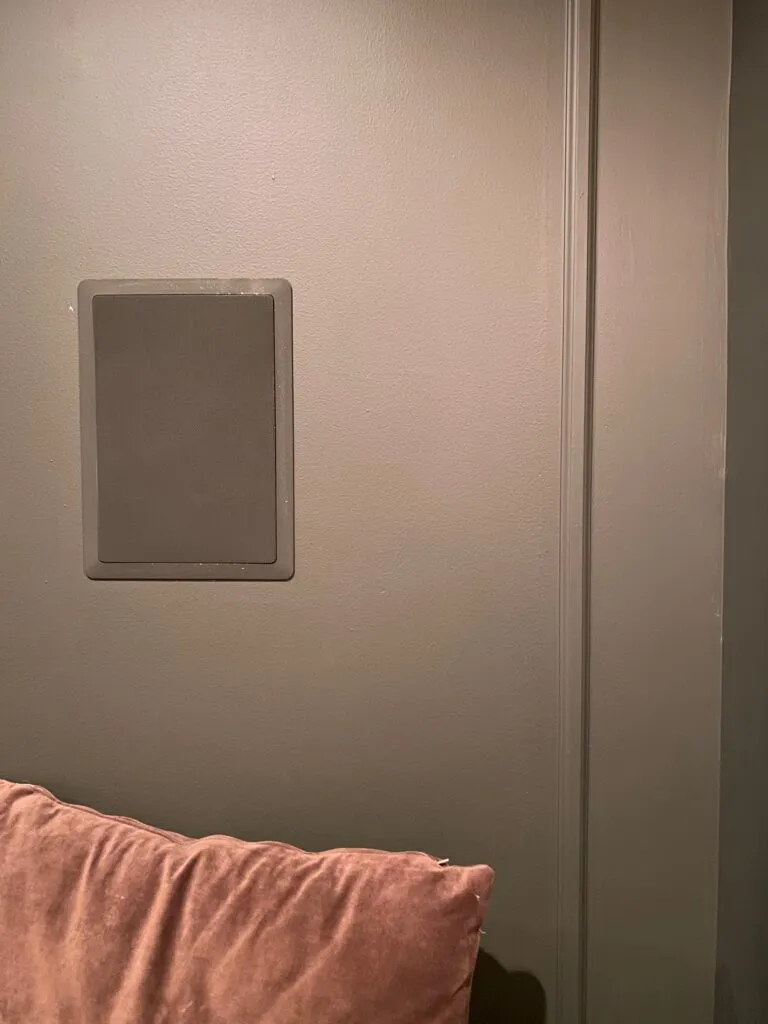
Installed a Dolby Atmos 11-channel surround sound system with in-wall speakers and two 10″ subwoofers.
Trim Design and Installation
For the trim, we removed the builder’s grade 5″ baseboards and used 1×10″ solid wood pieces with base cap on top. Since this is a basement and moisture can be an issue, we did not use MDF for the baseboards as that can which moisture up into the material and cause bloating and mold.
For the crown molding we installed our favorite combination – a piece of upside down base molding and 5″ crown on top.
We designed a picture frame molding pattern to give the walls some depth and visual interest. Check out this blog article about how we installed it!
Need help with your Theater design?
We can help! Learn about our e-Design service and Interior Design service. Or if you just need a consultation to get some advice, we do that too!
LEARN MORE
Paint
We went back and forth quite a bit on the color for this room. We wanted a dark vibe, but we did not want a color too light or too dark (so cliché!). We ended up selecting the darkest sample we had (which surprised even us).
The paint we chose was Behr Black Panther and we painted everything in matte finish. We used rollers to paint this room since we worked on this at night after our kids went down, but if we could do it again we would just spray it over a weekend.
Flooring
Normal theater styling uses dark carpets – we wanted a more inviting feel to our theater so we decided to do a lighter, thick-feeling carpet. We like the contrast it creates against the dark walls and ceiling, and it helps the room to not feel like a dark pit.
PRO TIP
Upgrade the padding under the carpet to the thickest padding you can get!
MEdia & Electronics
The structural work and cosmetic changes are great, but my favorite part (by far) is the electronics and theater components. I have built several surround sound systems in my past homes, but this was my first true, dedicated theater room.
One of the first decisions we needed to make when laying out the plan for this theater room was the type of surround sound we needed so we could determine speaker placements and wiring.
For this room, we went for Dolby Atmos 7.2.4 – that’s 13 channels (aka 13 speakers) to rumble this room (and the rest of the house)! What does 7.2.4 mean? 7 surround speakers (front, center, surround), 2 powered subwoofers, and 4 speakers in the ceiling. Check out this page for details about all the Dolby Atmos configurations.
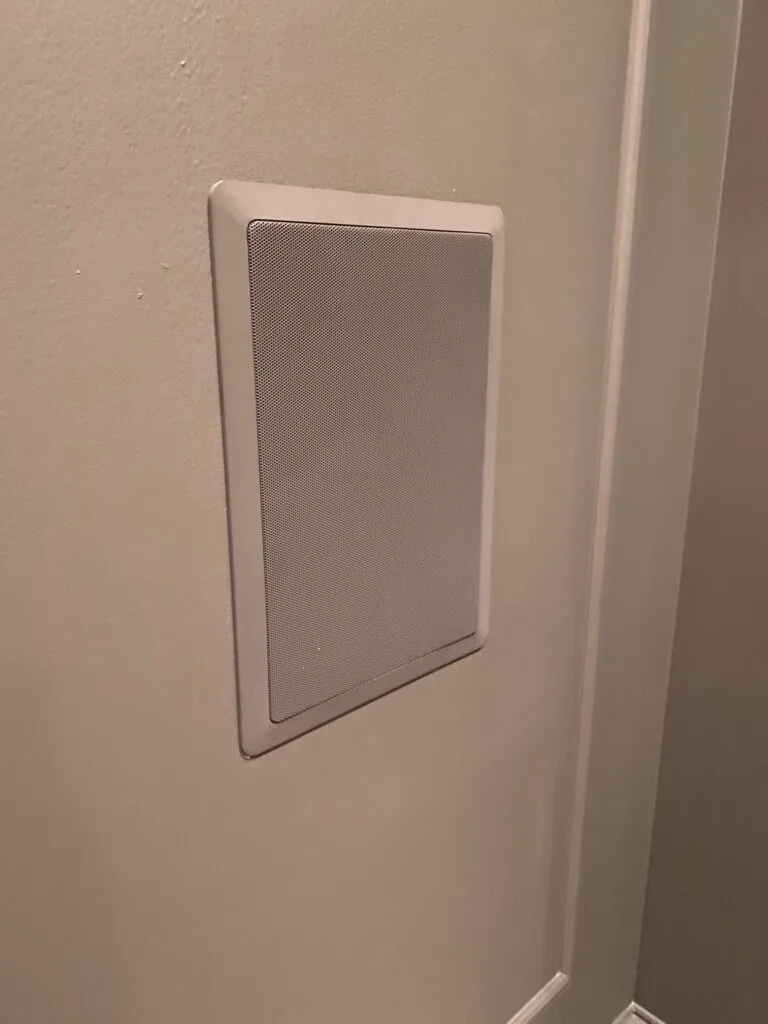
I wanted a clean look, which meant I needed in-wall speakers (flush, no wires showing). I also wanted a giant screen, which meant I needed to install the built-in speakers for the front (left, center, right) behind the screen, which I didn’t realize was even possible without sound muffling.
However, (and this was news to me) they make screens that are audio transparent, meaning they let sound waves through the screen without distortion. What a time to be alive! The screen we chose was the Elite Screens AcousticPro 150″ 16:9 screen.
PRO TIP
Select a frame that has dark velvet – that will hide any overlap from the projector output so your video always looks perfectly aligned to the frame.
The other hurdle I had to figure out in order to maintain the “clean” look was where to put the electronics. I did not want them visible in the room for two reasons – the lights are distracting to the eyes and the fans on the units can be loud. There is a storage room on the other side of the wall, so I wired everything to route to that location.
Speakers are an area where you can either spend a little or spend A LOT. I chose the mid-range and here is my reasoning: Unless you have a trained ear in audio acoustics, you won’t know the difference between a Polk speaker or a Klipsch speaker, which is twice as much.
PRO TIP
Going mid-range on the front and surround speakers and high-end on the subwoofers, you will save a ton of money and still be blown away by the sound quality.
As mentioned, we wanted a clean look for this theater and in-wall speakers were the best option to achieve this look. We used affordable Polk 3-way speakers for the front left and right, a Polk center channel speaker, and four Polk 2-way speakers for the surrounds. For the four ceiling speakers, we used circular Polk 2-Way speakers. These speakers have paintable grills so that they can blend in seamlessly with the walls and trim.
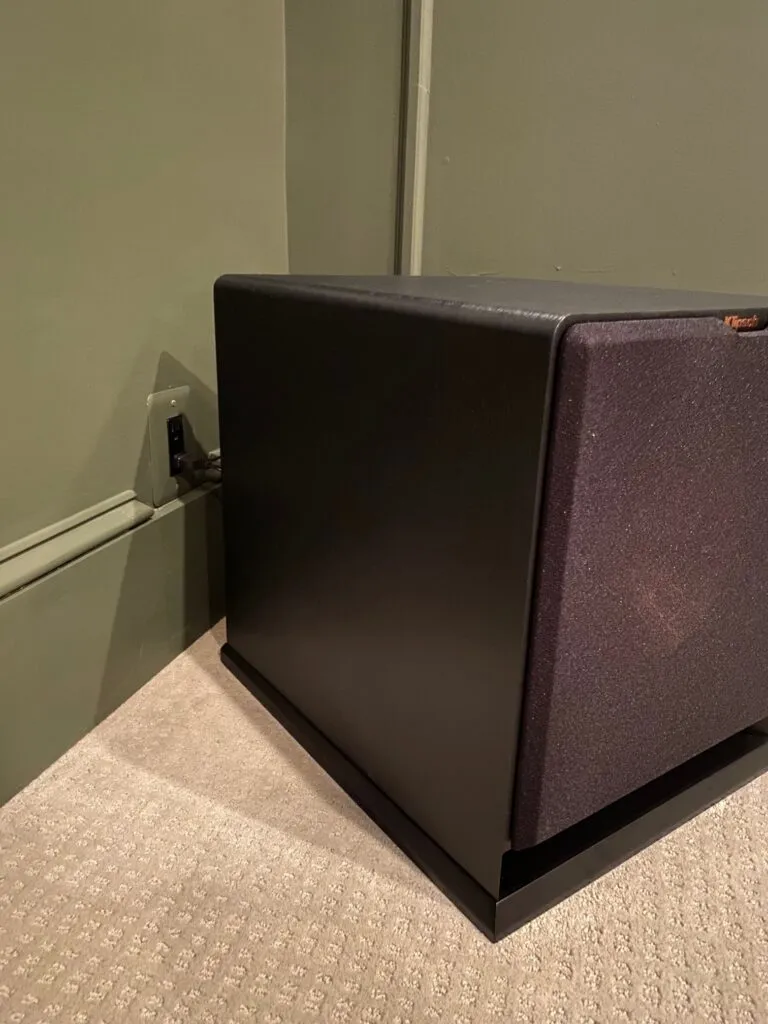
For the subwoofers, we went high-end and purchased two of the Klipsch 12-inch subwoofers. These subs literally shake the entire house!
PRO TIP
Plan where your subwoofers will be ahead of time and wire an electrical outlet in that area so that you don’t have power cords visible. Notice in the picture above that the electrical outlet is directly behind the subwoofer so no wires are visible from the front.
Lighting
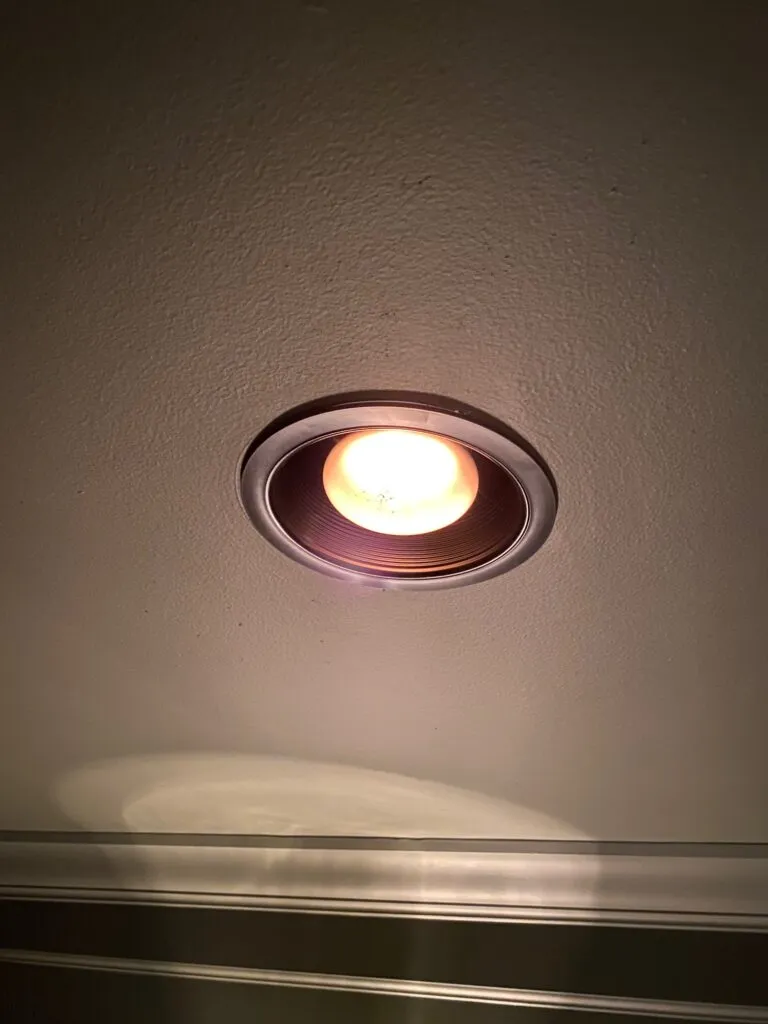
The room already had recessed lights, so simply swapped out the old baffles and trim and replaced with black versions. Why didn’t we use our favorite CREE recessed LED lights? Great question, and the reason is because of dimming. When you dim an LED low, you don’t get the same warmth of incandescent bulbs, and you also can’t dim down as low. For a theater, very dim lighting is essential, so we opted to keep the old-fashioned incandescent light bulbs throughout.
For the sconces, we moved the existing locations to better match our picture frame molding design. The lights now are all on the same vertical level and are centered in the middle of the picture frames. We chose simple, yet elegant, brass wall sconces with incandescent bulbs that dim extremely low. (Here is a list of other brass sconces to consider in your theater design.)
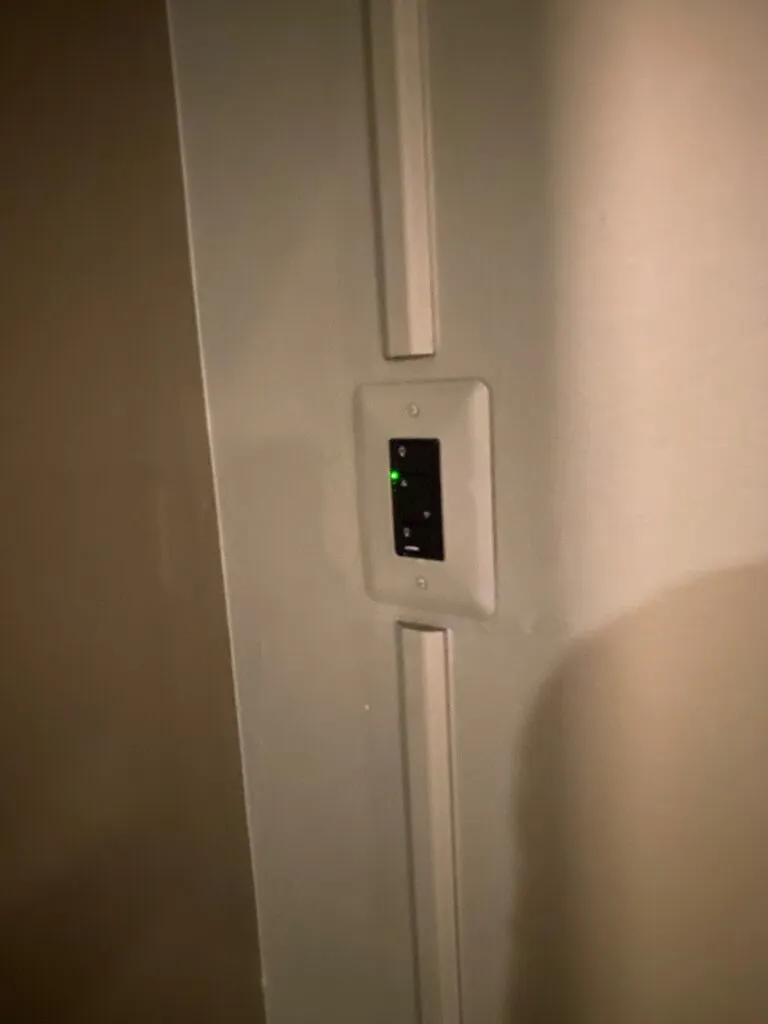
As we do throughout our house, we added Black Lutron Caseta Dimmers and connected them to our smart home hub. Since this room is dark, we went with the black dimmers.
PRO TIP
If your theater is dark, use black electrical outlets and switches/dimmers. Paint the outlet covers the same color as your walls so they blend in.
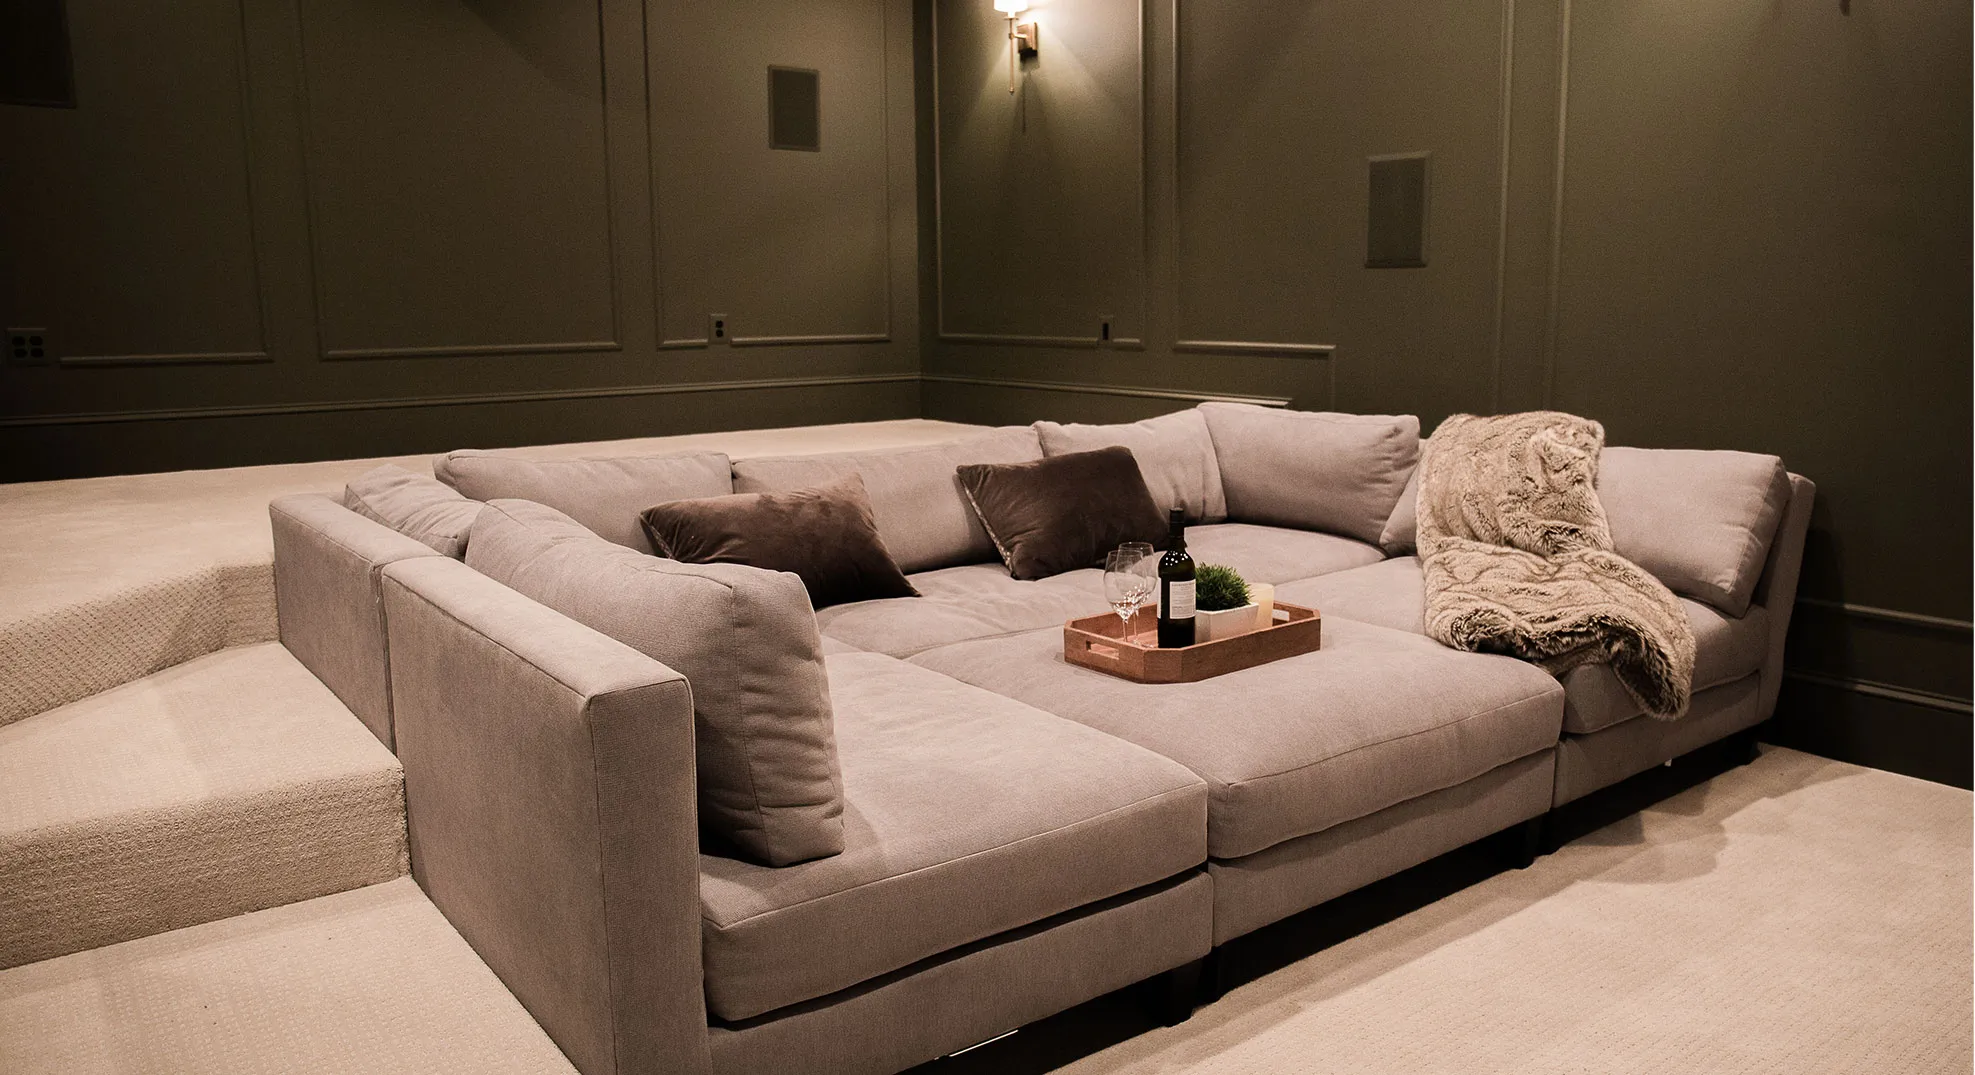
Furniture
Traditional theater seating? Not in this room – we wanted our family to lounge together and enjoy our movies on an oversized pit couch. These modular pit sectionals are awesome, and we considered many (see this blog post about it) and ultimately decided on the Chelsea Pit Sectional from Wayfair.
For the upper section of the theater, we will eventually have some leather club chairs, but for now, our kids use that as a launching pad to jump onto the couch.
Final thoughts
Do we like our home theater? No. We LOVE it! Our family has had a great time utilizing this space and connecting by watching a movie together every Friday night.
The sound system is audibly incredible and visually discreet, and the picture quality on the massive screen is stunning. Best of all, we were careful with the budget and splurged in the areas we needed to and compromised on some of the other less-important items in the room. We also saved a ton of money by doing all the design, trim work, and painting ourselves.
If you need help with your theater design, contact us and we would love to help you! Feel free to leave some comments at the bottom of this page, and the products we used in this space are listed below for your convenience.
Disclosure: We are happy to share products and links with you! Some of the links in this post are affiliate links and if you use them to make a purchase, we may earn a small commission on the sale. This helps us fund the reoccurring fees and expenses that go along with running a blog site.
[…] Once your boxes are up, give them a couple coats of paint and your room will be completely transformed! We recommend painting your trim and walls the same color and sheen (satin or eggshell) to get that casual, modern look on formal picture frame molding. This gives the formasual look that we absolutely love! For the final results of our theater room with before and after pictures, check out our theater blog post. […]
Andy
March 11, 2022
Awesome post thanks all the tips! What are the dimensions to your room and how far was the couch to the screen?
1021home
→ Andy
March 18, 2022
The room is 21′ long by 14′ wide and the couch is 7′ 9″ from the couch. Thanks for the question!


")

The Comments
DIY Picture Frame Molding – Arched Manor
[…] Once your boxes are up, give them a couple coats of paint and your room will be completely transformed! We recommend painting your trim and walls the same color and sheen (satin or eggshell) to get that casual, modern look on formal picture frame molding. This gives the formasual look that we absolutely love! For the final results of our theater room with before and after pictures, check out our theater blog post. […]
Andy
Awesome post thanks all the tips! What are the dimensions to your room and how far was the couch to the screen?
1021home
→ AndyThe room is 21′ long by 14′ wide and the couch is 7′ 9″ from the couch. Thanks for the question!